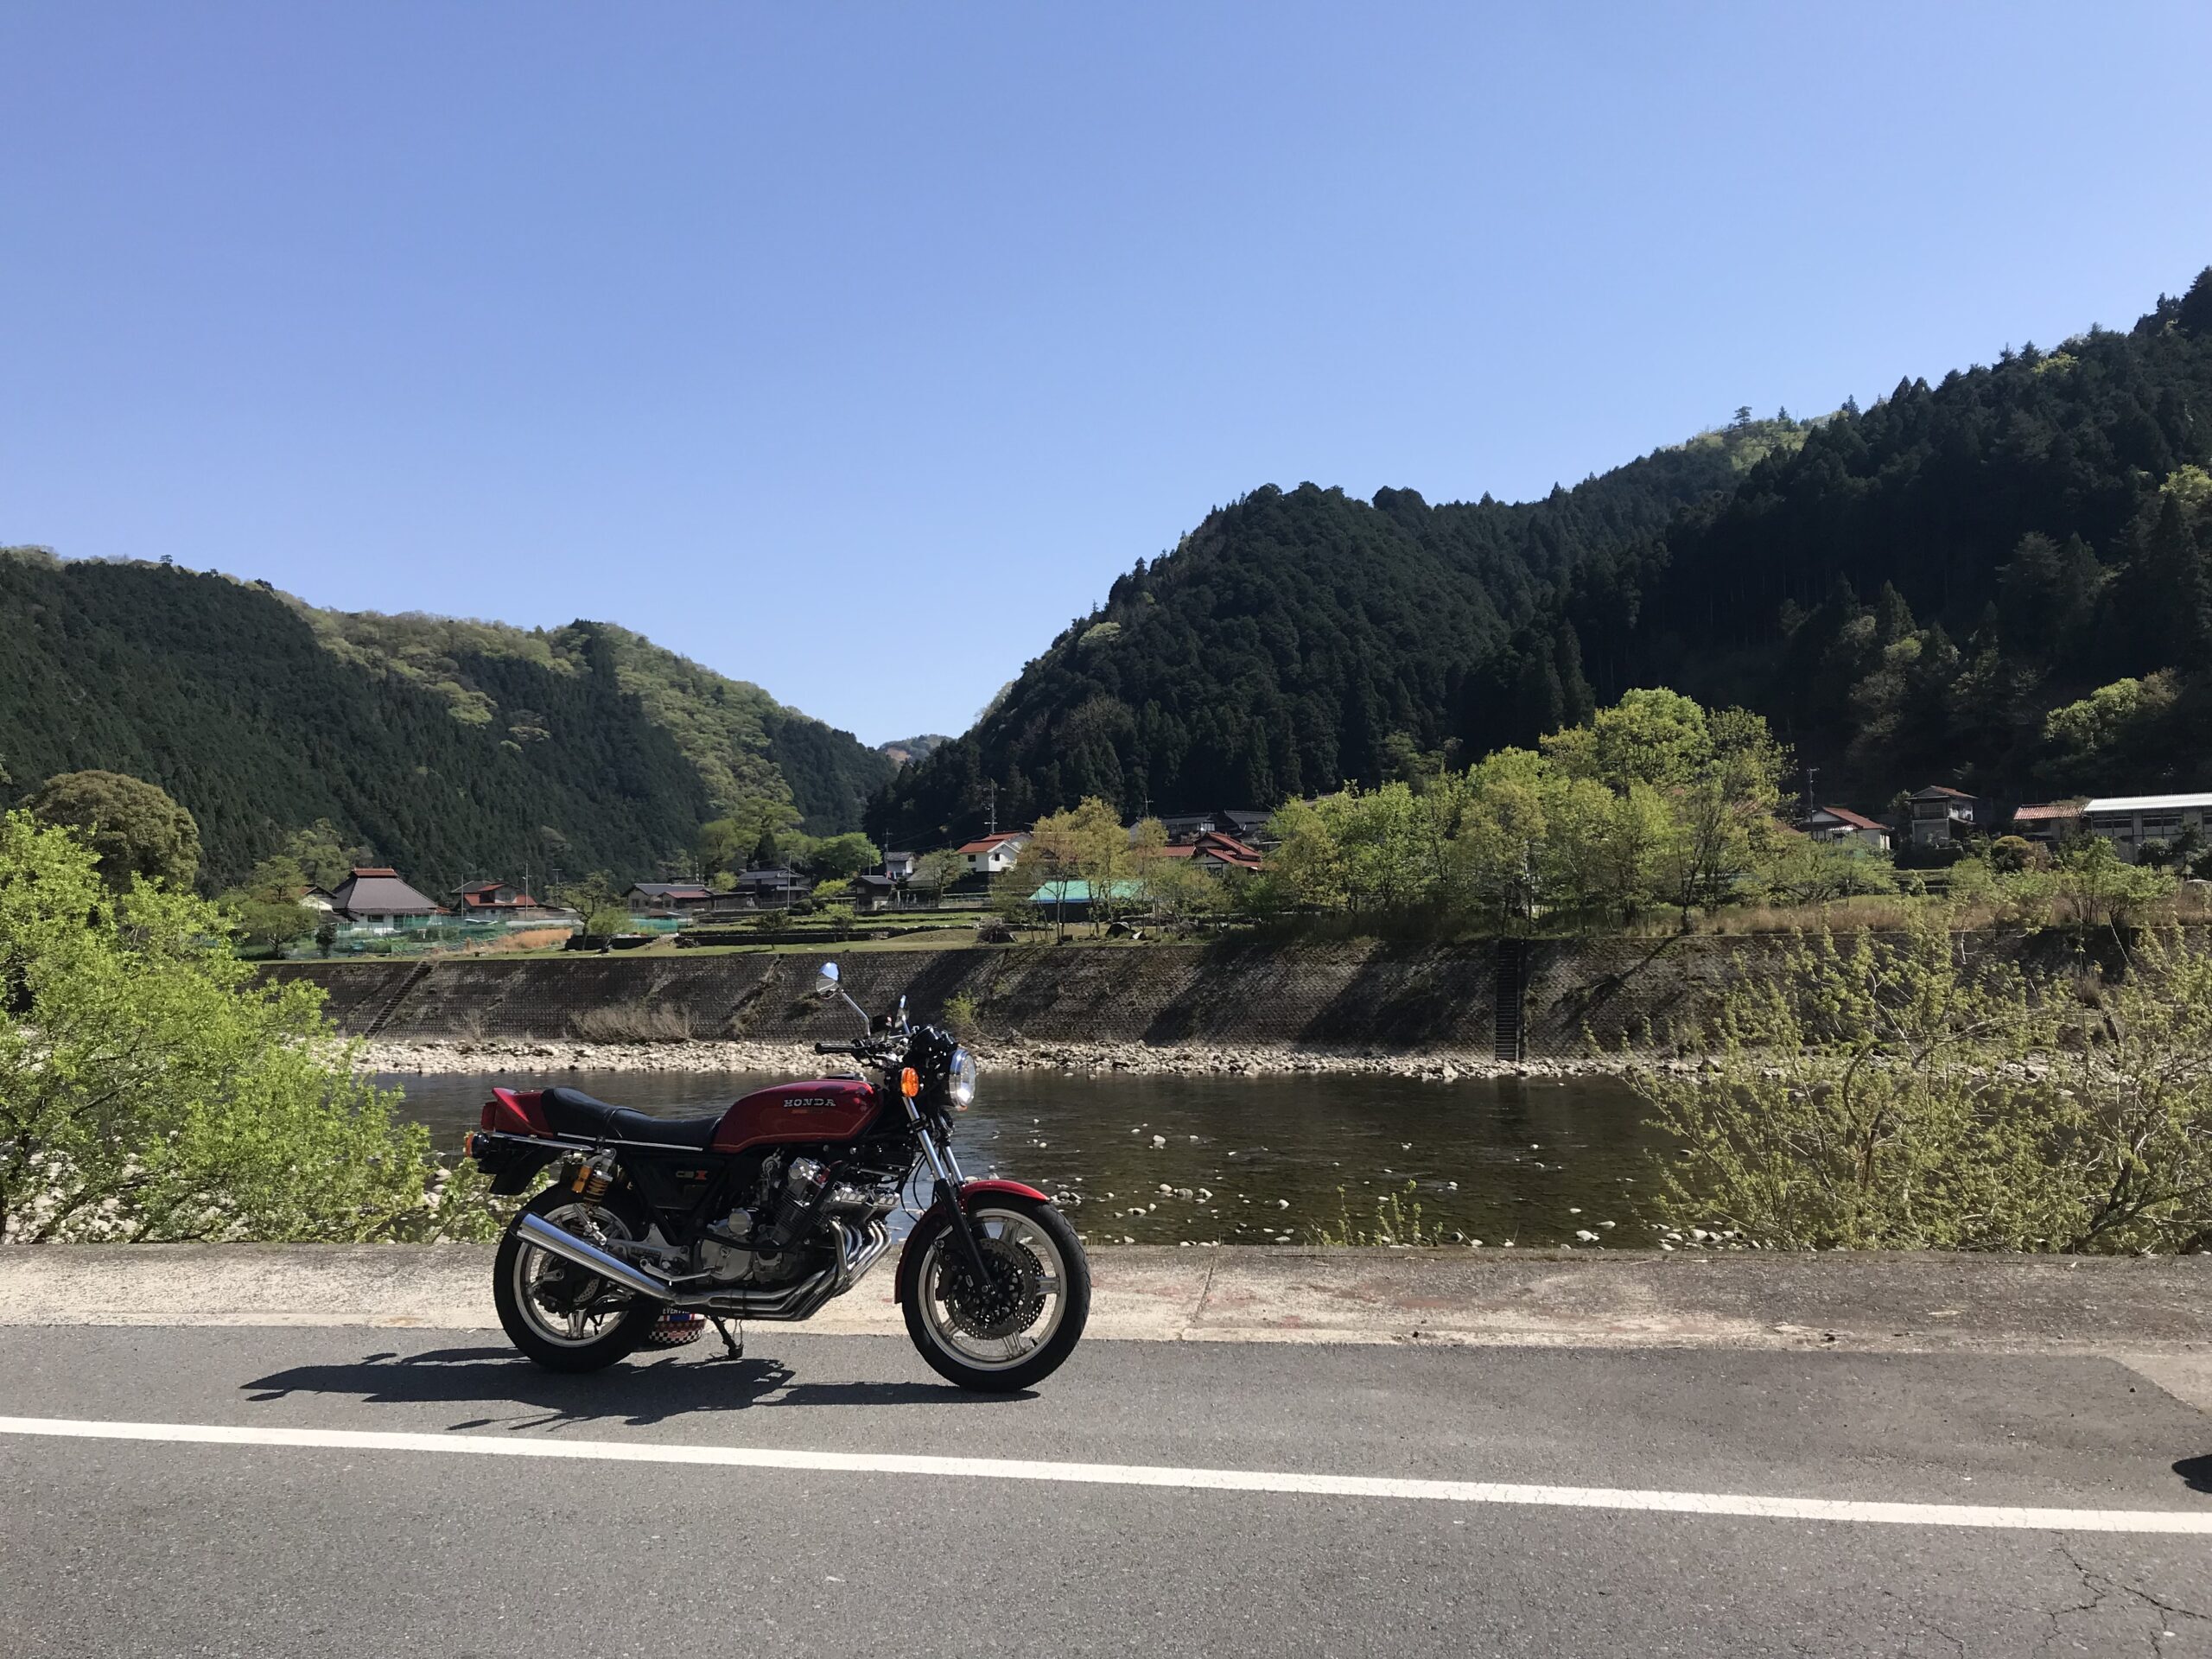
I am the owner of a Honda motorcycle [CBX1000] who lives in Hiroshima City, Japan. I am posting about FCR carburetor and CBX1000 customization. I also post about things other than cars and motorcycles. We will post information that will make bikers around the world happy.
Creating a turn signal position lamp on/off for a Honda motorcycle
As time passes, you will be able to do things that you couldn't do before.
My CBX1000 also has a similar case.
One of them is tuning the turn signal position lamp on and off using a switch.
I'll write it at the beginning, but it's not a detailed method, but it can be done! This is a post to introduce that.
We can tell you what to use, how much time and cost, and how difficult it is.
Starting with the conclusion...
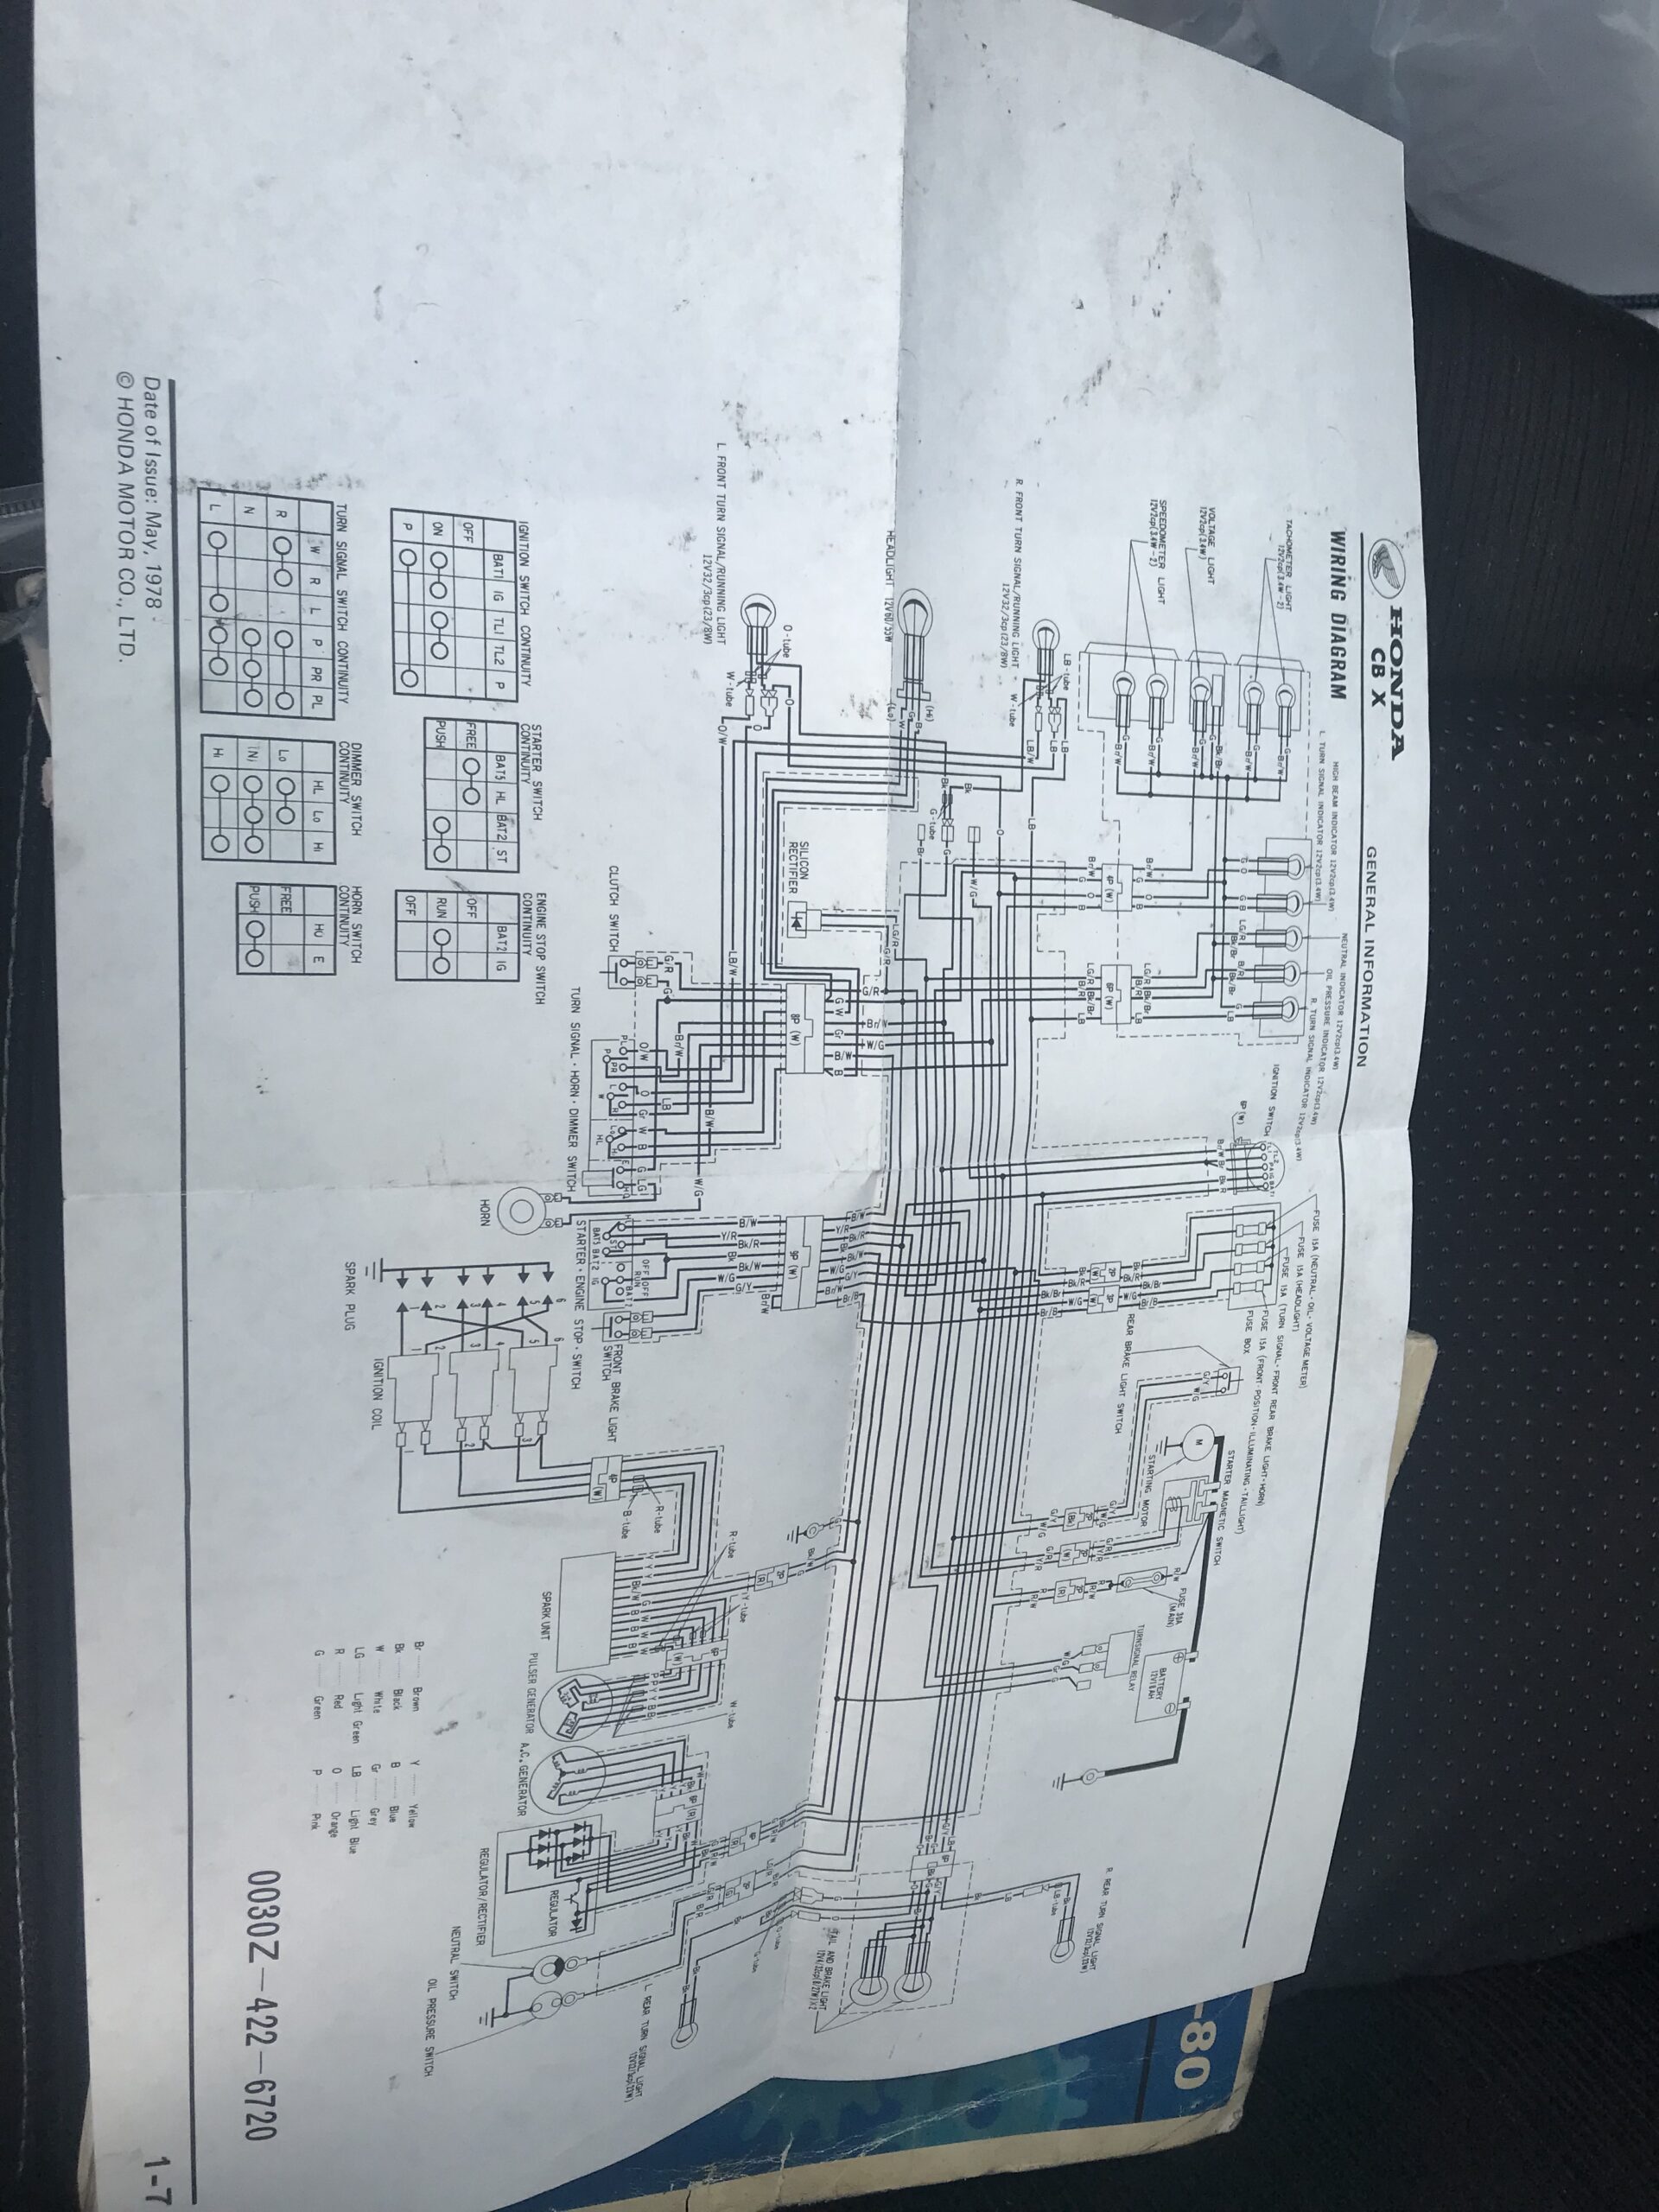
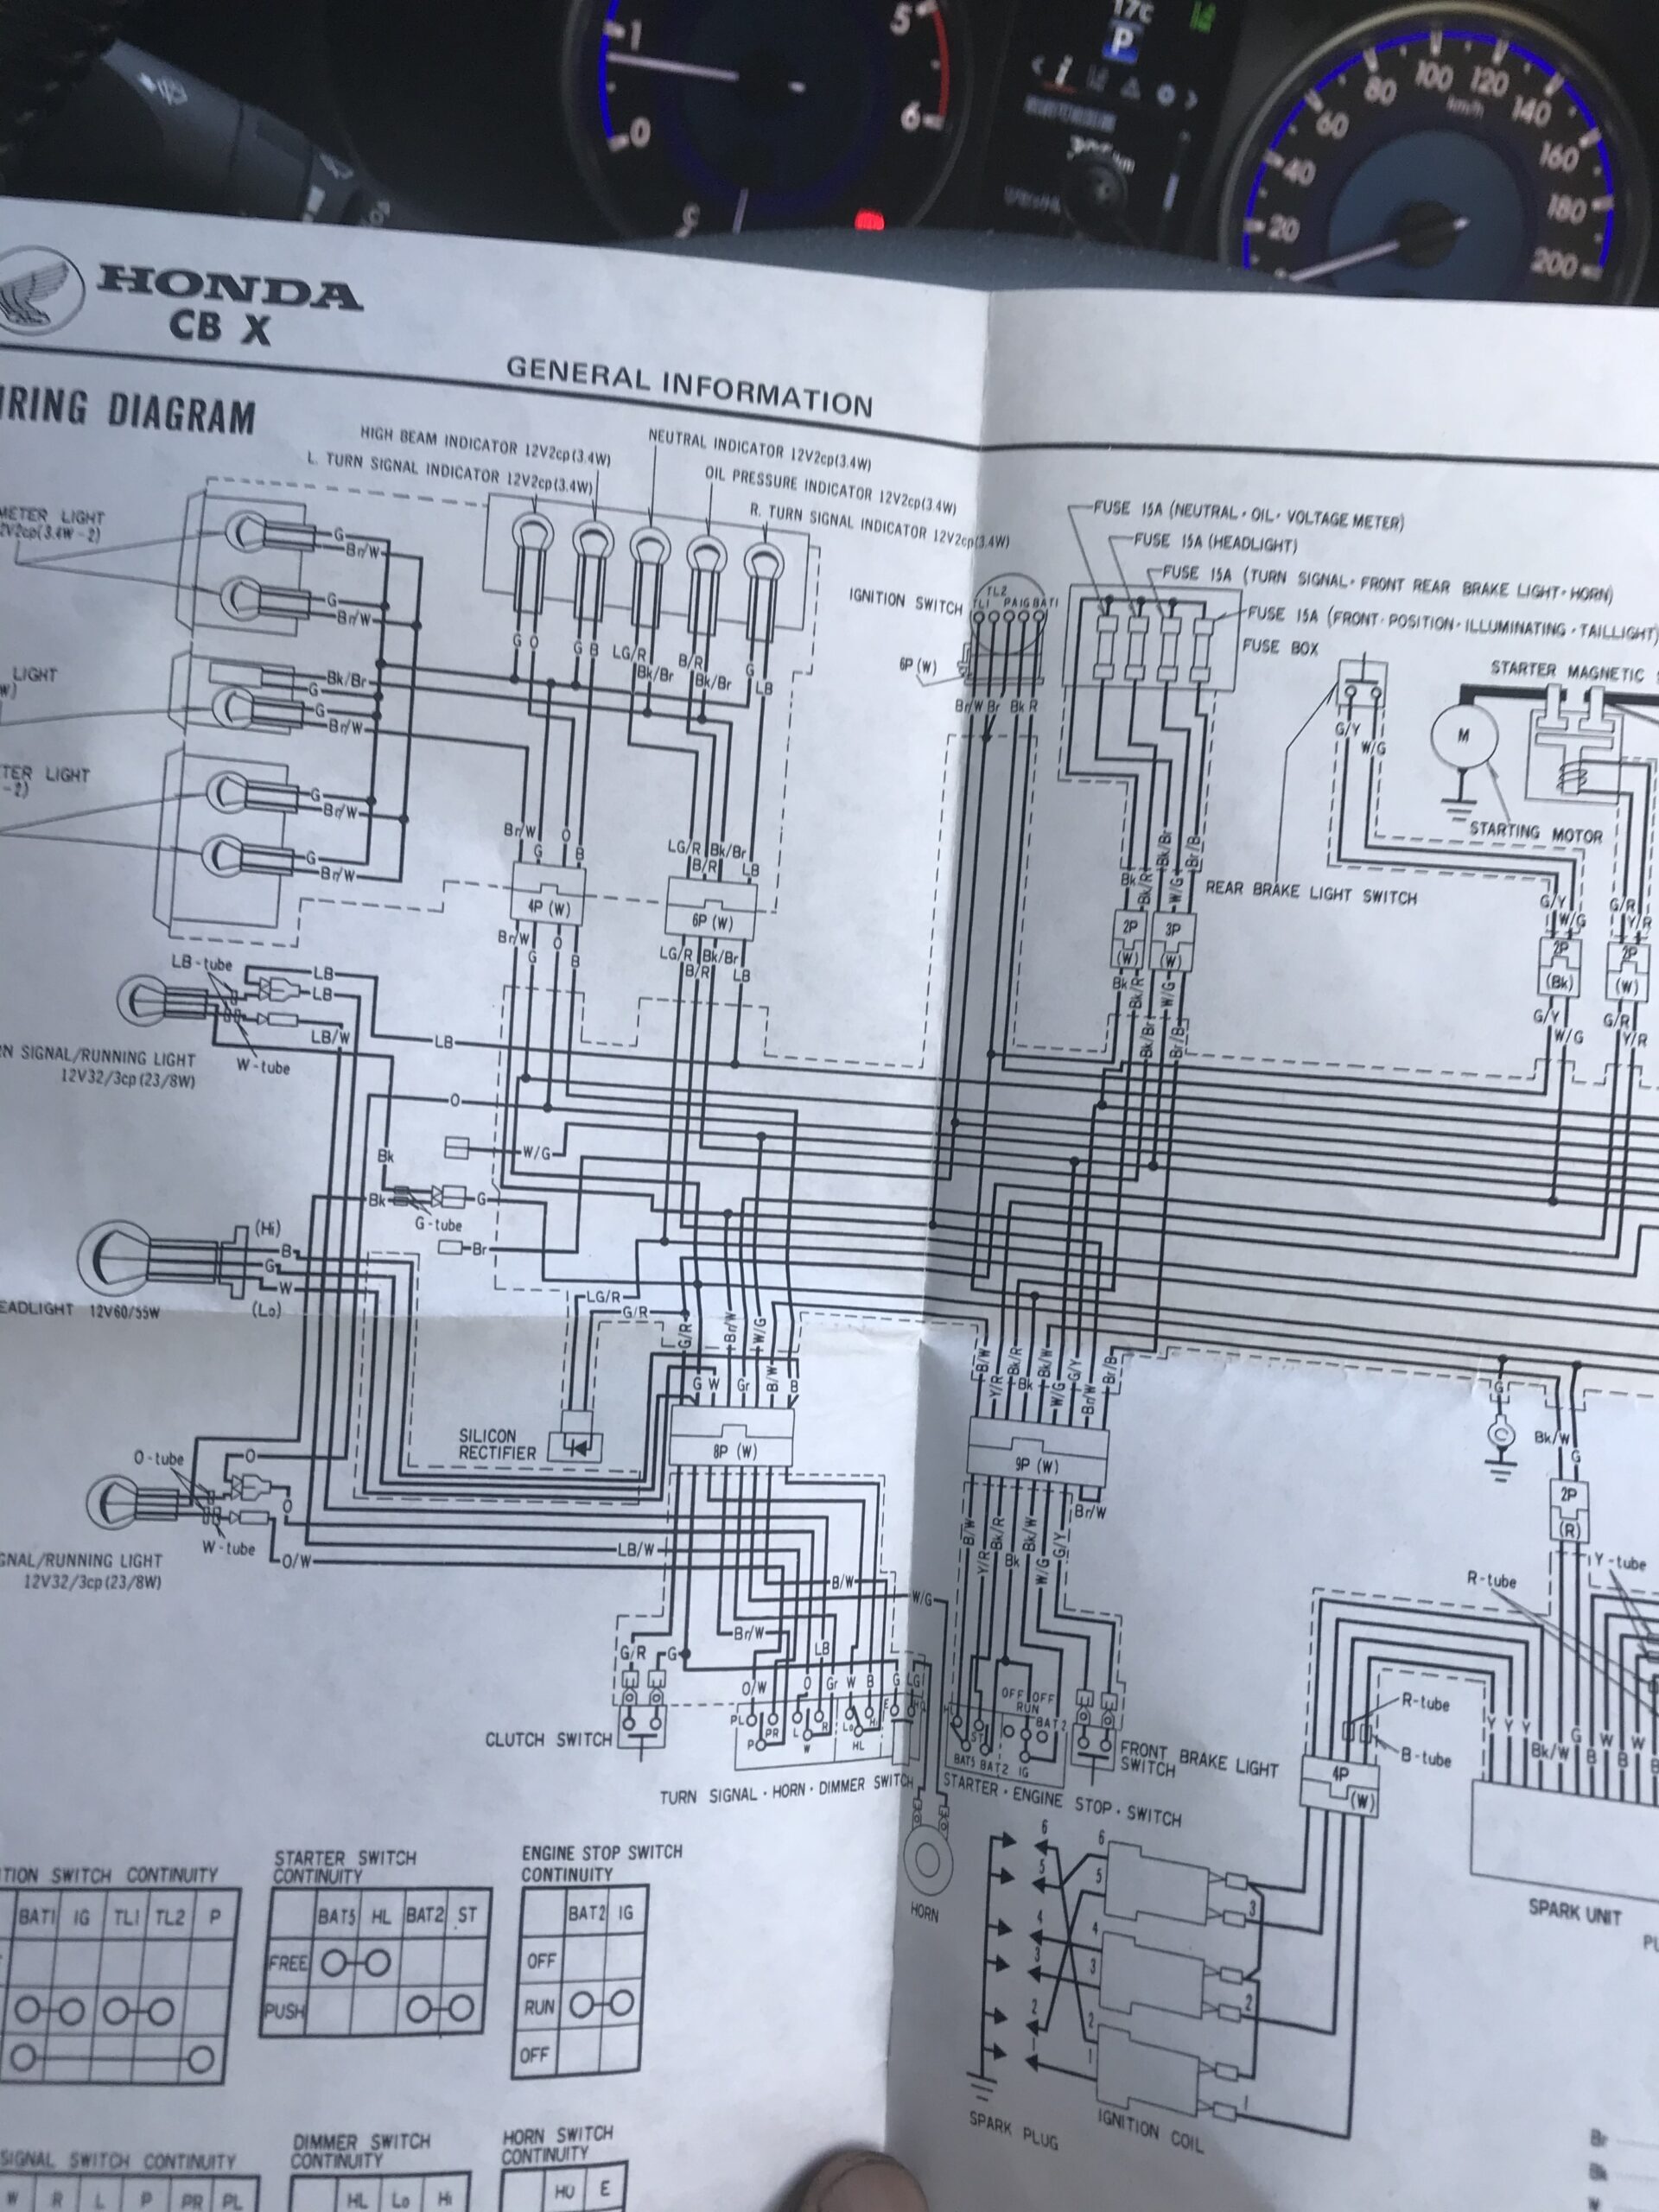
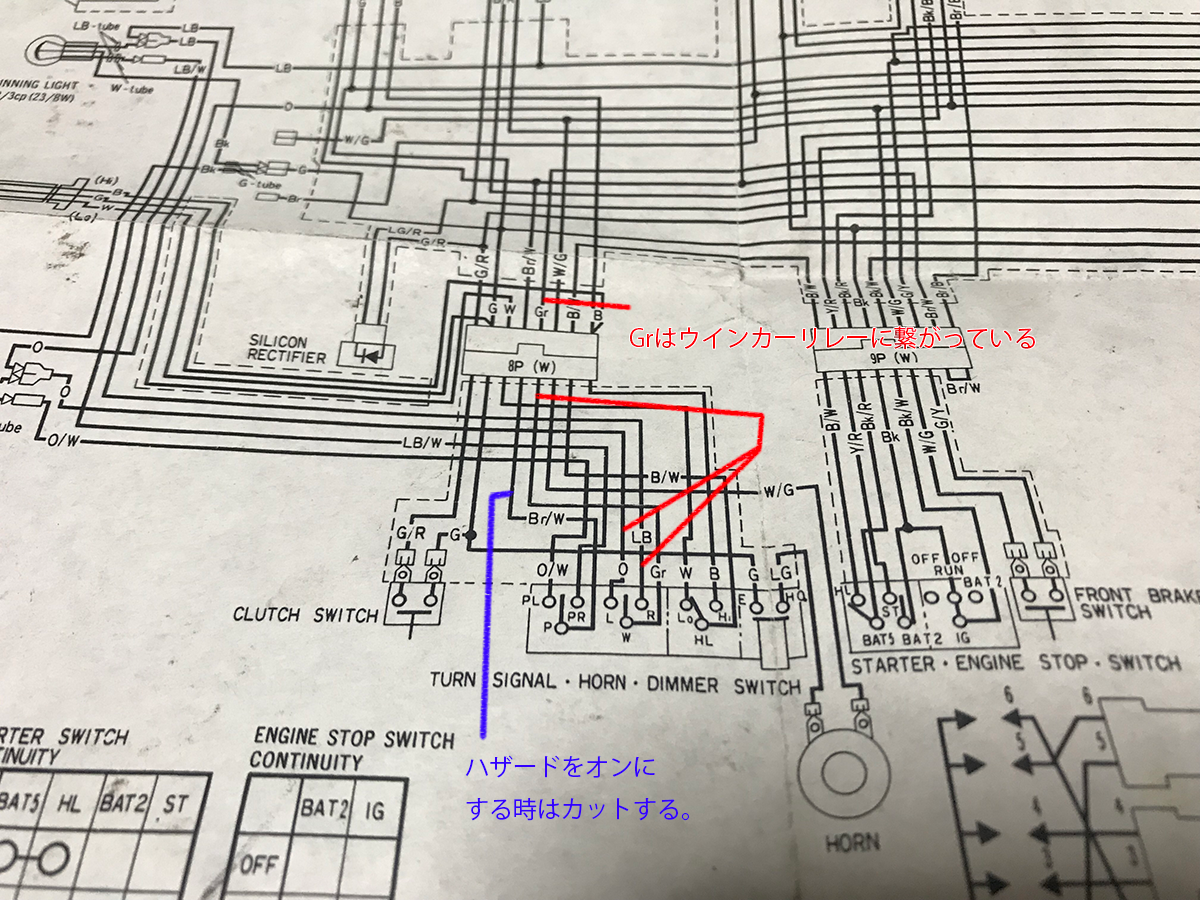
CBX1000 turn signal position on/off tuning. By cutting Br/W coming out from 8p (8-pole coupler), on/off function can be realized.
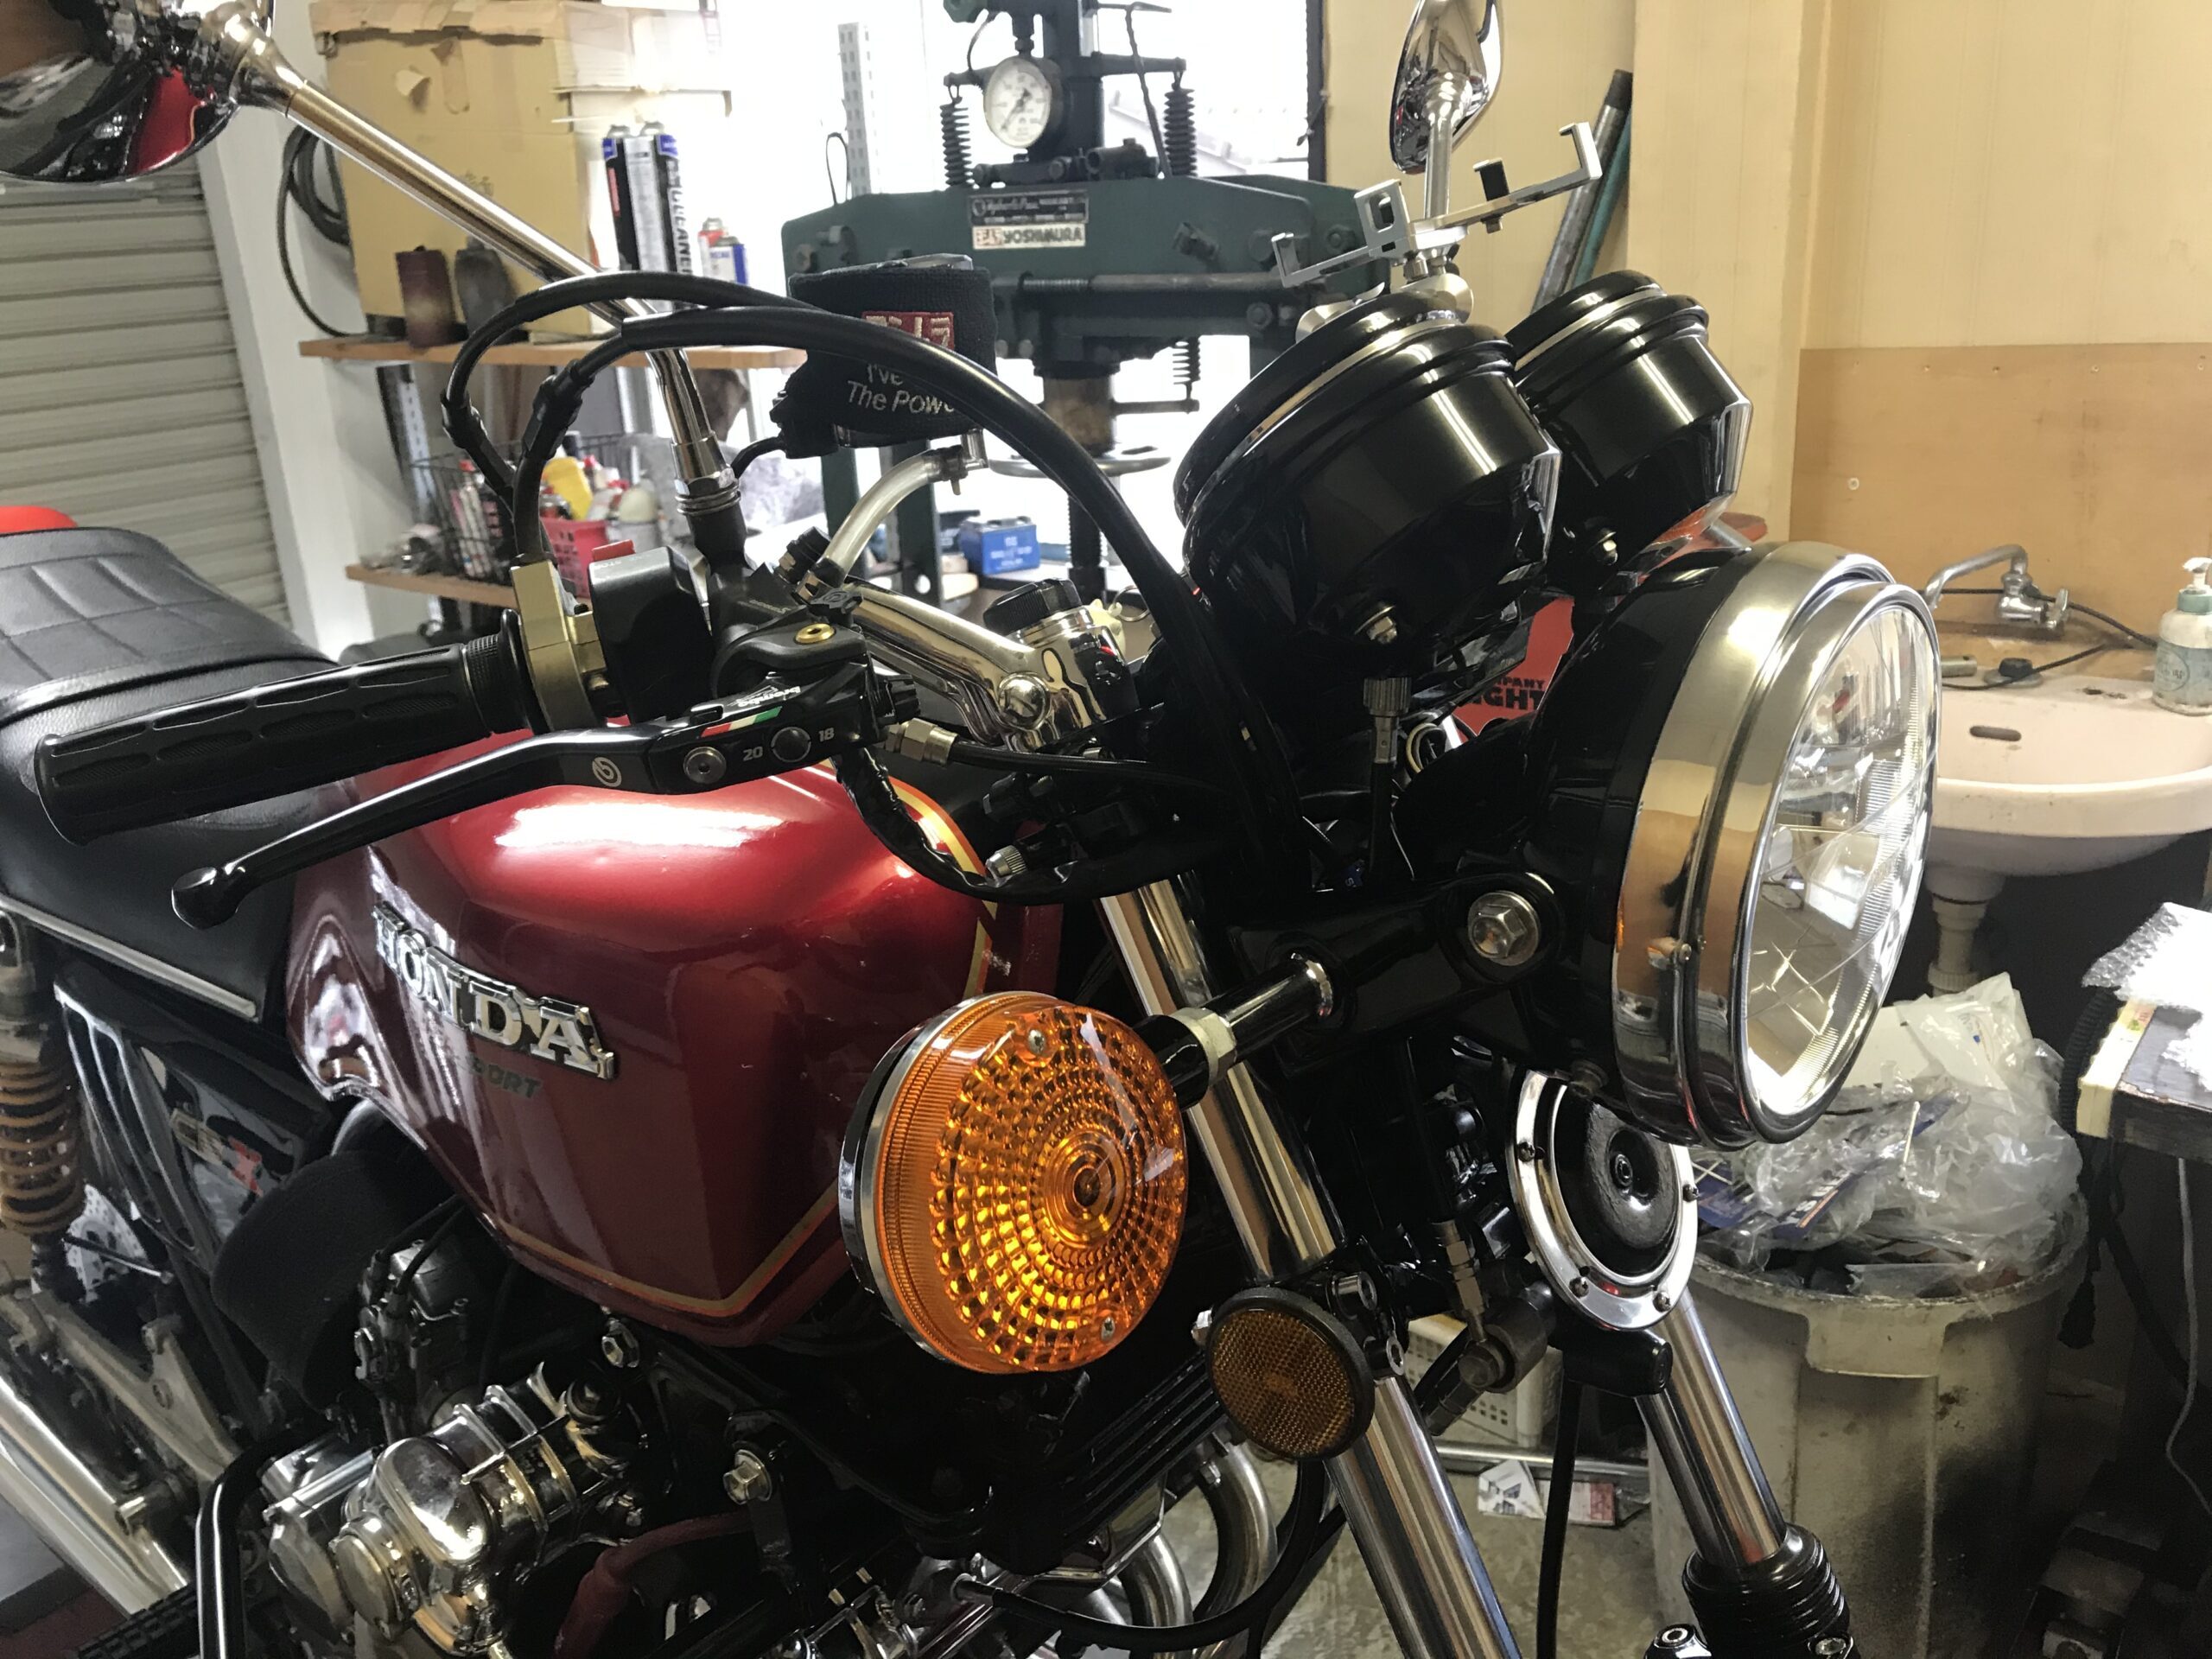
Some Honda motorcycles have front turn signals that also serve as position lamps.
Most motorcycles have their turn signals on all the time.
It is designed to turn off the lights when you turn on the turn signal switch.
For example, if you turn on the right turn signal switch, the left front turn signal will remain on.
The right front turn signal is flashing. The right rear turn signal is flashing.
When I was young, it was difficult to add on/off wiring, and no matter how I tried, I couldn't figure out how to do it.
Now I know how.
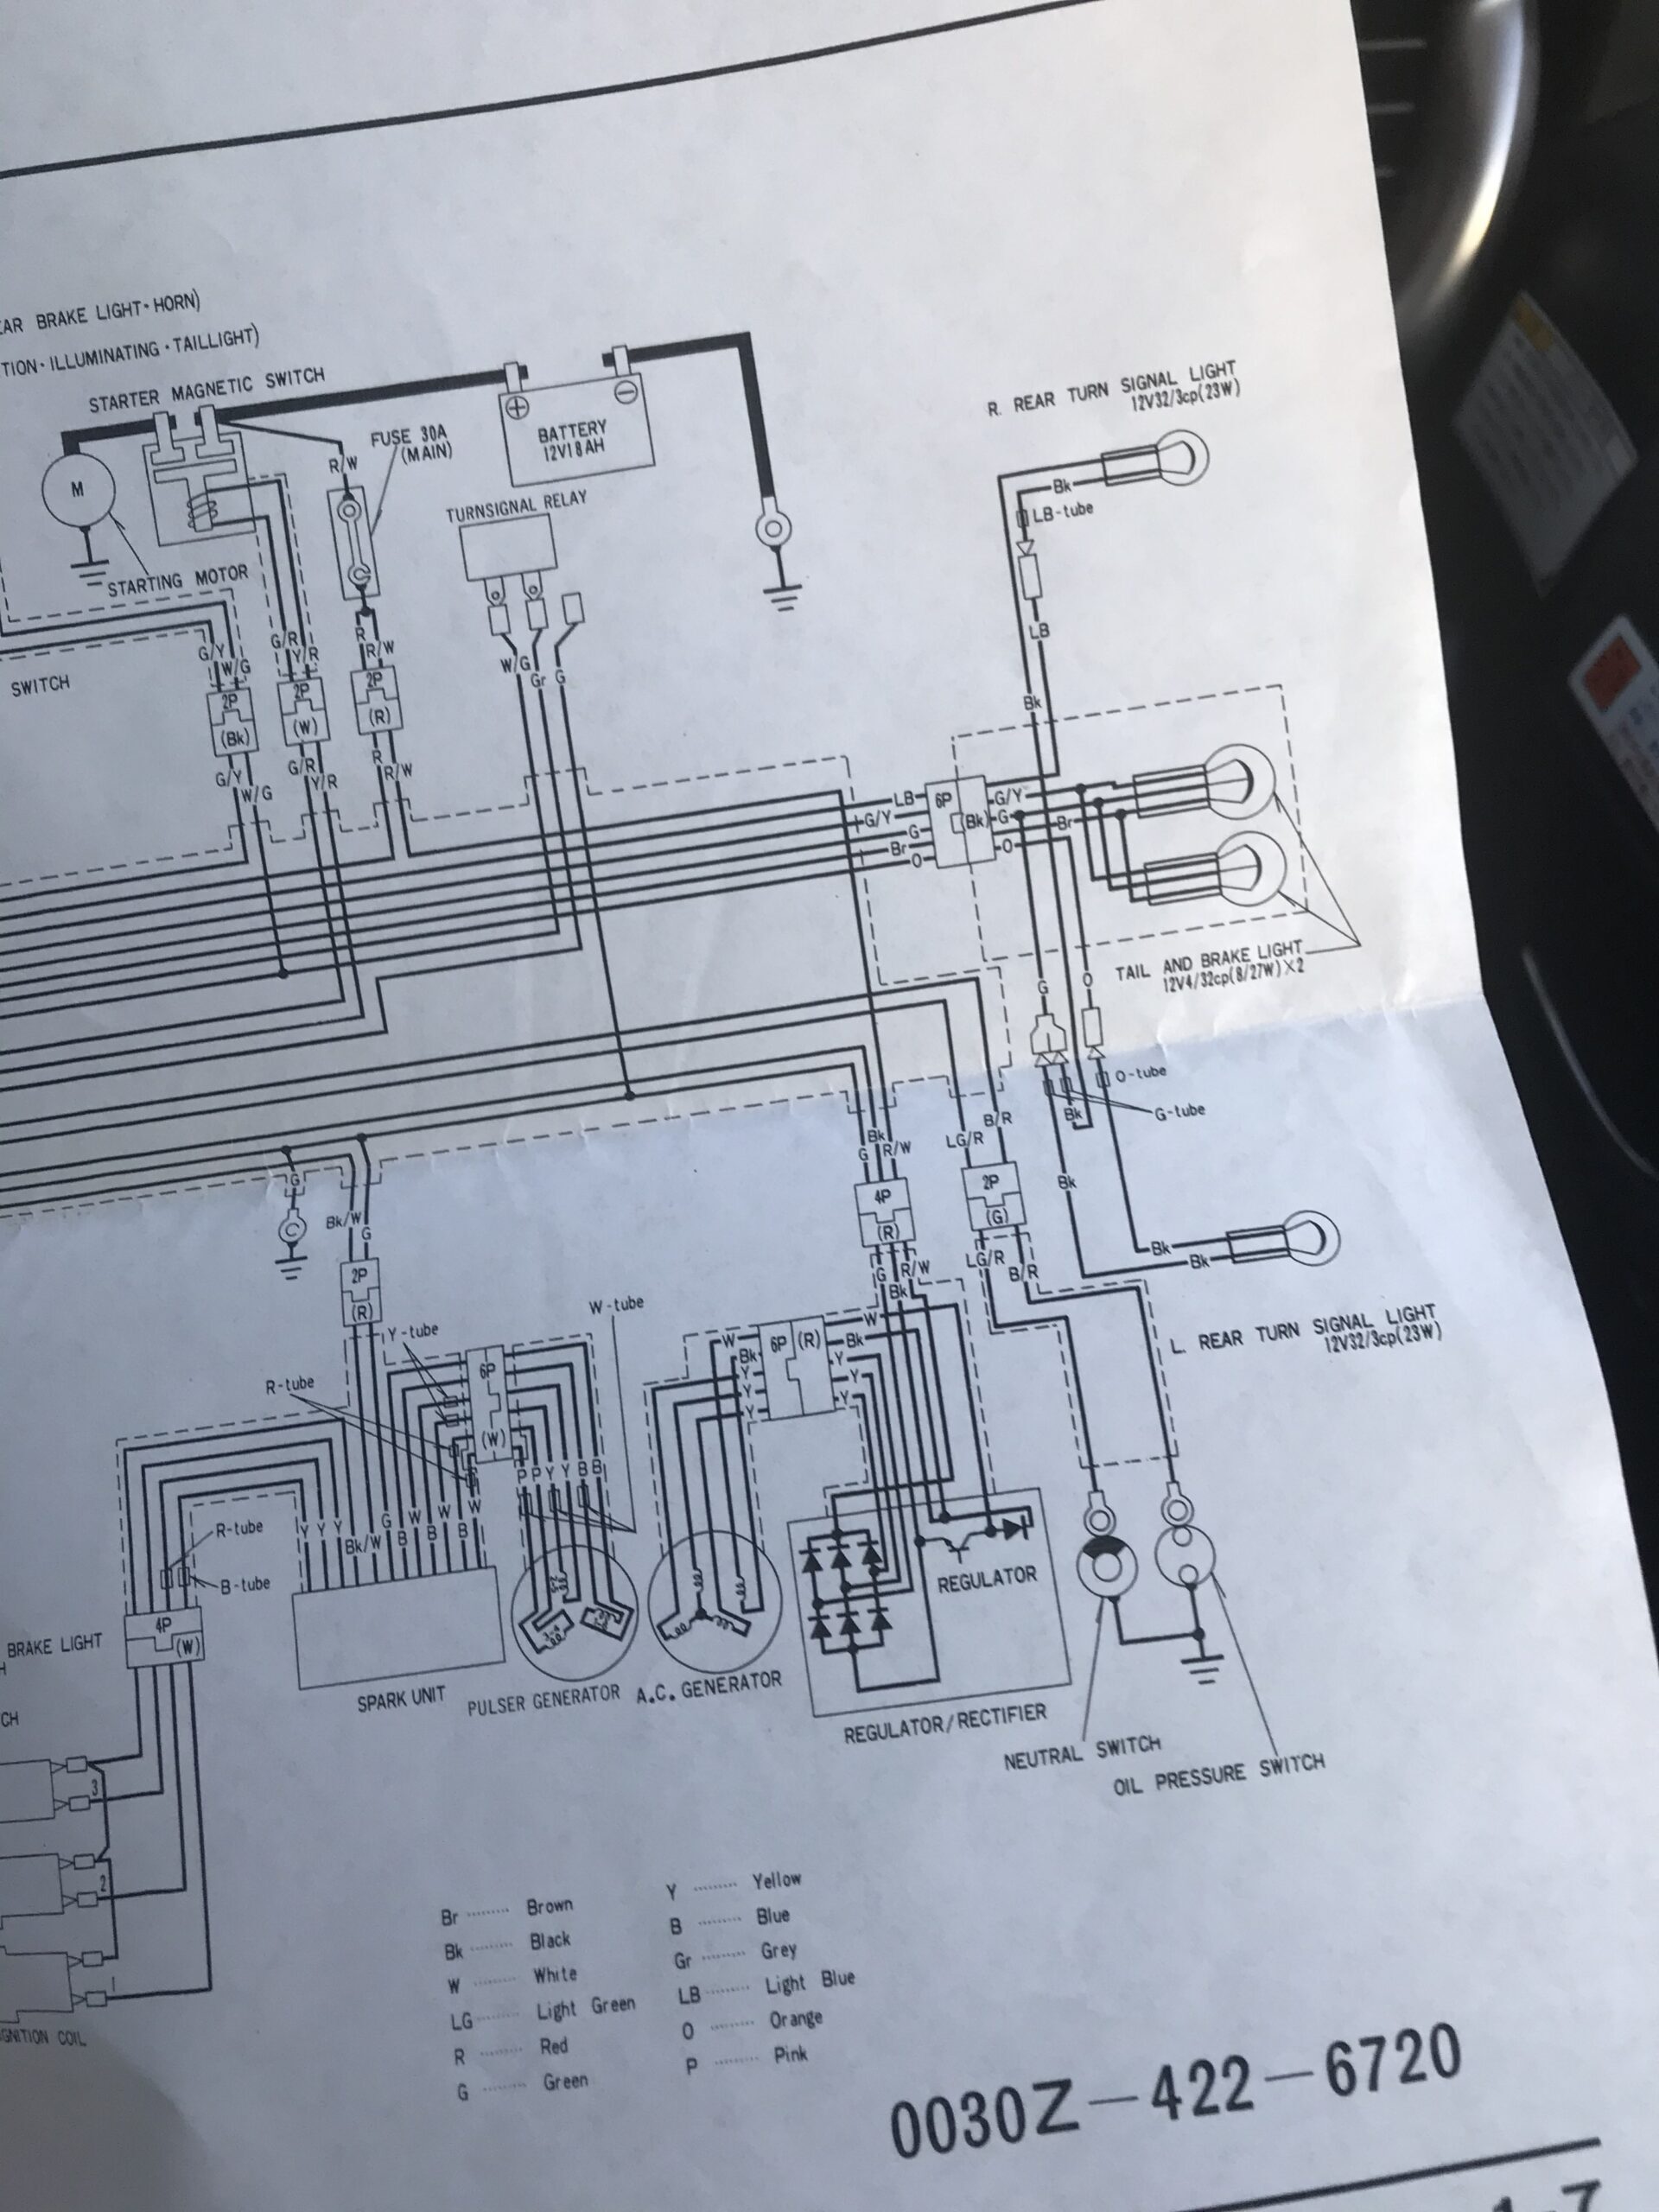
The front turn signals are called double bulbs, meaning they have two light sources in one lamp. It has two positive wires and one ground wire.
If you are motivated, you can find out the keywords and necessary items from this post, and most old Honda motorcycles will be able to realize the turn signal position on/off function.
You Tube
It may be hard to understand, but this video shows the lights tuning on and off, including the tail lights.
What is GND?
A quick explanation for those who are not good at wiring. This is the wiring that connects the negative parts of electricity. Generally, the black wire is often GND. If you connect the negative part where electricity flows to a wire called GND, electricity will flow without shorting. GND is the wiring for unbranched current to return to the battery. Or it could be the rules for wiring diagrams. Once you understand the concept of GND, you will be able to install accessories that use electricity yourself as long as you can connect the wiring properly.
If you ask a motorcycle shop or parts shop to do the wiring for you, they will generally do the wiring neatly and correctly, but in rare cases,
There are some engineers who do very dirty wiring, so you need to be careful.
Japanese law
・Motorcycles manufactured after April 1, 1998 (both domestic and imported) are in violation even if they only have a headlight on/off switch installed.
・Please note that the installation may change due to legal revisions such as mandatory daylight for motorcycles manufactured in 2023.
preparations
①On, position, off switch
②4-pole relay
③ Wiring tools and terminal set
④Power distribution diagram if possible
I will explain step by step.
[① On, position, off switch]
When installing FCR, in most cases in Japan this switch is installed.
There are also parts that disable the function of the headlight switch as a product tuning.
A Japanese web page will open.
I don't know if there are any other cool right switch boxes.
The requirement is that it be separated from the throttle holder.
If you already have a switch and don't need a separate throttle holder, ignore this item.
[②4-pole relay]
You can do without it, but I used it.
I won't go into details here, but there are two benefits.
[Reduced wiring processing points] [Can withstand large amounts of current]
It is two points. There is no need to cut or stretch the wiring, which improves work efficiency.
It's full of good things. Since I learned about this device, I changed the position of the turn signal lamp.
There is a point where I have taken the plunge. It may be fine without it, but it's super important to me.
This is a required item and without it I could not create a turn signal position switch.
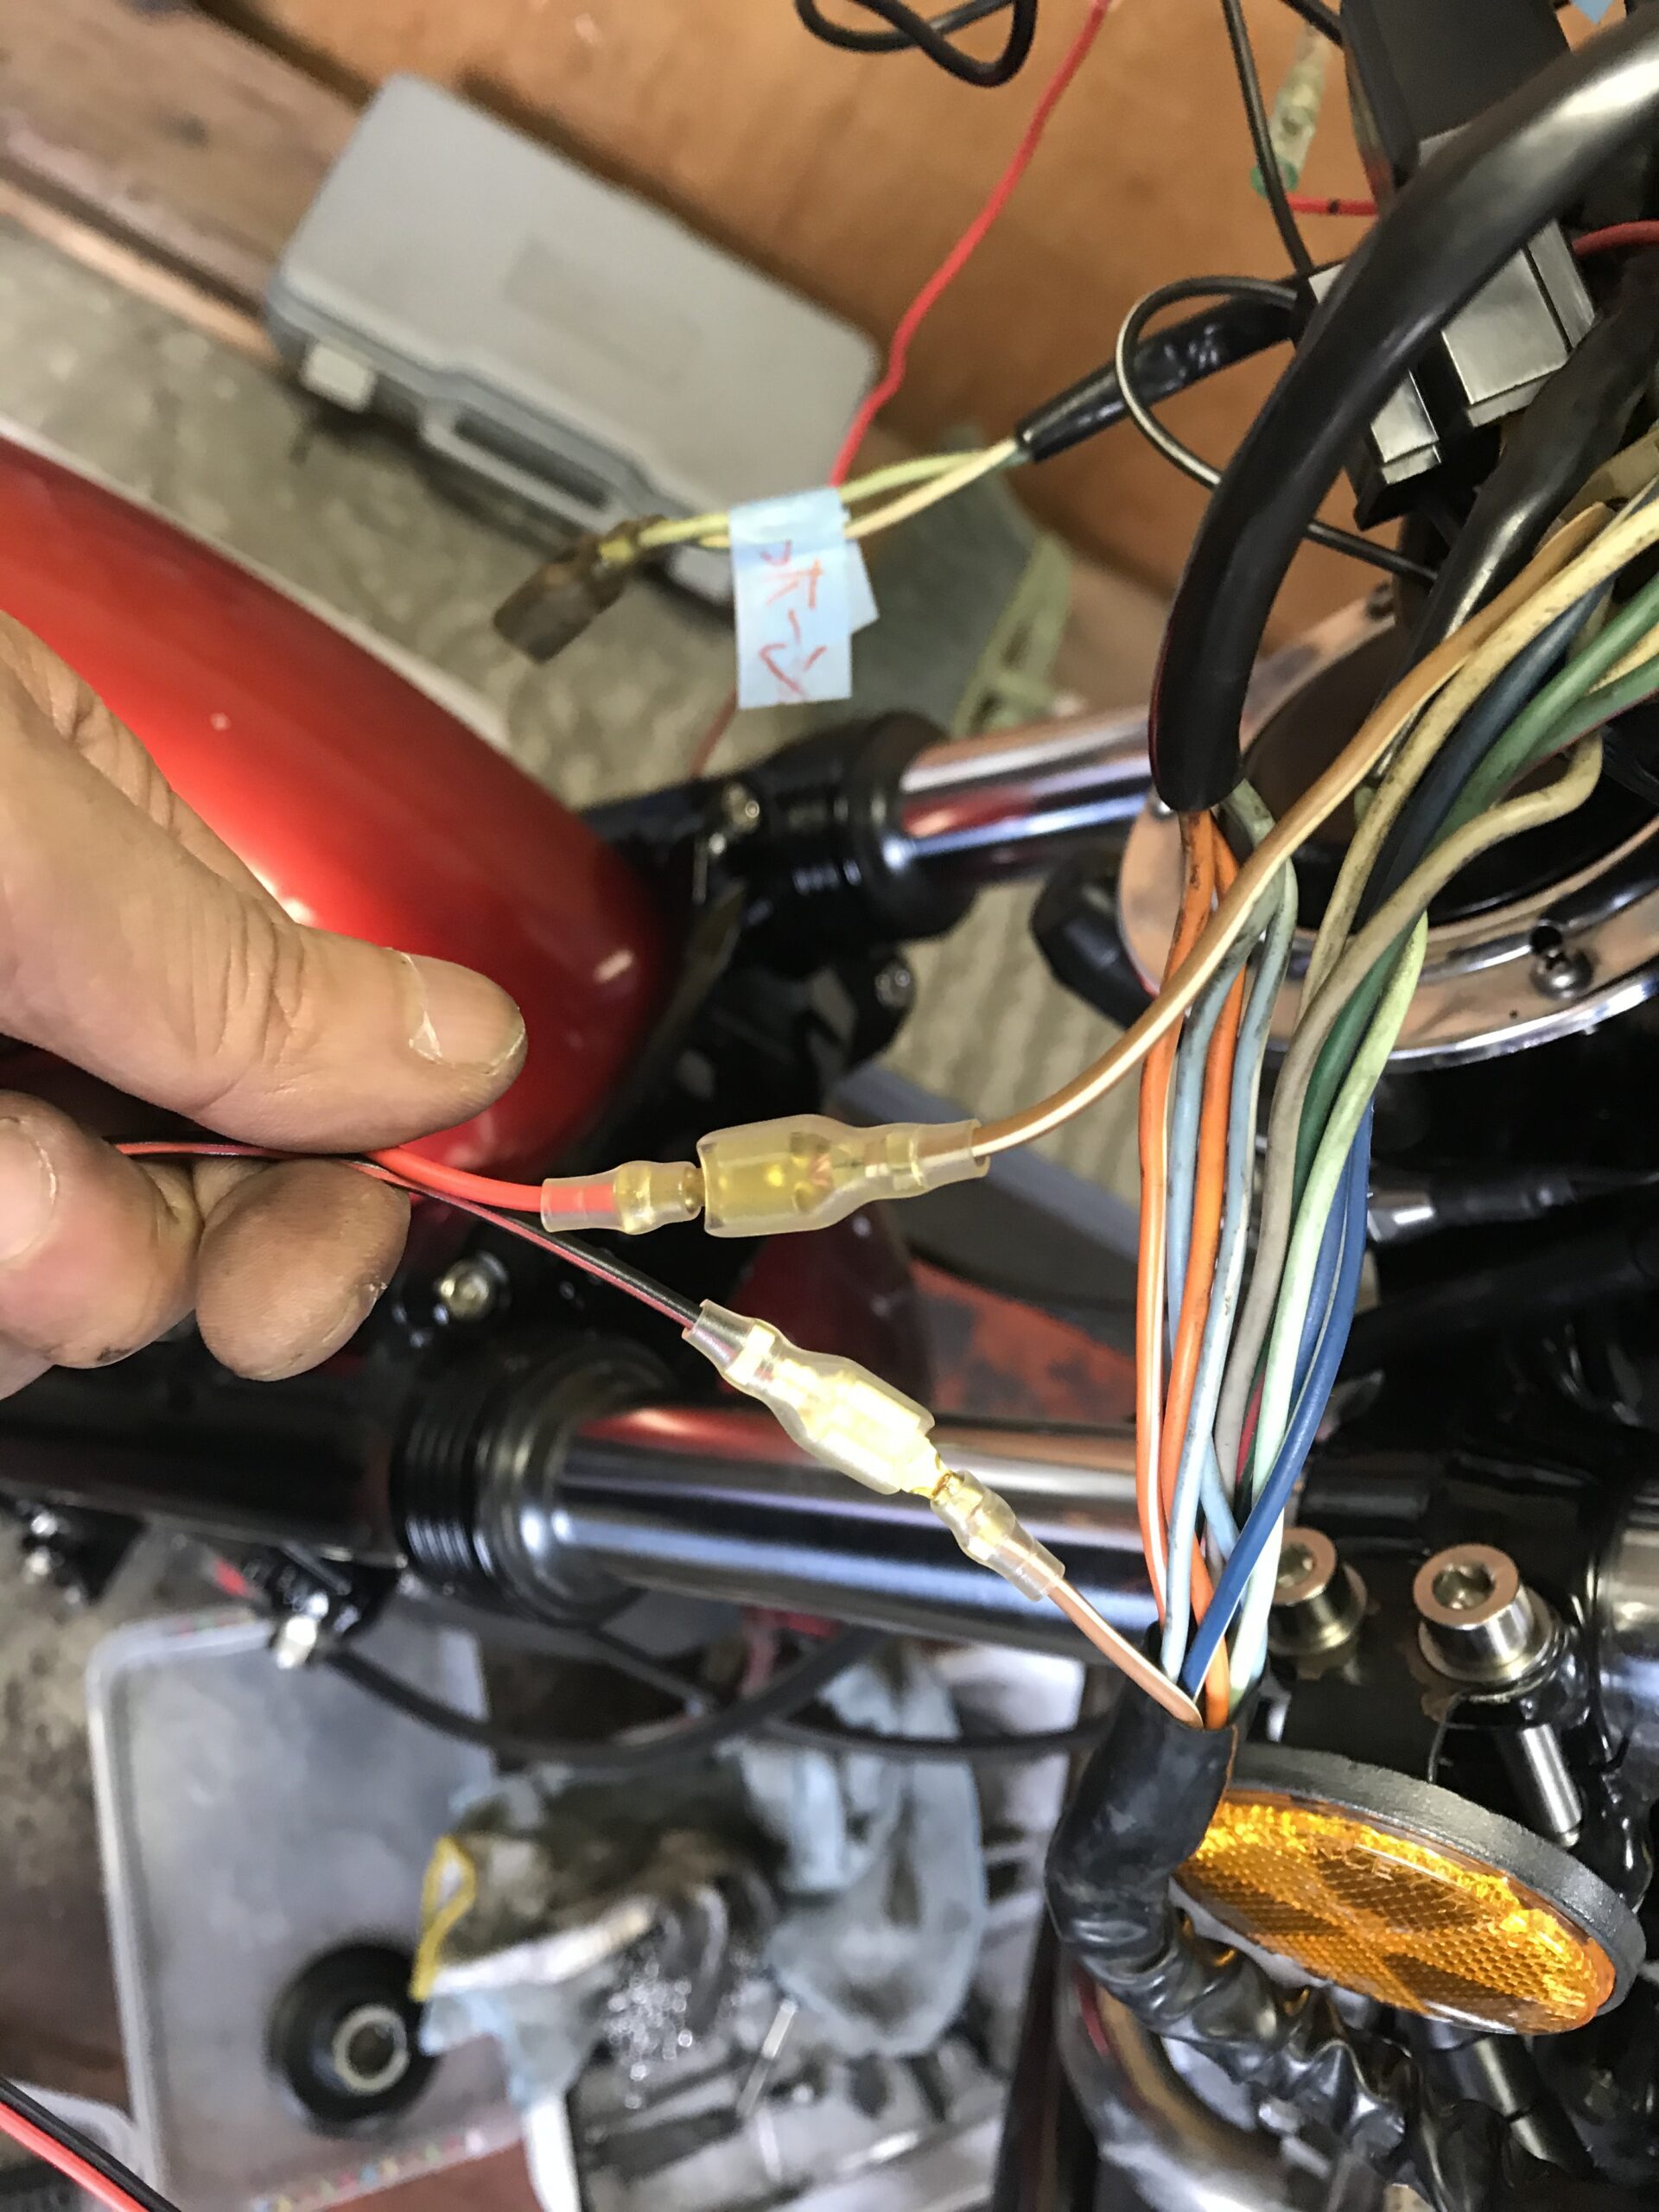
[③ Complete set of wiring tools and bullets]
I can't work without these parts, so I need to buy a set. It's not that expensive.
Giboshi or coupler is fine, but I only use giboshi. When you want to fix the wiring,
I'm planning on changing to a coupler. Make sure that the positive wire of the bullet is female.
This reduces the possibility of a short circuit if it accidentally comes off.
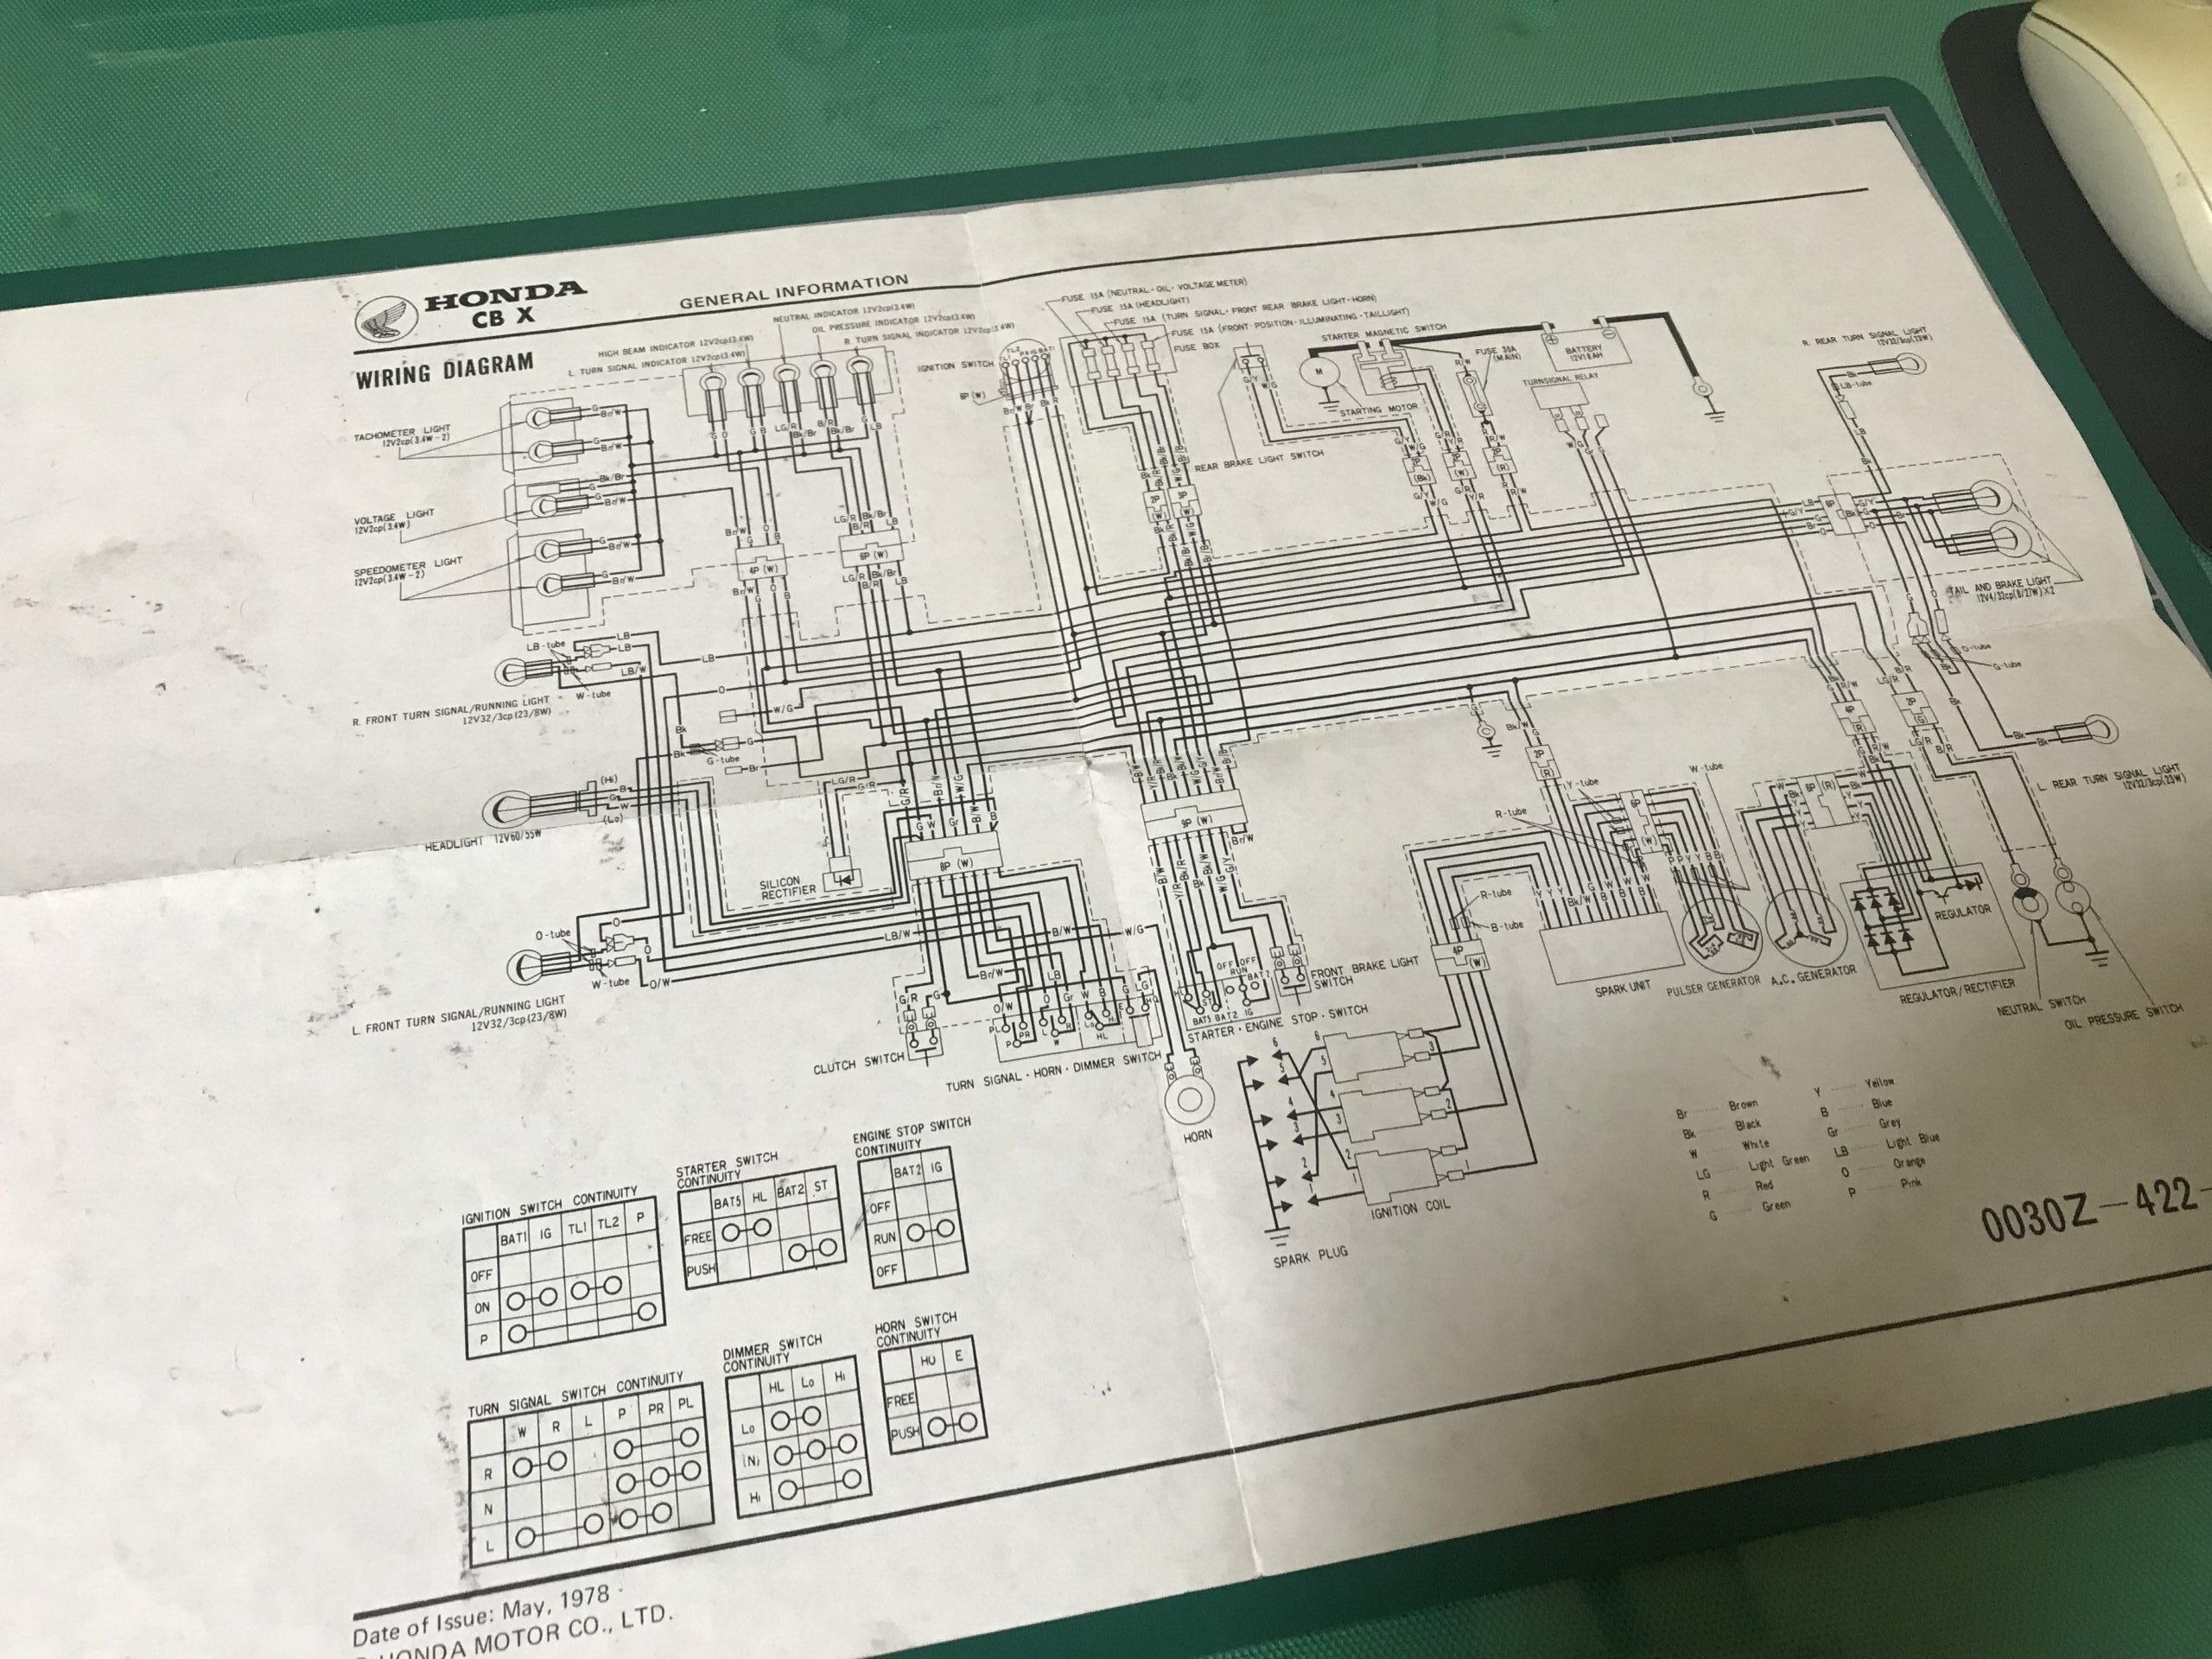
[④Power distribution diagram if possible]
It is not necessary for experienced users, but if you are using this post as a reference, please get it if possible.
If you can't get one, carefully check the left switch wiring and tail lamp wiring. If you are motivated, you can understand it without a power distribution diagram. It's impossible to understand without a power distribution diagram.
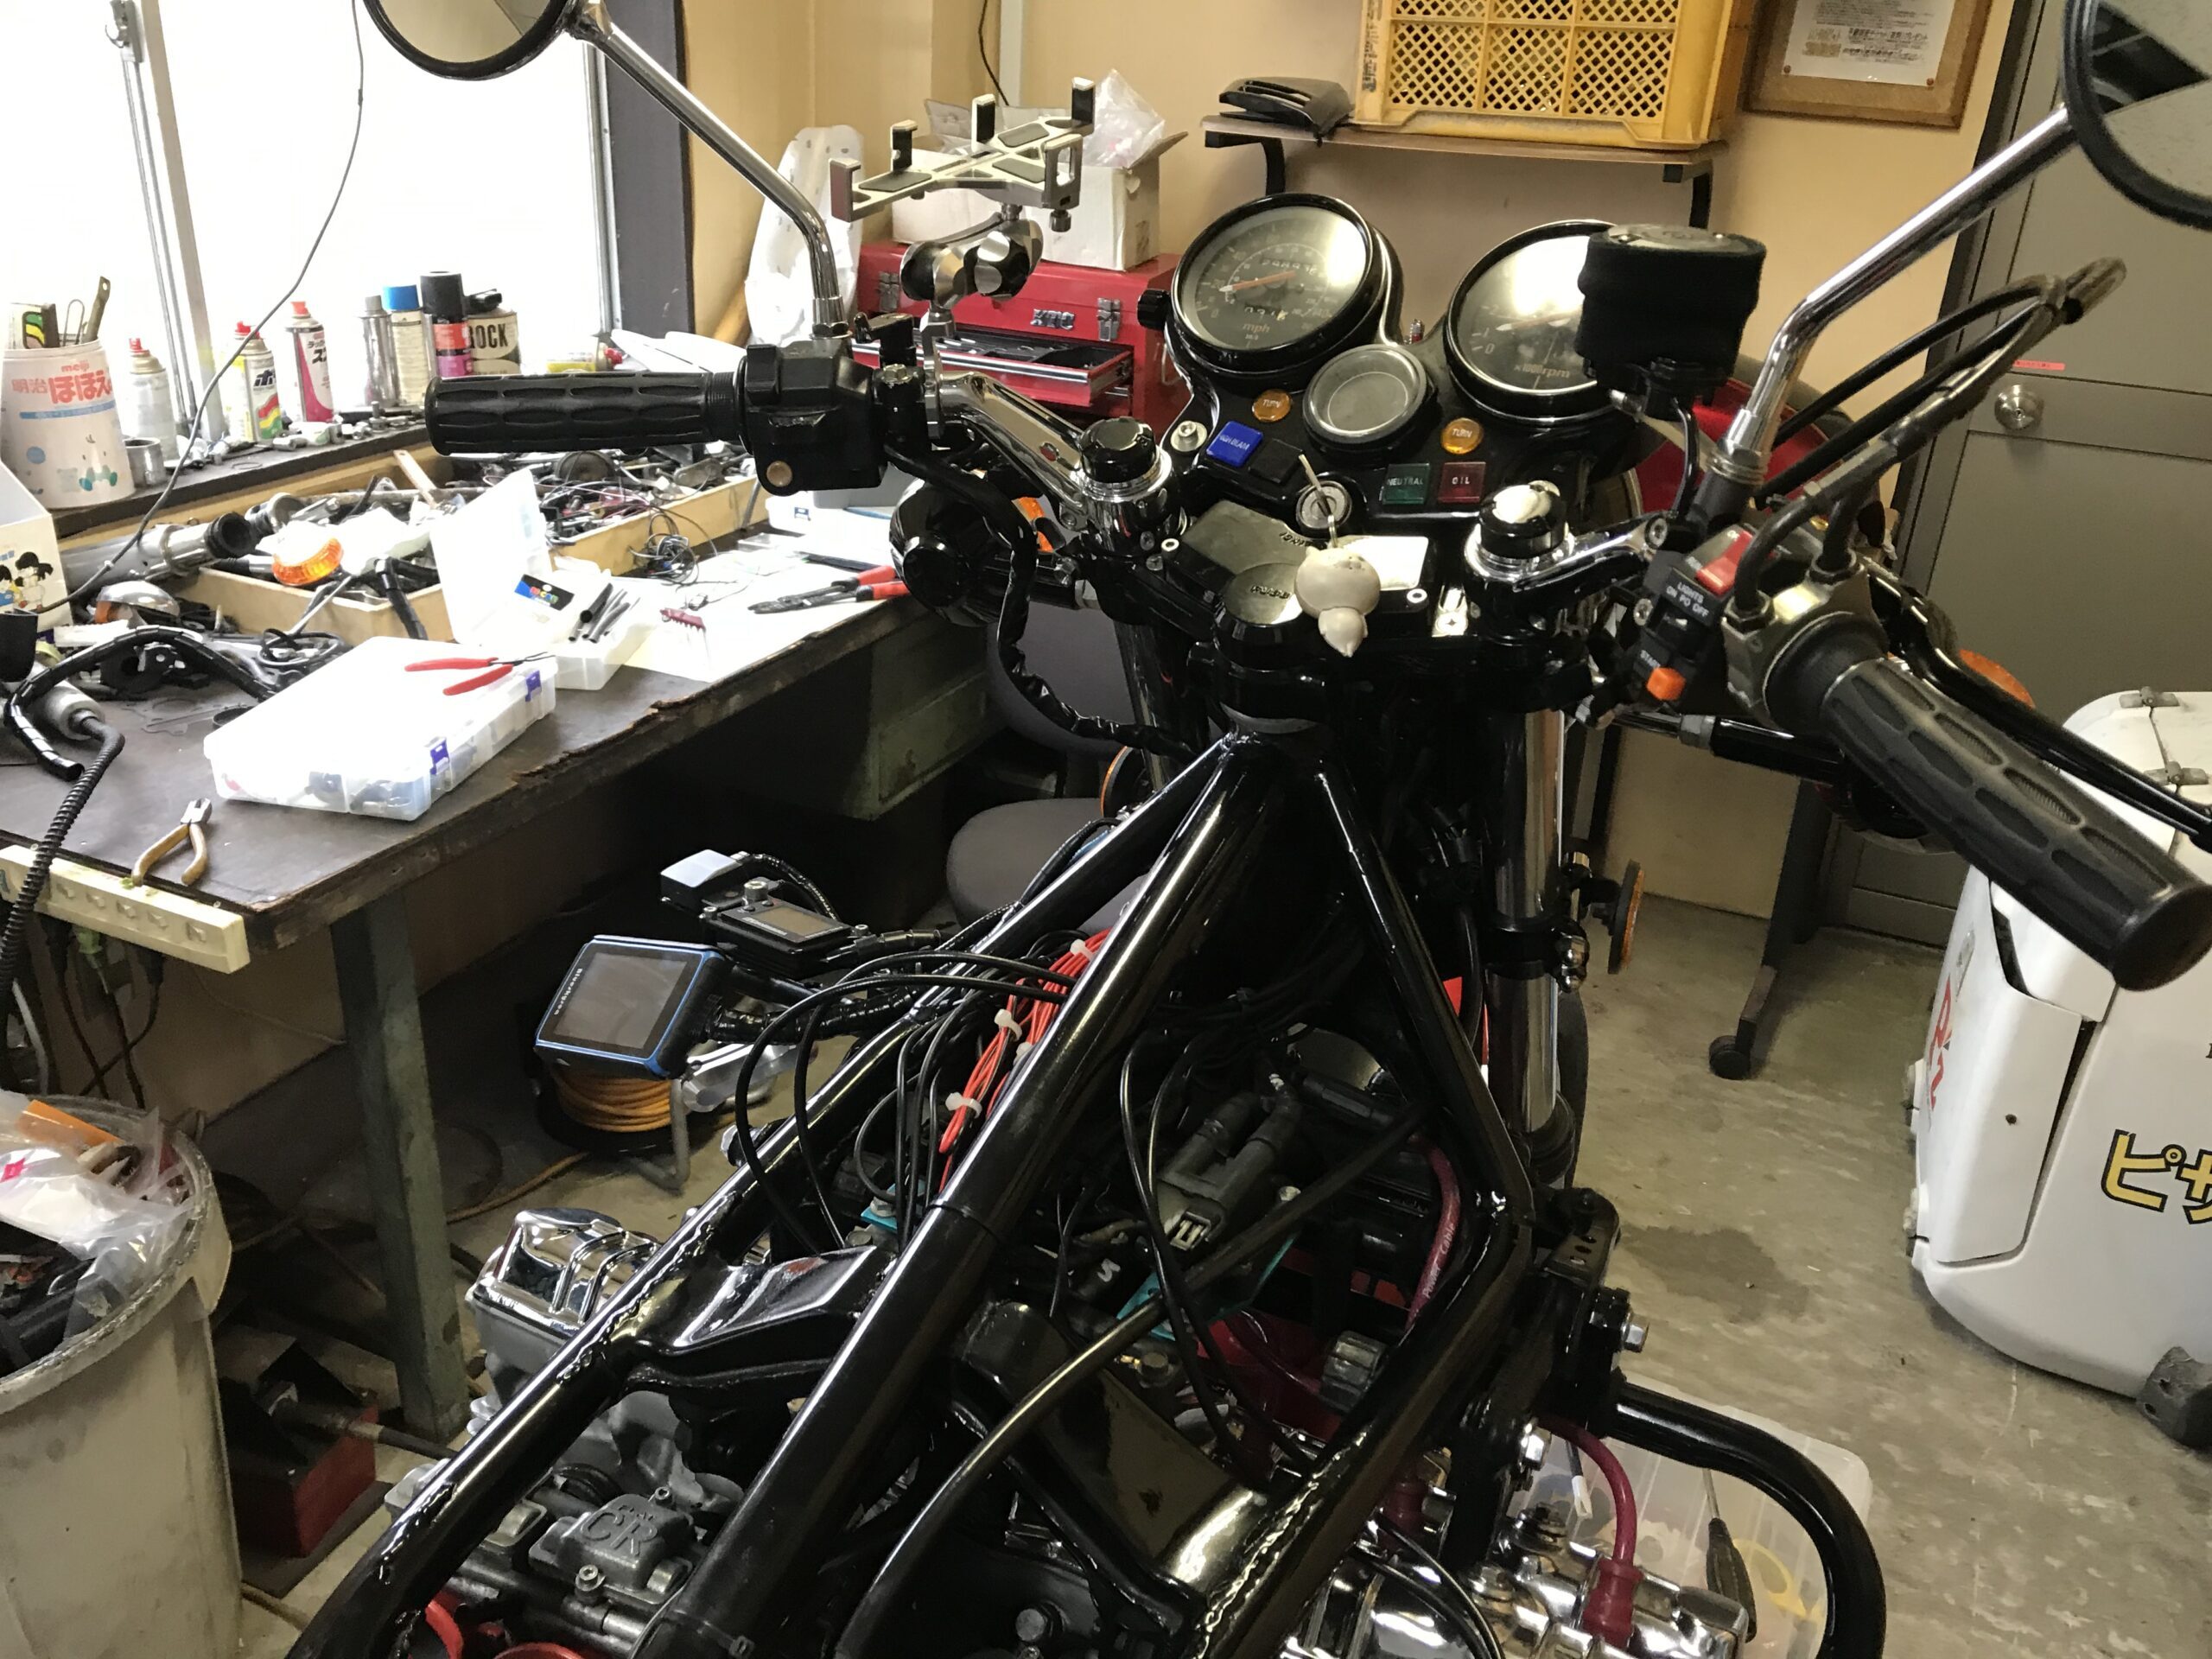
I didn't know, but the on/off switch when the blinker blinks in the blinker position is
It's in the switch box on the left. I didn't know this, so in the past I couldn't turn the turn signal position lamp on and off.
The power distribution diagram for the ow01 switch can be easily obtained online.
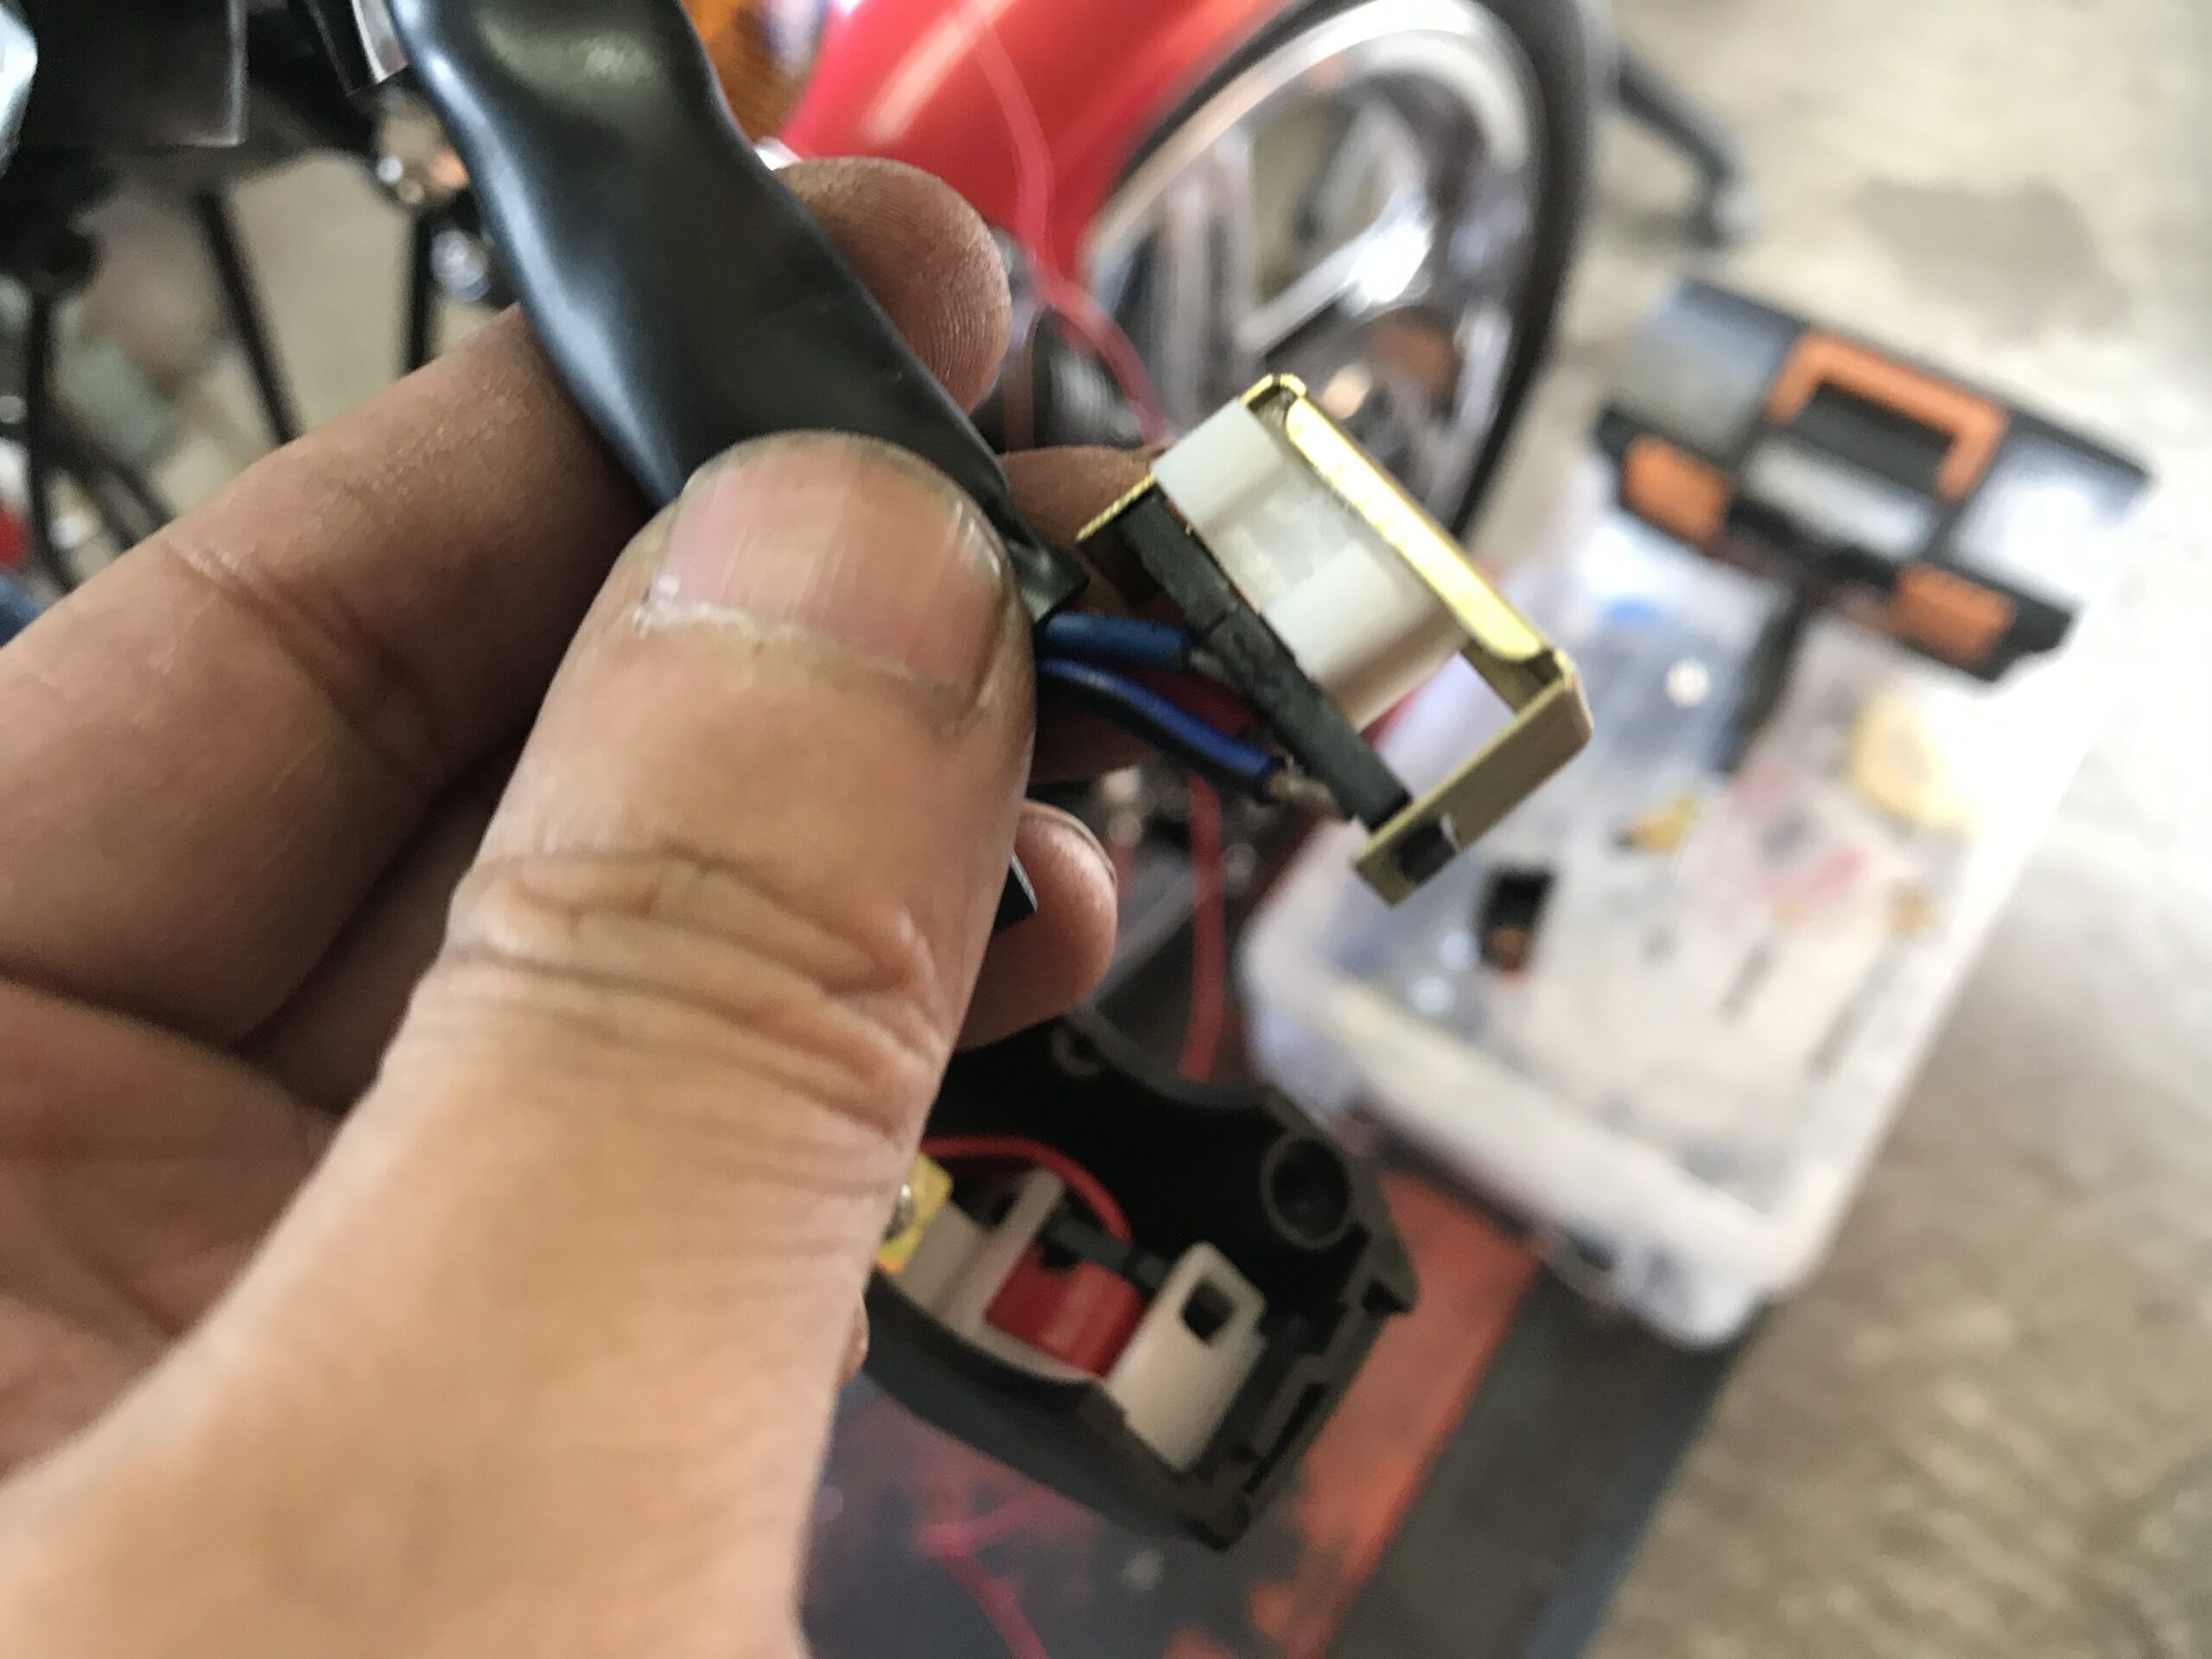
Super important thing – Honda turn signal switch
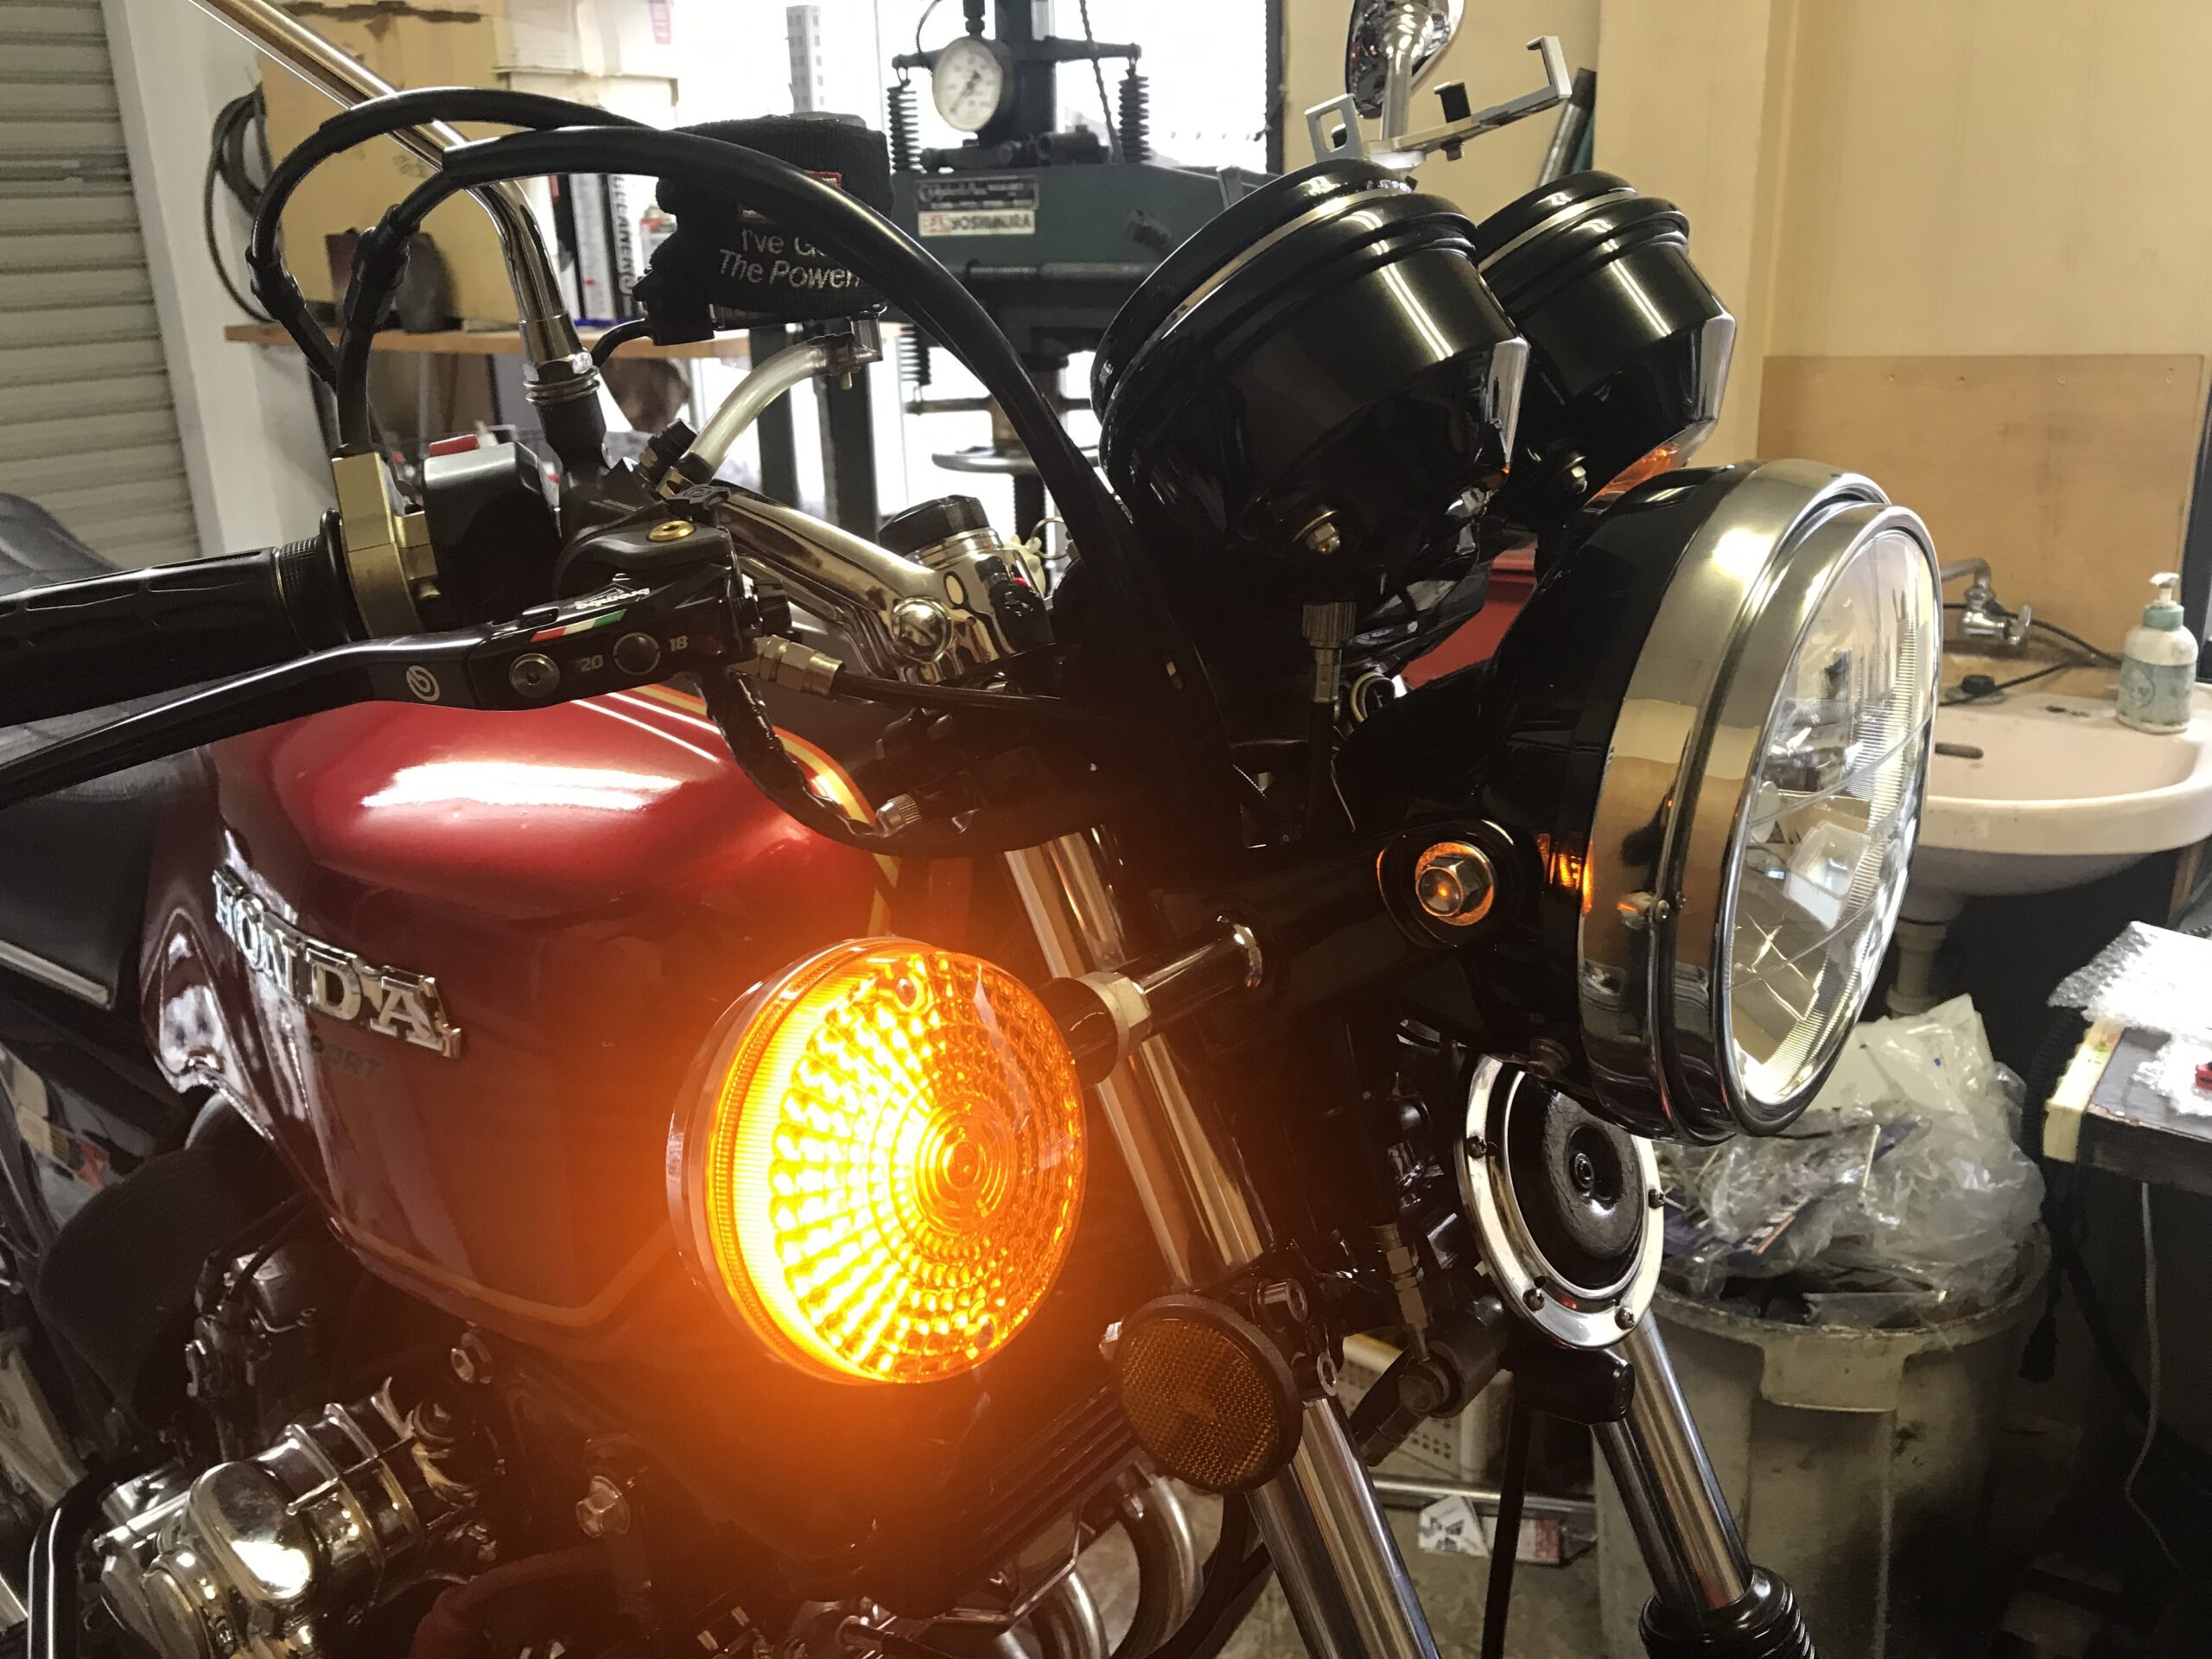
As I wrote earlier, this is a Honda motorcycle's front turn signal double bulb.
When you turn on the turn signal, one light source inside the double bulb goes out and the second light source takes charge of blinking.
I will write about the mechanism of the turn signal switch in the left switch box.
For example, when you turn on the left turn signal, turn off the light source of the left position lamp,
Electricity flows to the light source for the left turn signal via the turn signal relay.
This is important.
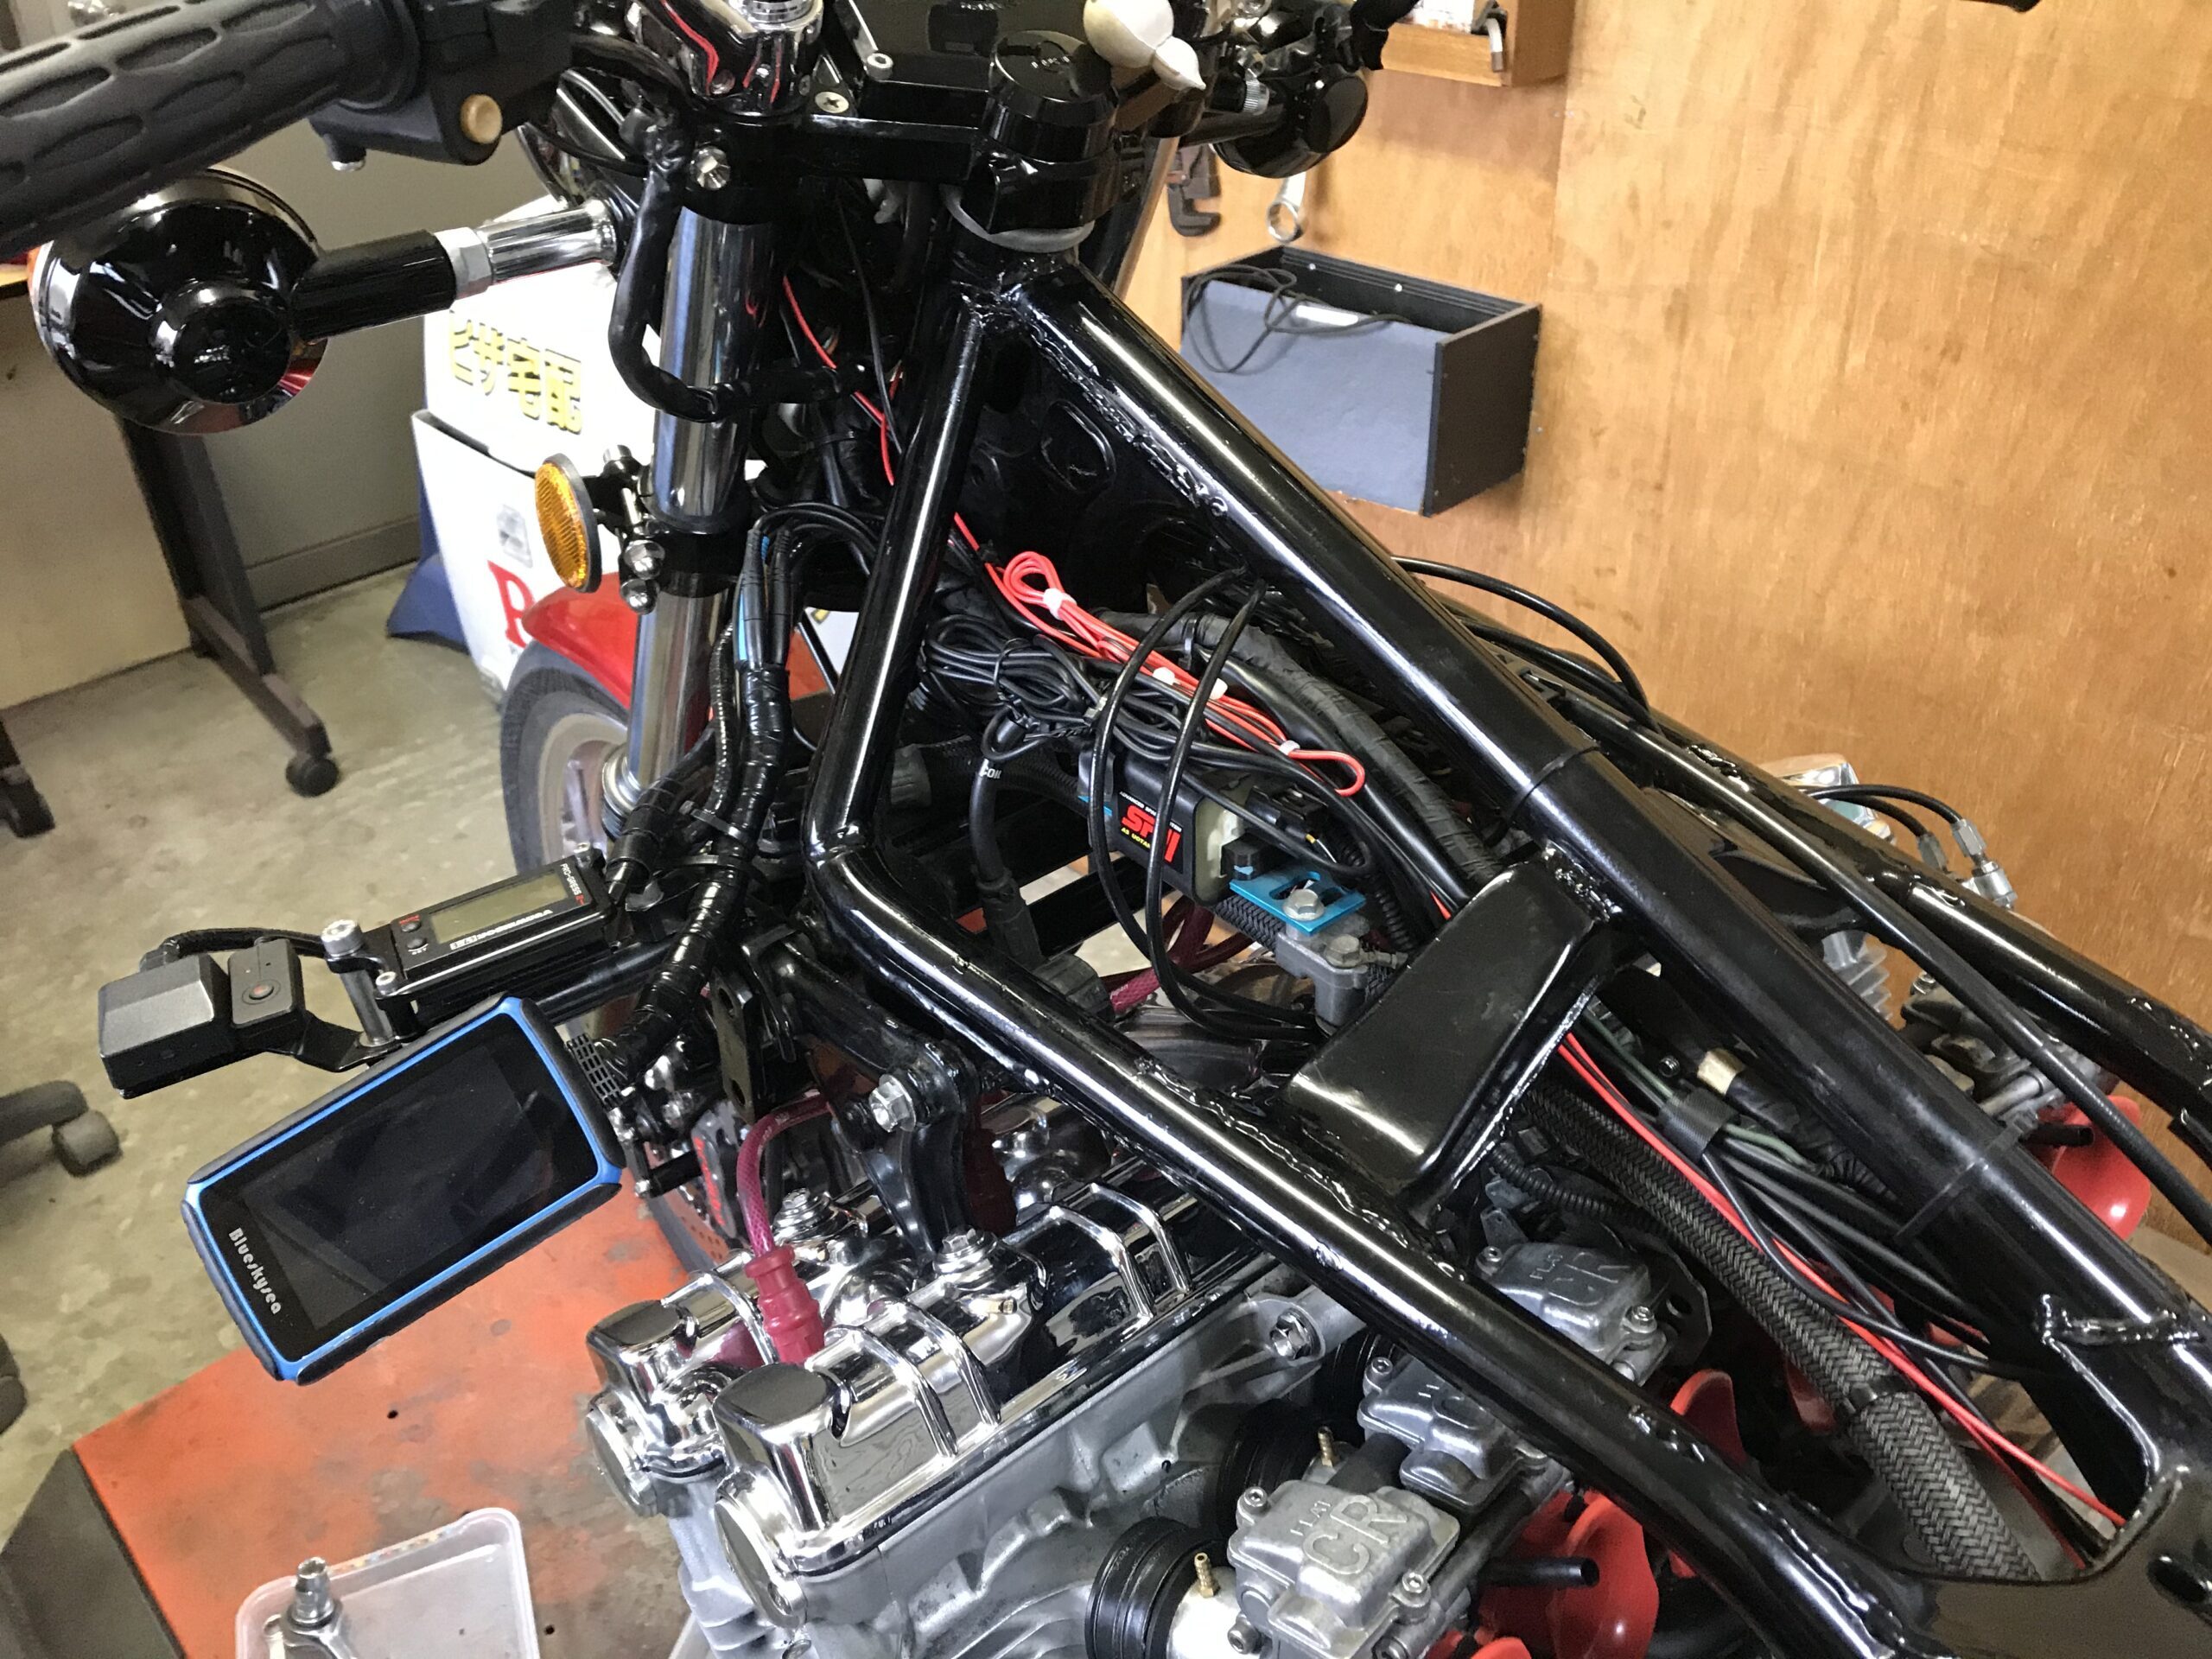
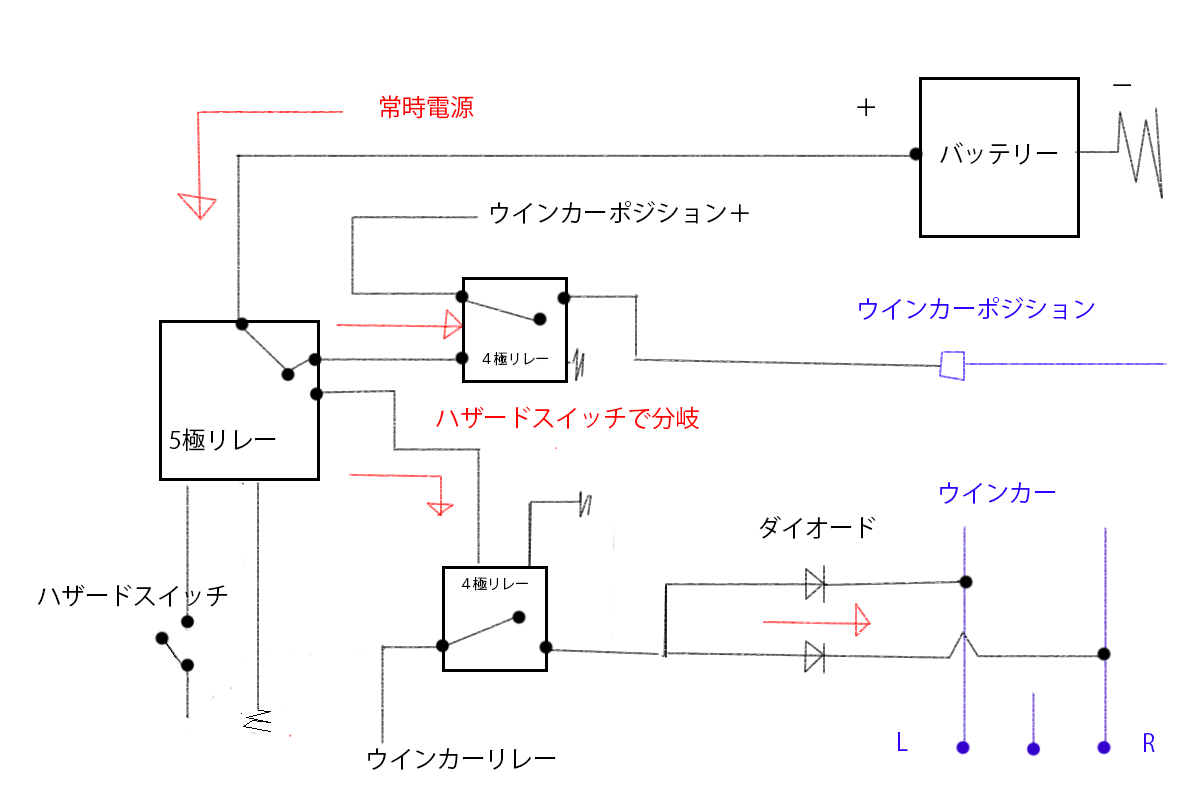
By modifying the wiring of the left switch, the turn signal position lamp on/off function can be realized. If you don't know this, a tremendous amount of wiring work will be required. Alternatively, work such as installing an aftermarket turn signal kit may be required. If you are installing a racing carburetor such as FCR and have a thin switch, you can use a 4-pole relay and simply cut the left switch wiring in one place.
The on/off function can be realized by cutting the Br/W coming out of the 8-pole coupler.
*Please obtain the power distribution diagram separately.
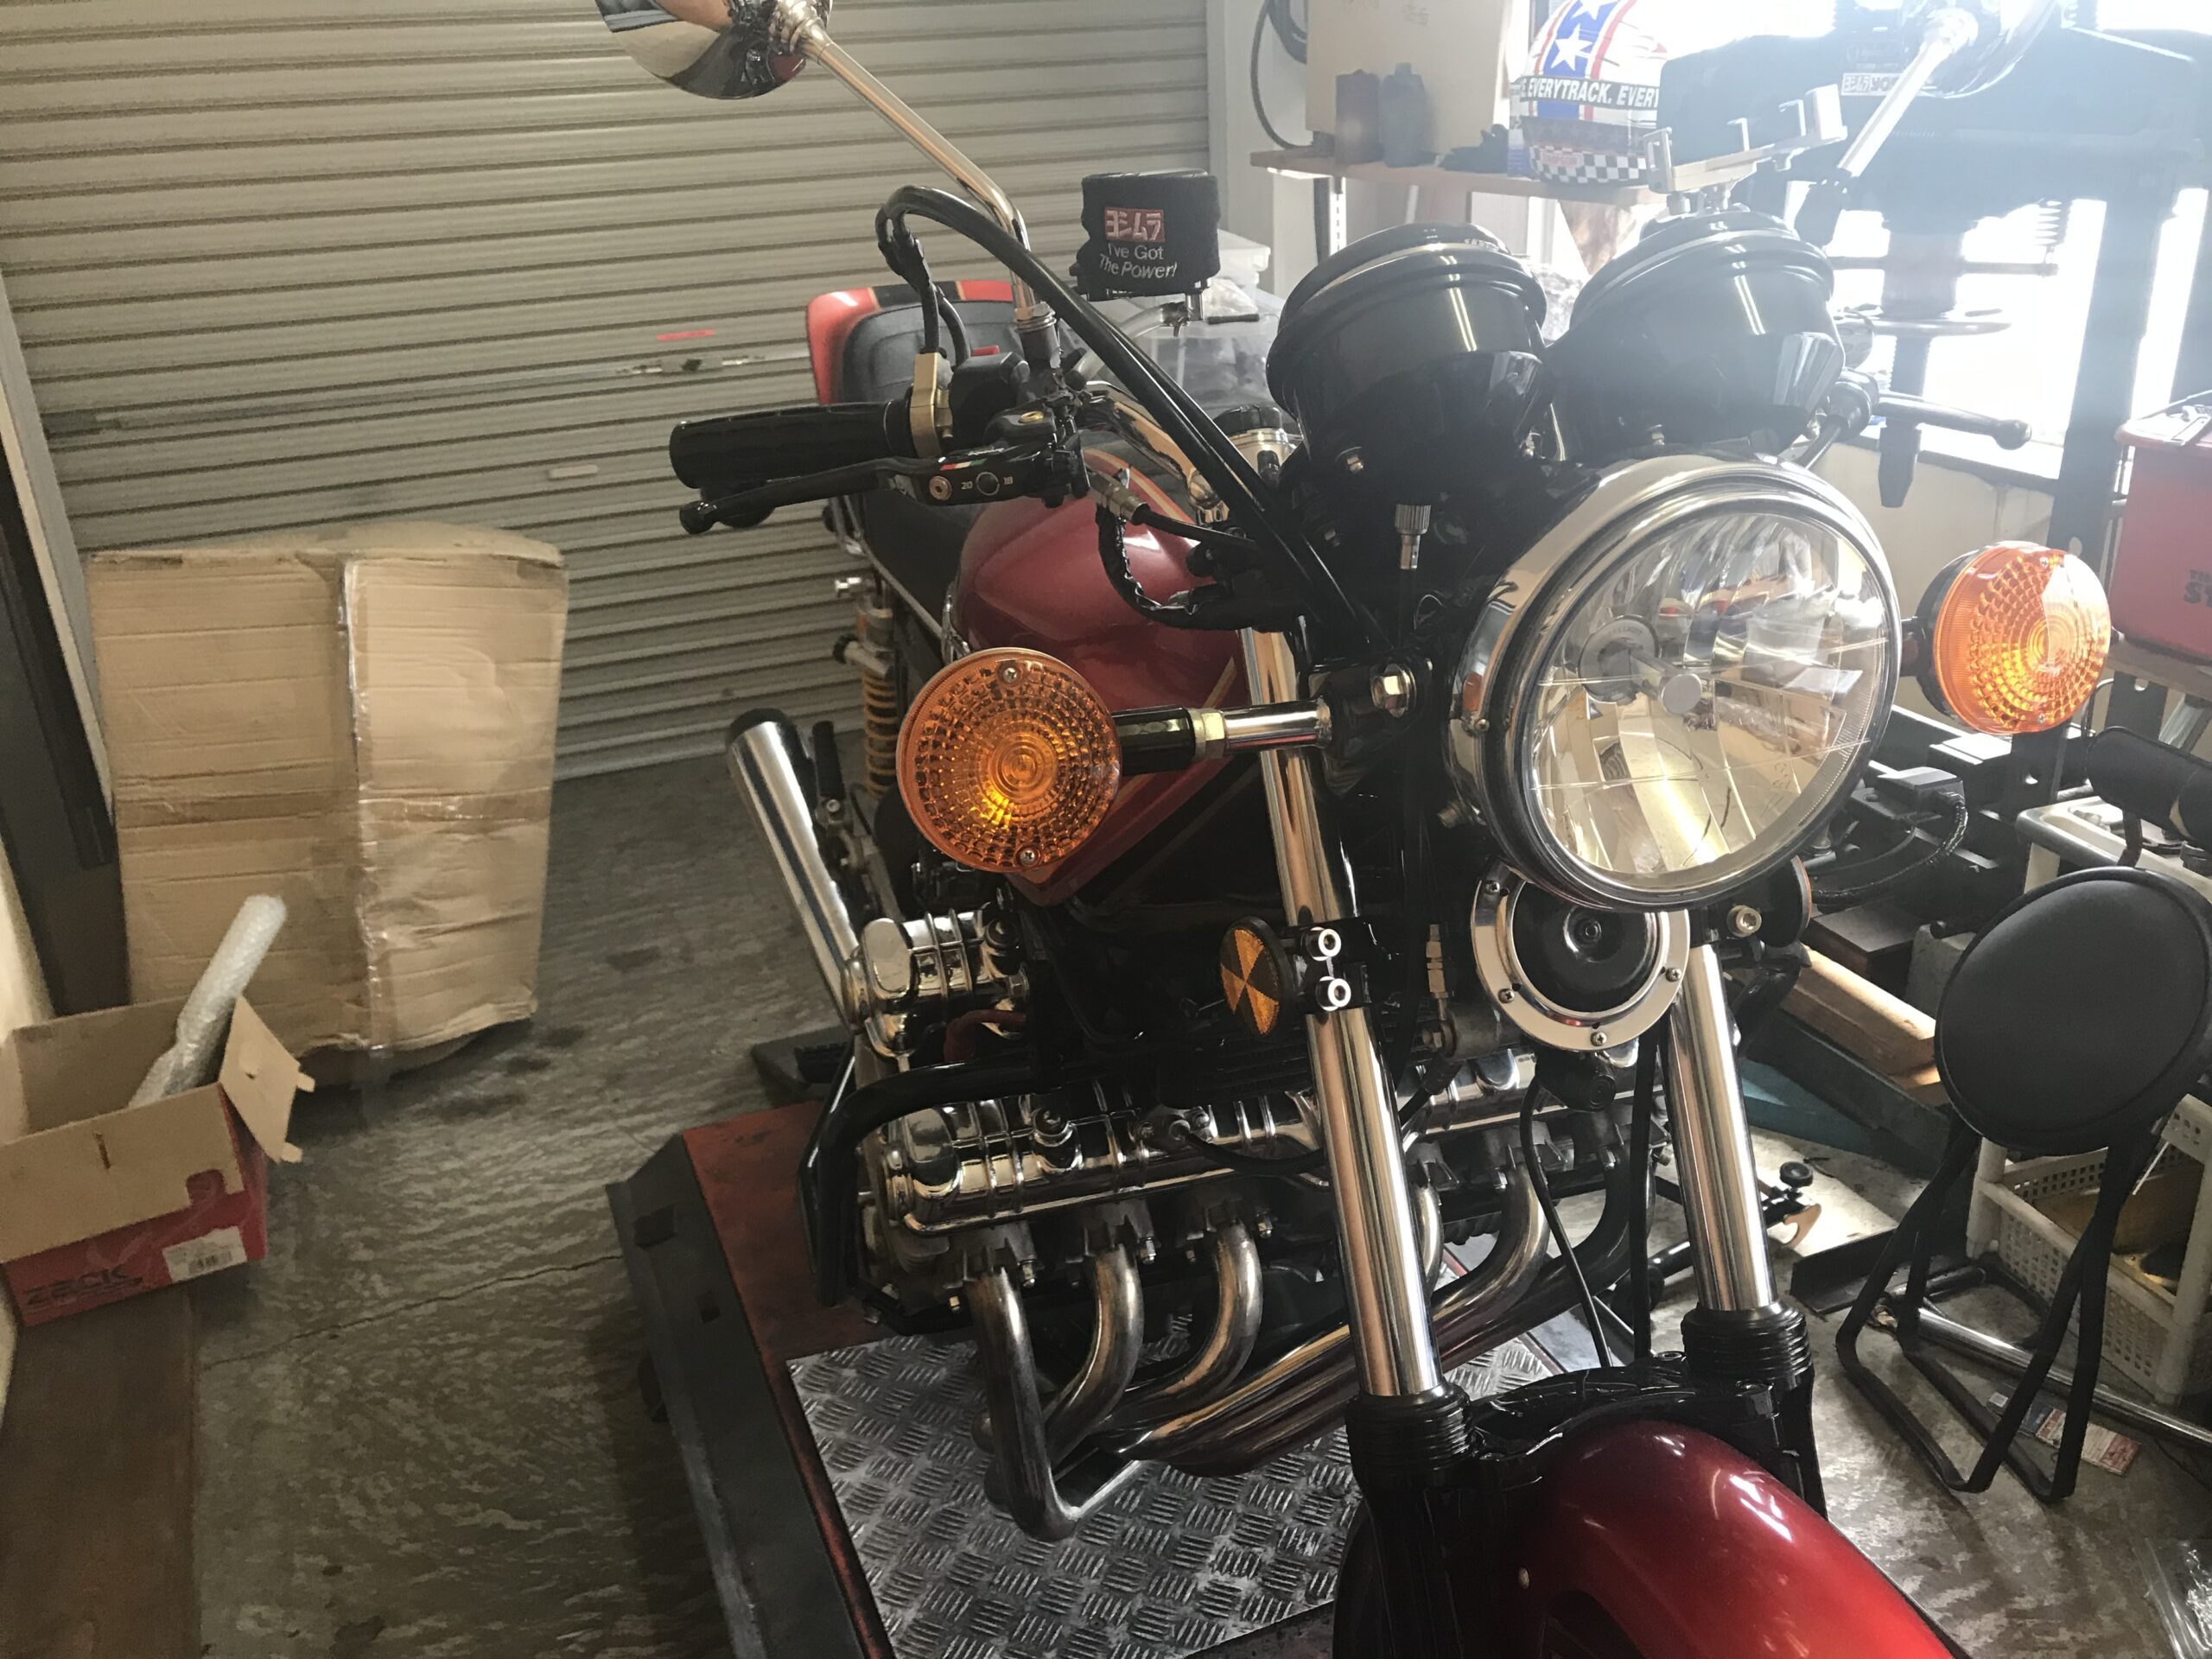
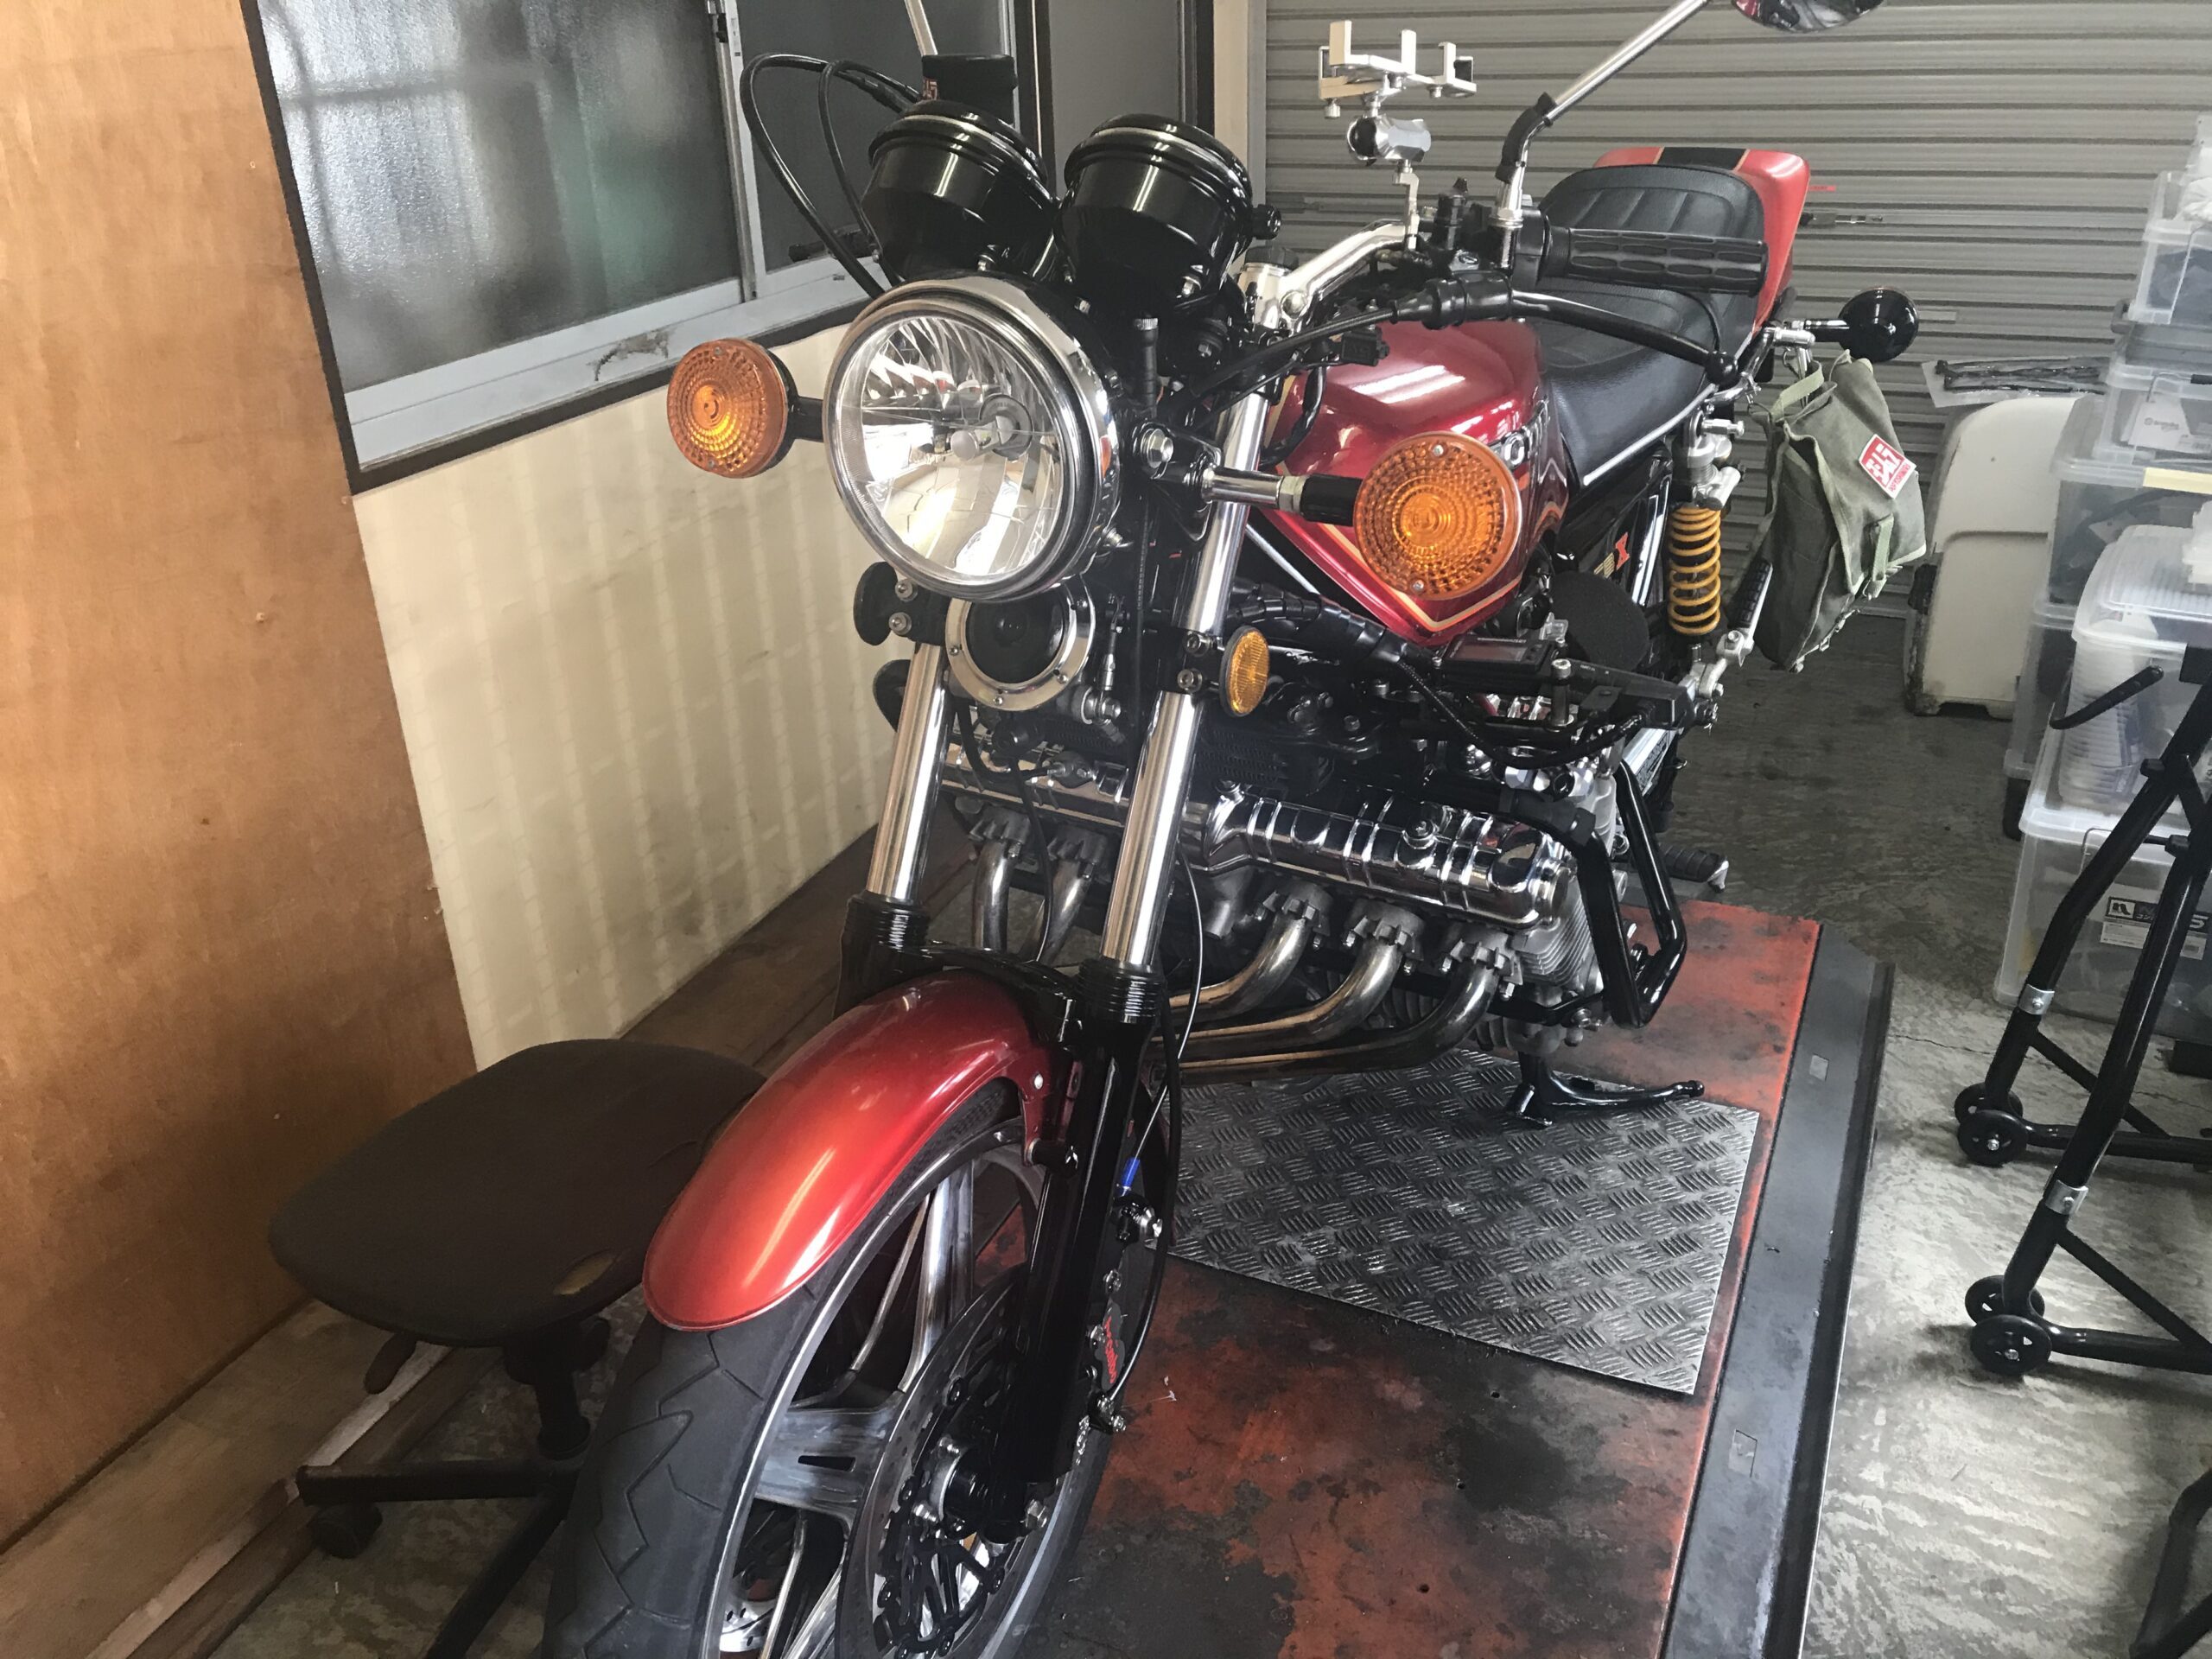
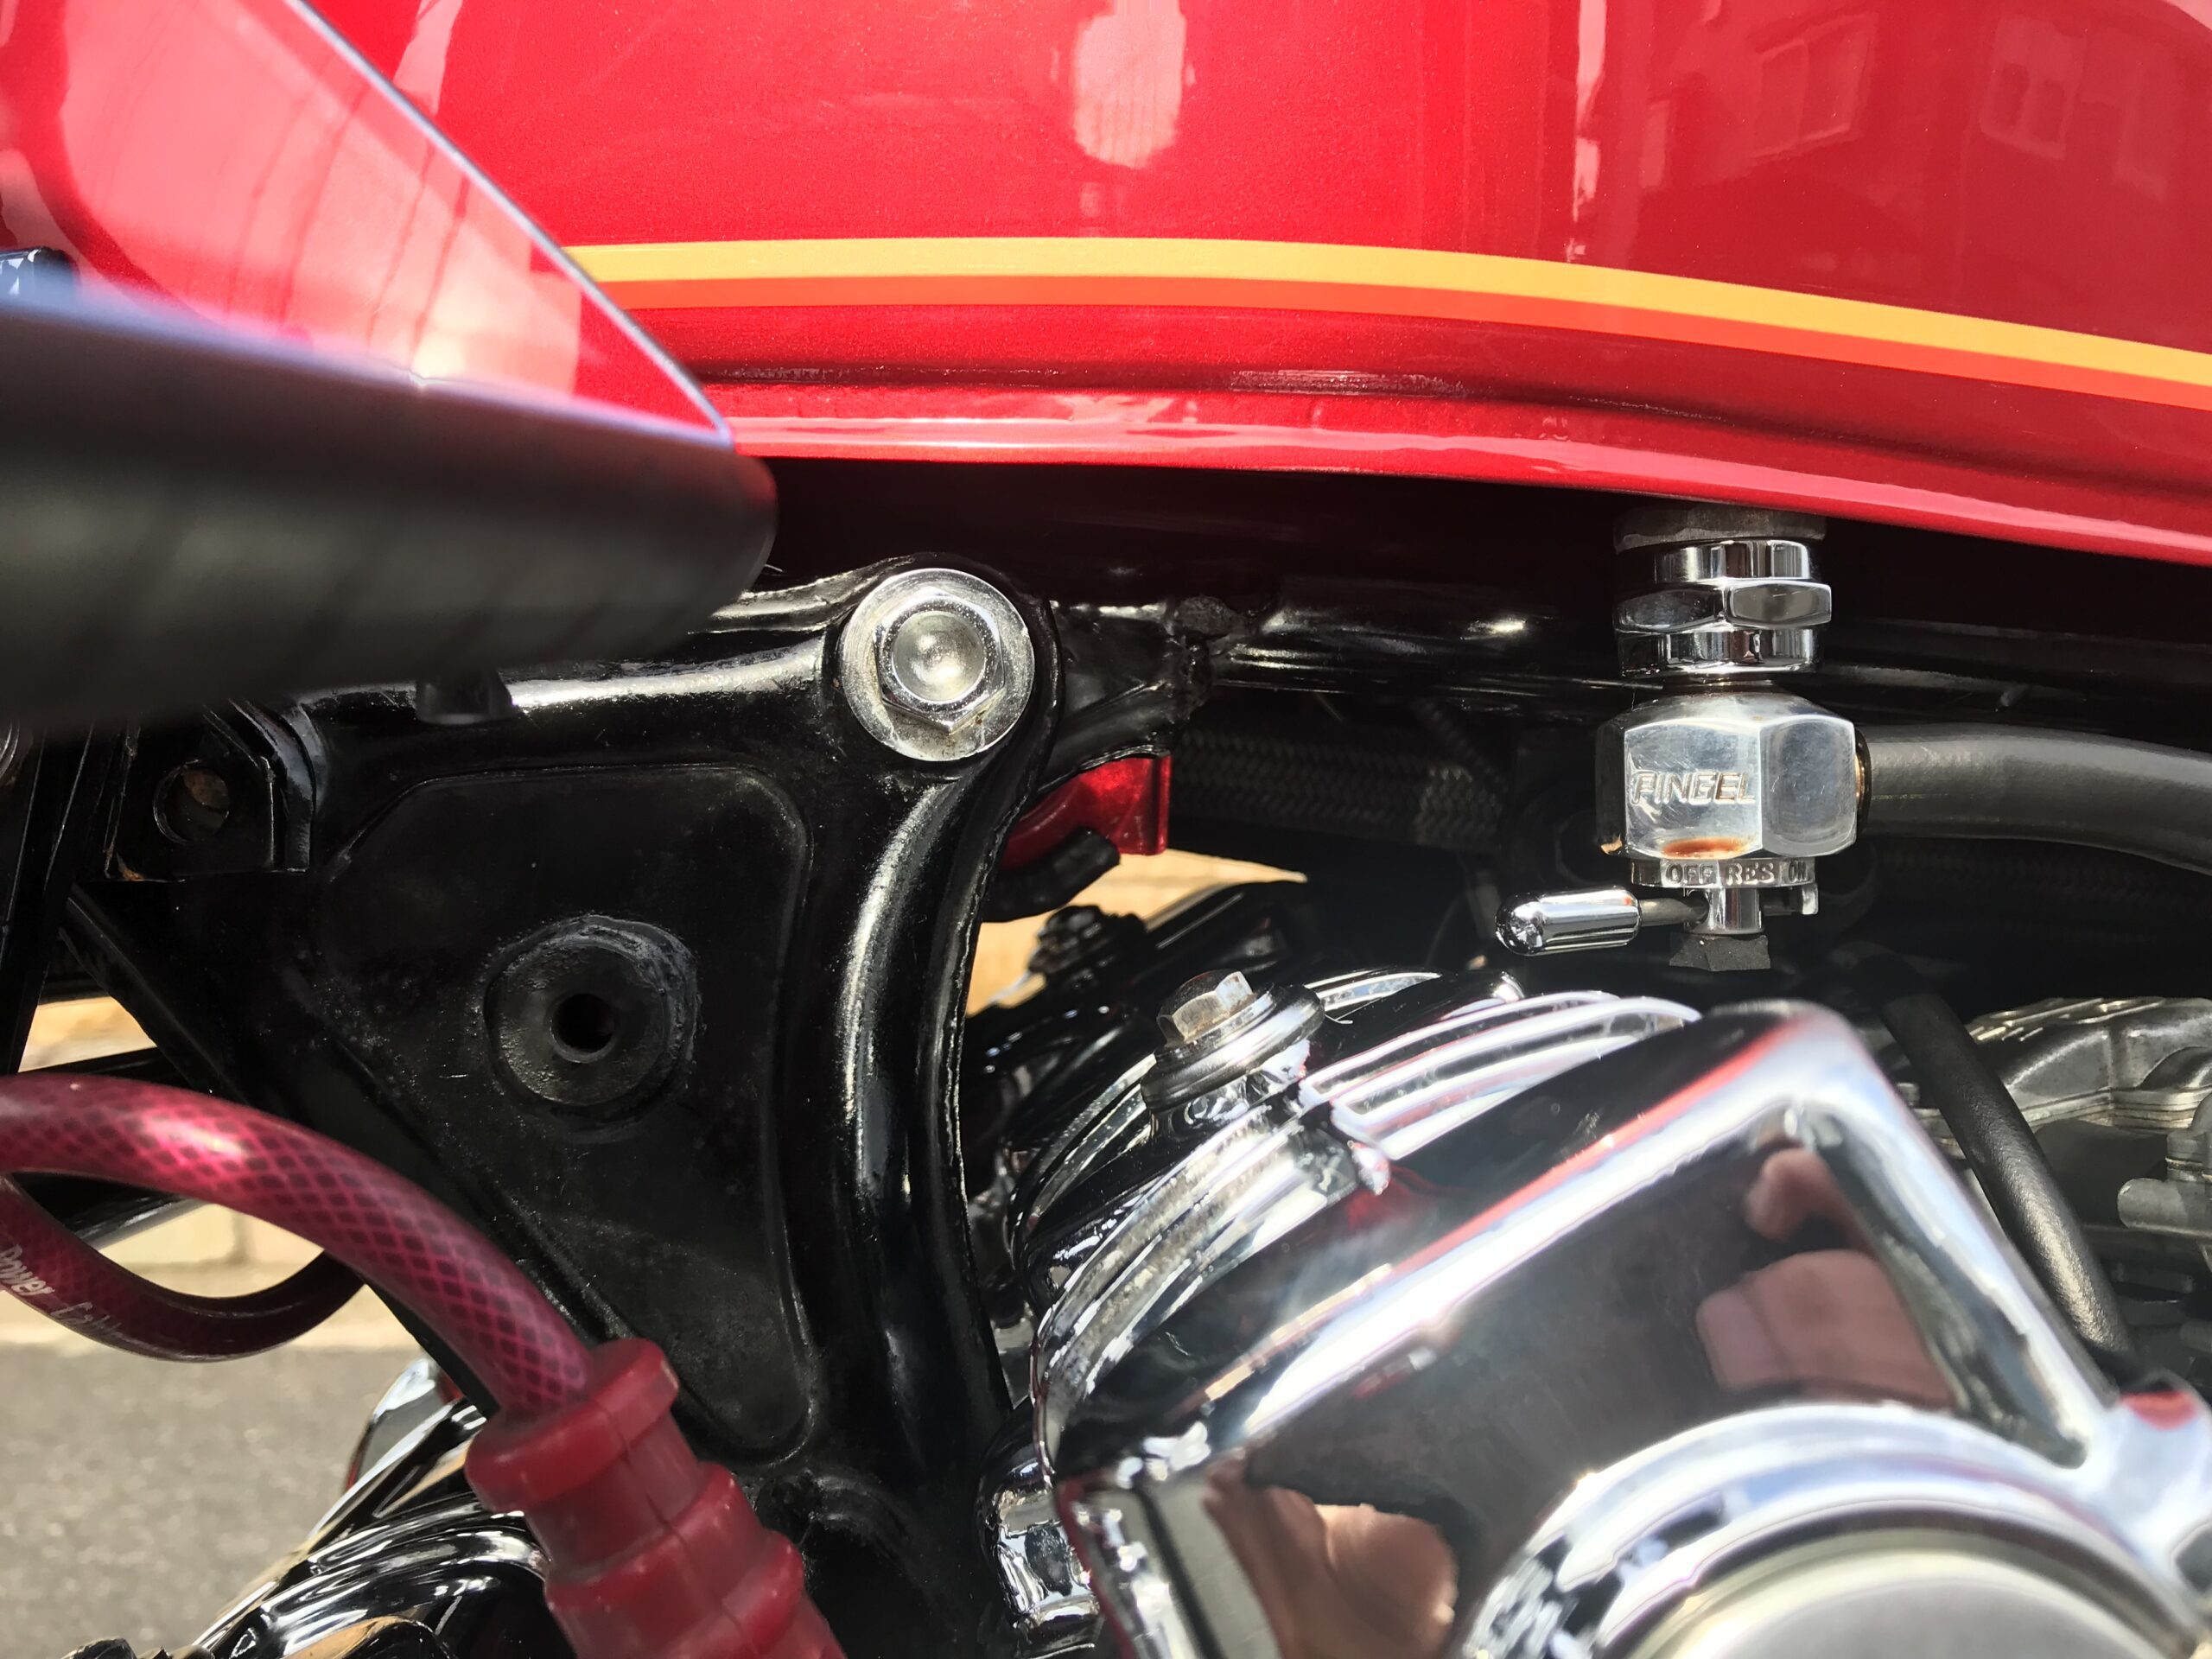
*The gallery contains photos taken on that day, but it also includes photos taken while testing unrelated wiring and the area around the right switch.
CBX1000-Switch OffCBX1000-position lampCBX1000-HeadlightCBX1000-WiringCBX1000-WiringCBX1000-WiringCBX1000-WiringCBX1000-WiringCBX1000-right switchHONDA CBX1000 – Wiring diagramHONDA CBX1000 – Wiring diagramCBX1000 wiring diagramCBX1000 wiring diagramPower distribution diagram – processing partTurn signal relayWiring etc.
This includes tuning the tail lights on and off, and fixing the dirty wiring on the right switch, so the photos are not just about tuning the turn signal on and off.
HONDA-CBX1000
HONDA-CBX1000
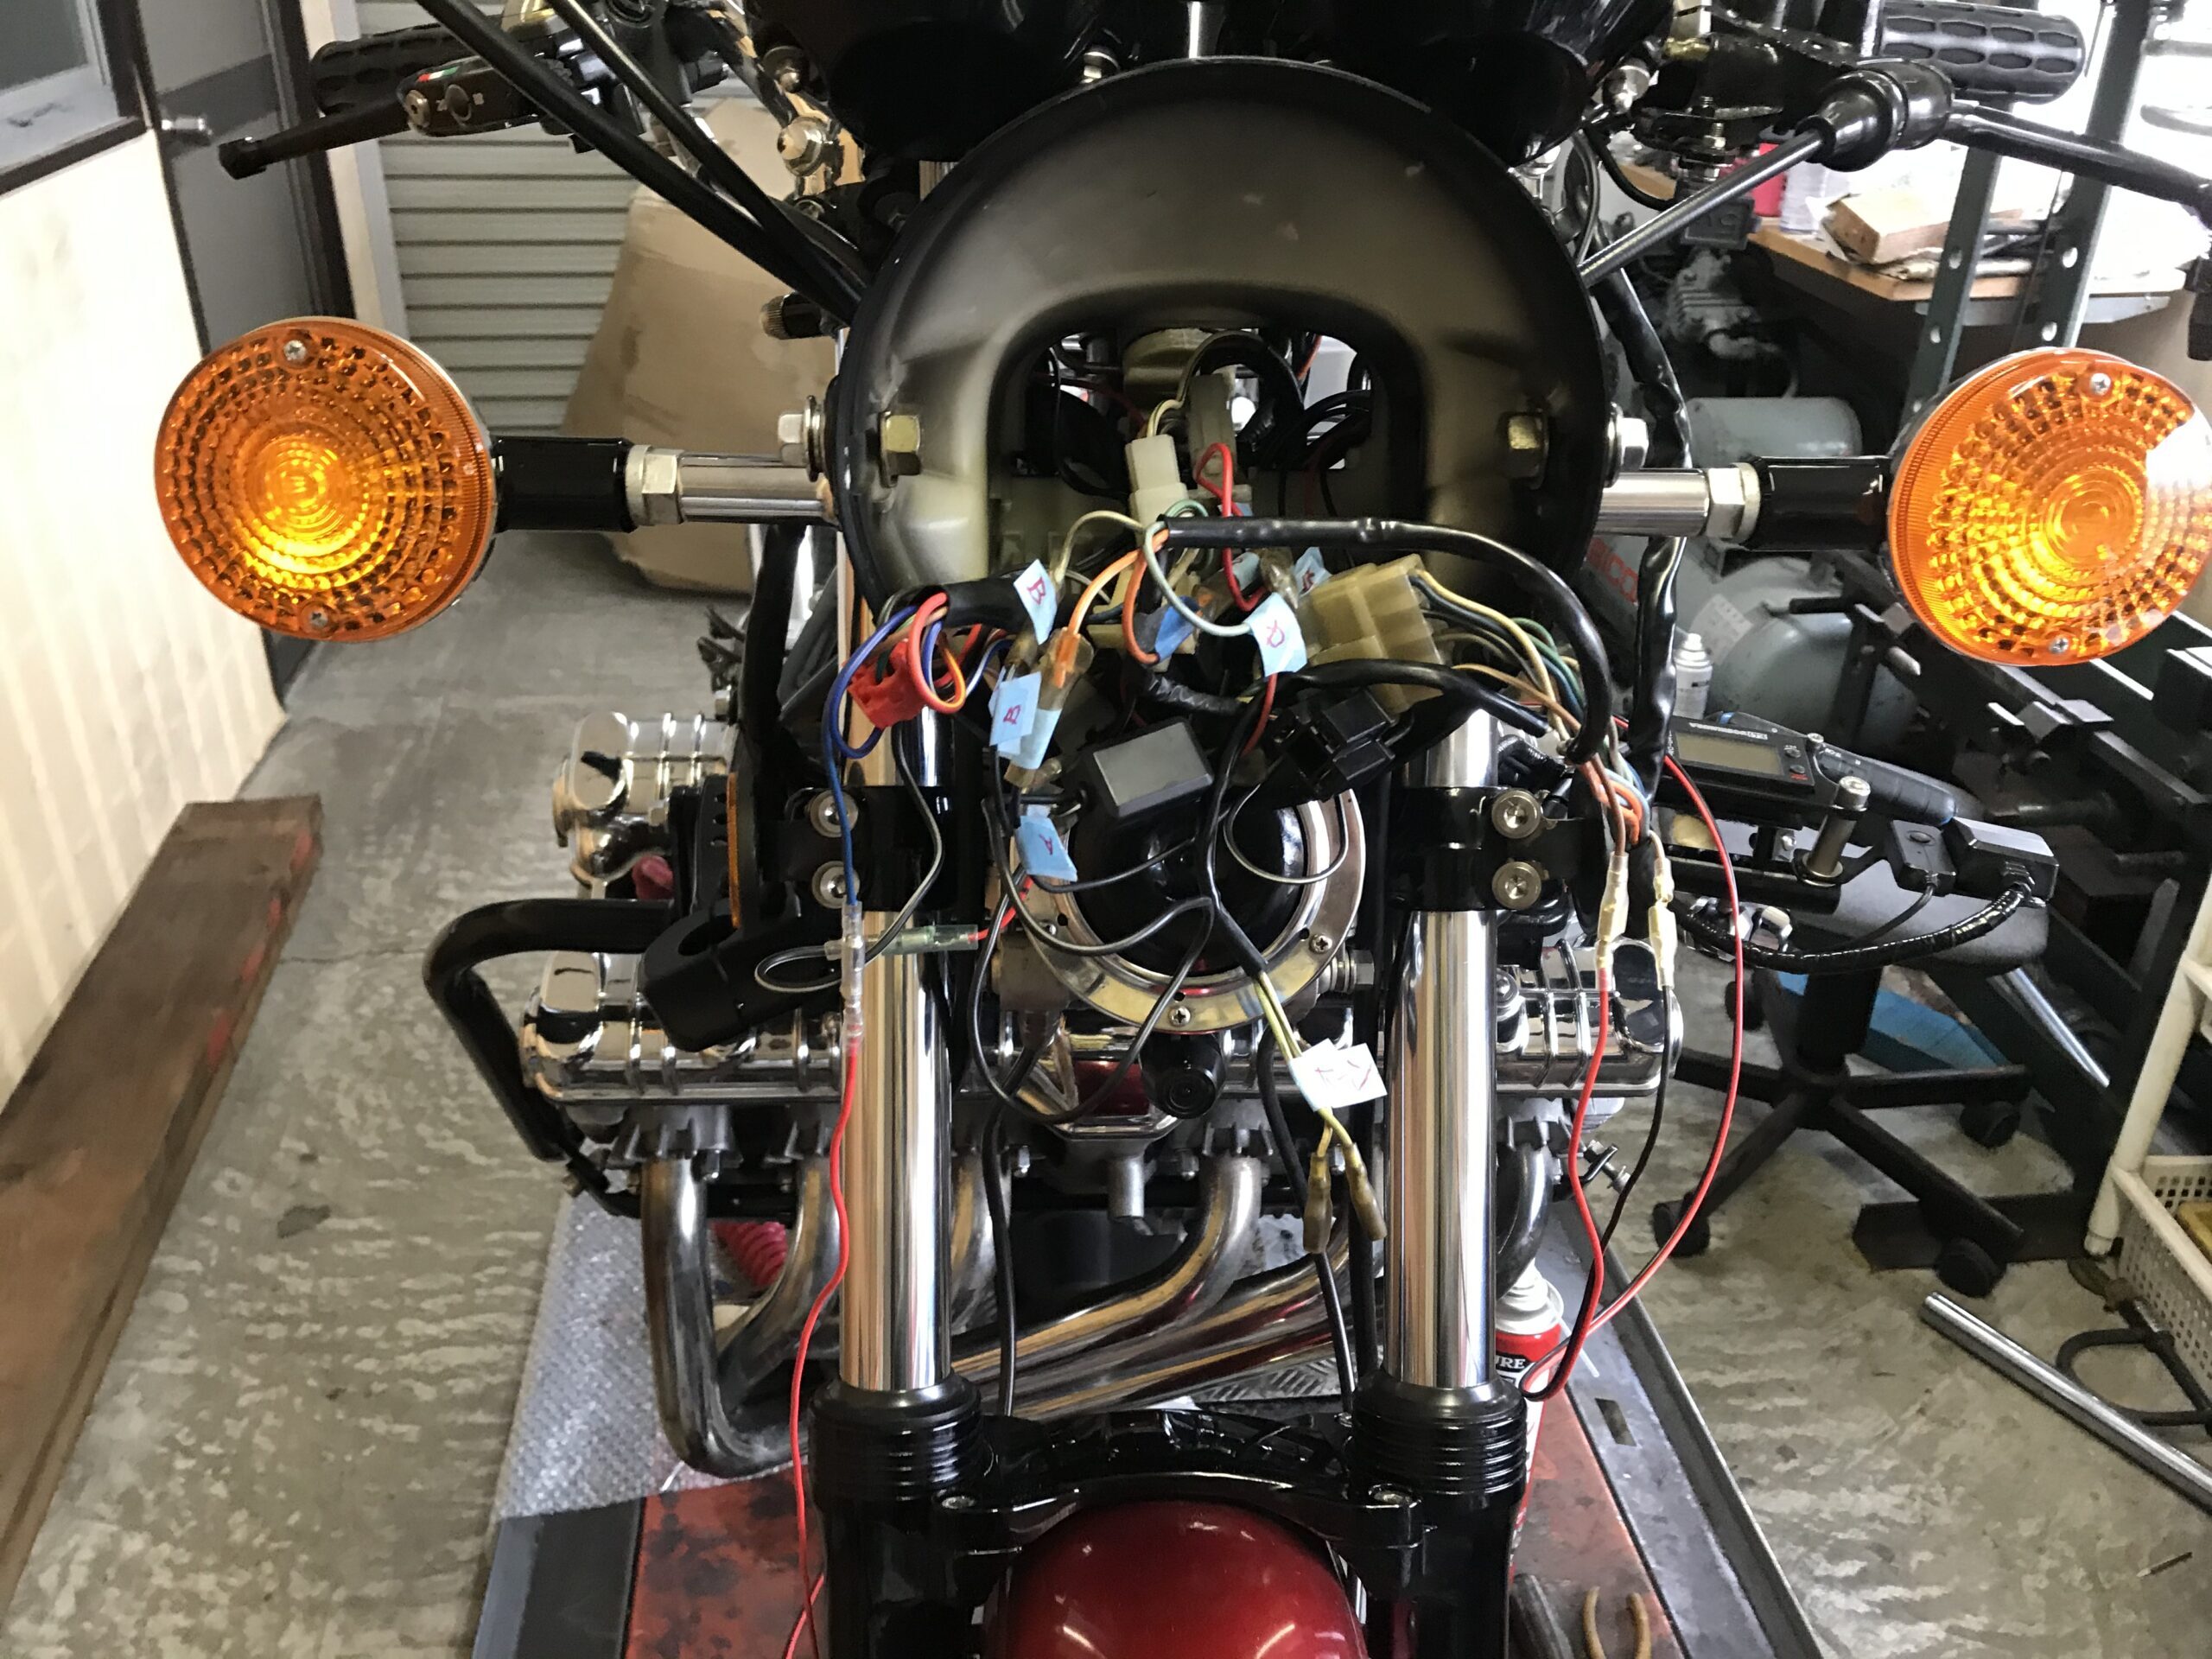
I am doing some manual work in a rental garage. Even if you don't have the space or tools, if you use these services, even a Sunday mechanic can do the job.
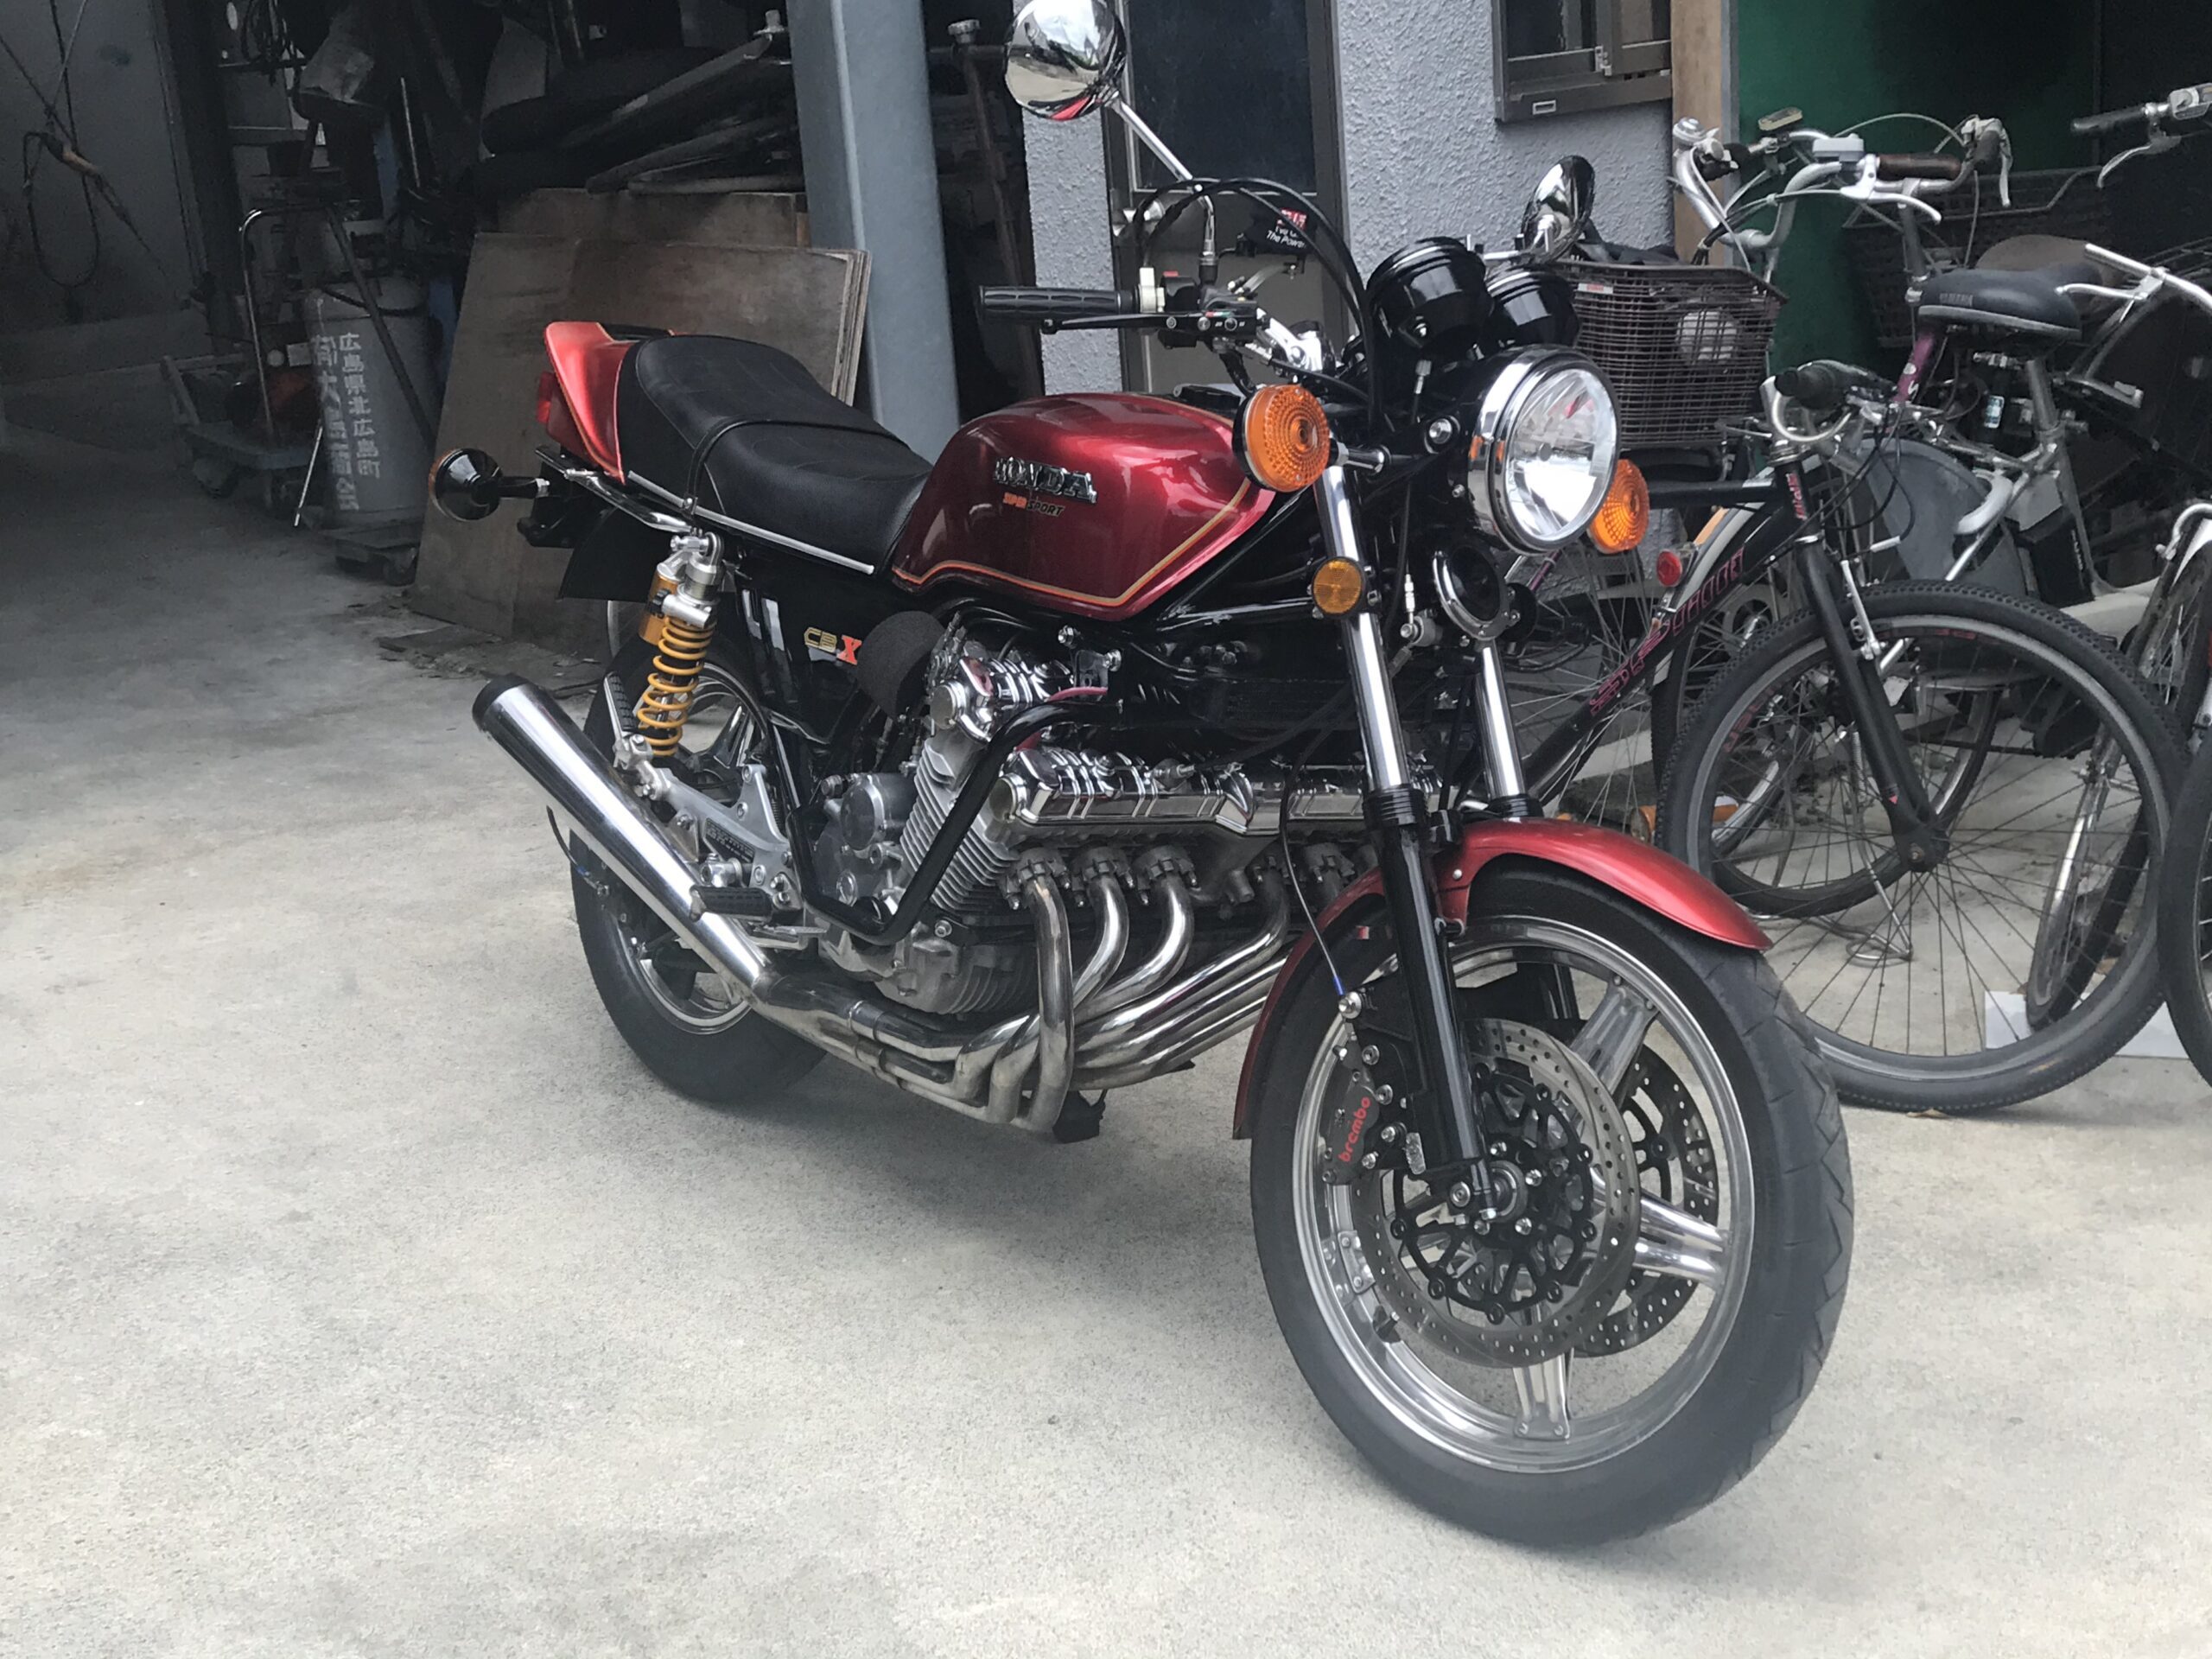
Honda CBX1000
This is a photo when it was shipped. Photos taken on cloudy days have a different, vibrant feel and are fun to look at.
In Japan, laws differ depending on the year in which the product was sold. Older motorcycles have fewer legal restrictions.
Creating a turn signal position lamp on/off for a Honda motorcycle【summary】
I feel very happy when I am able to do something that I couldn't do before, or when I find a way to do it.
I don't intend to make any unusual specifications, so I'm sure there are people who want to turn the turn signal position lamp on and off.
And, at the time of writing this post, I have also added hazards. In the past, it probably wasn't necessary, but in modern times, I think it's necessary when stopped and for communication on a motorcycle.
Around 2023, side reflectors, width lights, headlight projectors, etc.
It is likely that various trends will emerge. The times are going to change, with things like injection becoming easier, the quality of fuel changing, fossil fuels becoming no longer possible to run, and taxes increasing.
I want things to change for the better for bikers.
Well then! See you again!