I am the owner of a Honda motorcycle [CBX1000] who lives in Hiroshima City, Japan. I am posting about FCR carburetor and CBX1000 customization. I also post about things other than cars and motorcycles. We will post information that will make bikers around the world happy.
FCR Tuning – Should the Slow Jet Be Changed According to the Season?
Japan is now deep in winter. Is everyone still tuning their FCR carburetors despite the cold? In winter, it is customary to tune the FCR to run richer. But how rich should it be? Should the changes be made across all throttle openings? These are some common questions. I, too, have tried various approaches.
FCR tuning requires adjustment based on the weight of air and fuel. As the temperature drops, air density increases, making the air "heavier." To compensate, you need to increase the fuel (make it "heavier") or reduce the amount of air. In Japan, where the seasons are distinct, tuning adjustments are required throughout the year.
In this blog post, I'll focus on the slow jet. Recently, I tried changing the slow jet multiple times, and I strongly feel that you don't need to change the slow jet every season. The slow jet you initially choose when you start tuning your FCR should be left alone as much as possible. First, adjust the pilot screw, air screw, and jet needle, and only then should you consider changing the slow jet.
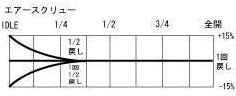
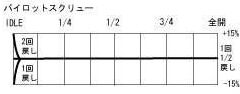
If the air screw's adjustment range is between 0.45 to 2.00 minutes return, there’s no need to change the slow jet. Additionally, the pilot screw should be within 1.00 to 2.00 minutes return. Generally, the pilot screw is adjusted toward a richer mixture, though sometimes it’s turned toward a leaner one, but not by much.
The tuning manual specifies that the lower limit for the air screw is 0.30 minutes return. Even if it goes below 0.30 minutes return, you can still adjust it.
As an example, let’s assume the air screw is adjusted near the appropriate value. A change from 0.30 to 0.25 minutes return makes a significant difference. However, a change from 2.30 to 2.35 minutes return is less noticeable.
Here’s my conclusion: At low throttle openings, the adjustments can largely be made with the pilot screw, air screw, and clip position on the jet needle. If those adjustments no longer suffice, then it’s time to change the slow jet. The jet needle affects the range from low throttle openings to slightly higher ones. It's easy to change the slow jet first, but I used to change it too quickly. Here’s what I’ve been doing recently:
① Change the slow jet. ② Adjust the air screw and pilot screw. ③ Change the clip position on the jet needle. ④ Revert the slow jet to the previous size. This has been the process.
The slow jet is not an easy jet to access. After you set it initially, consider it the last thing to touch. In many cases, the tuning can be just right without even changing the slow jet. I’m sure the slow jet’s inconvenient location is a silent message from its developers!
In the following sections, I’ll go into more detail about the slow jet. Let’s go!
I first consider the combination of the slow jet and jet needle.
As part of the initial FCR tuning, I select the slow jet and jet needle. The premise is to avoid changing the slow jet as much as possible. For the initial tuning, if you select the jets based on factory settings or by referencing the tuning of a similar motorcycle with a close history, model, and engine displacement, you won't stray too far off.
I begin tuning with the jet needle.
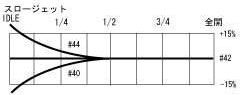
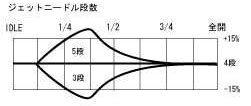
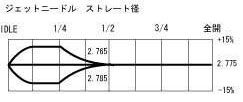
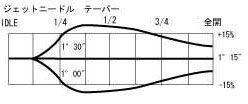
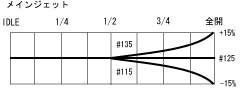
The FCR jets have a partial impact even outside of their designated ranges.
For example, the slow jet affects from idle up to just before half throttle.
Though its influence outside of its specific range is limited, it’s still noticeable.
By adjusting the clip position or straight diameter of the jet needle by just one step, you can sometimes cover tuning changes that you would have otherwise made with the slow jet.
Compared to the slow jet, the jet needle is more accessible for tuning adjustments.
Before changing the slow jet, it’s often better to first adjust the clip position of the jet needle and then fine-tune the air screw, which can lead to optimal tuning.
Even changing the straight diameter by just one step can have a significant impact.
If you change the straight diameter by about three steps, you’ll also need to adjust the clip position to avoid throwing off the tuning balance.
When tuning, sometimes these large adjustments can be beneficial.
However, if you just want to make minor seasonal adjustments, major changes are usually unnecessary.
Changing the slow jet first may result in overly strong changes.

The jet needle is more expensive and has more variations compared to the slow jet, so selecting the right one can be challenging.
I recommend purchasing a leaner set.
Using the 90FTM as a baseline:
If you want to make small adjustments, get the 90FTN.
For stronger changes, get the 90FTR and reset the tuning.
If you want to try other sizes, starting with leaner options than the factory settings will give you more tuning flexibility.

As for the "cutaway" section, the basic option is the [T] type.
For the taper, you can choose from [E], [F], and [G].
Changing the taper means fundamentally redoing the entire tuning process.
For the CBX1000, it’s hard to consider anything other than [F] or [G].
This is because, with [E], the clip positions may not provide enough adjustability on the lean side due to the clip settings.
When should the slow jet be changed?
You need to change the slow jet when the screw’s effectiveness is poor or when it's nearing its limits.
If the screw’s performance is poor, it means the slow jet is significantly off from the appropriate setting.
If the air screw is within the proper range of 1.00 to 2.00 minutes return out, there’s no need to change it throughout the year.
As for the pilot screw, if the slow jet is too large, the engine will still idle even if the pilot screw is fully closed.
Including adjustments to the throttle stop screw, it might be unnecessary to adjust the pilot screw.

If the pilot screw’s performance seems off when the engine is idling at a reasonable speed, you should consider changing the slow jet.
Turning the pilot screw by about 0.30 minutes return increments should show noticeable changes in the air-fuel ratio if you have an air-fuel ratio gauge.
Without a gauge, it might be difficult to detect those changes.
Without an air-fuel ratio gauge, it’s hard to notice changes unless you adjust the pilot screw while the engine is running.
Compared to the air screw, you may feel that the pilot screw is less responsive, but it’s more about the amount you need to turn.
You should adjust the pilot screw in 0.15 minutes return increments.
With the air screw, sometimes even a 5-minute adjustment can make a noticeable difference.
For FCR Beginners – Trying Frequent Changes to the Slow Jet
This is the exact opposite of what I mentioned earlier. If you have the opportunity, please try changing the slow jet frequently.
I have tried going through sizes from 35 to 52 in order. This experience is very beneficial for getting accustomed to the atmosphere and handling of the FCR.
As a preliminary note, I will list potential issues that might arise:

①. The chamber packing may swell.
②. Debris may get stuck in the slow jet.
③. Debris may get stuck in the float valve.
④. Fuel leaks.
I will explain these in order. Generally, these issues stem from human error. They can be prevented with caution.
Please refer to the following when these symptoms apply.
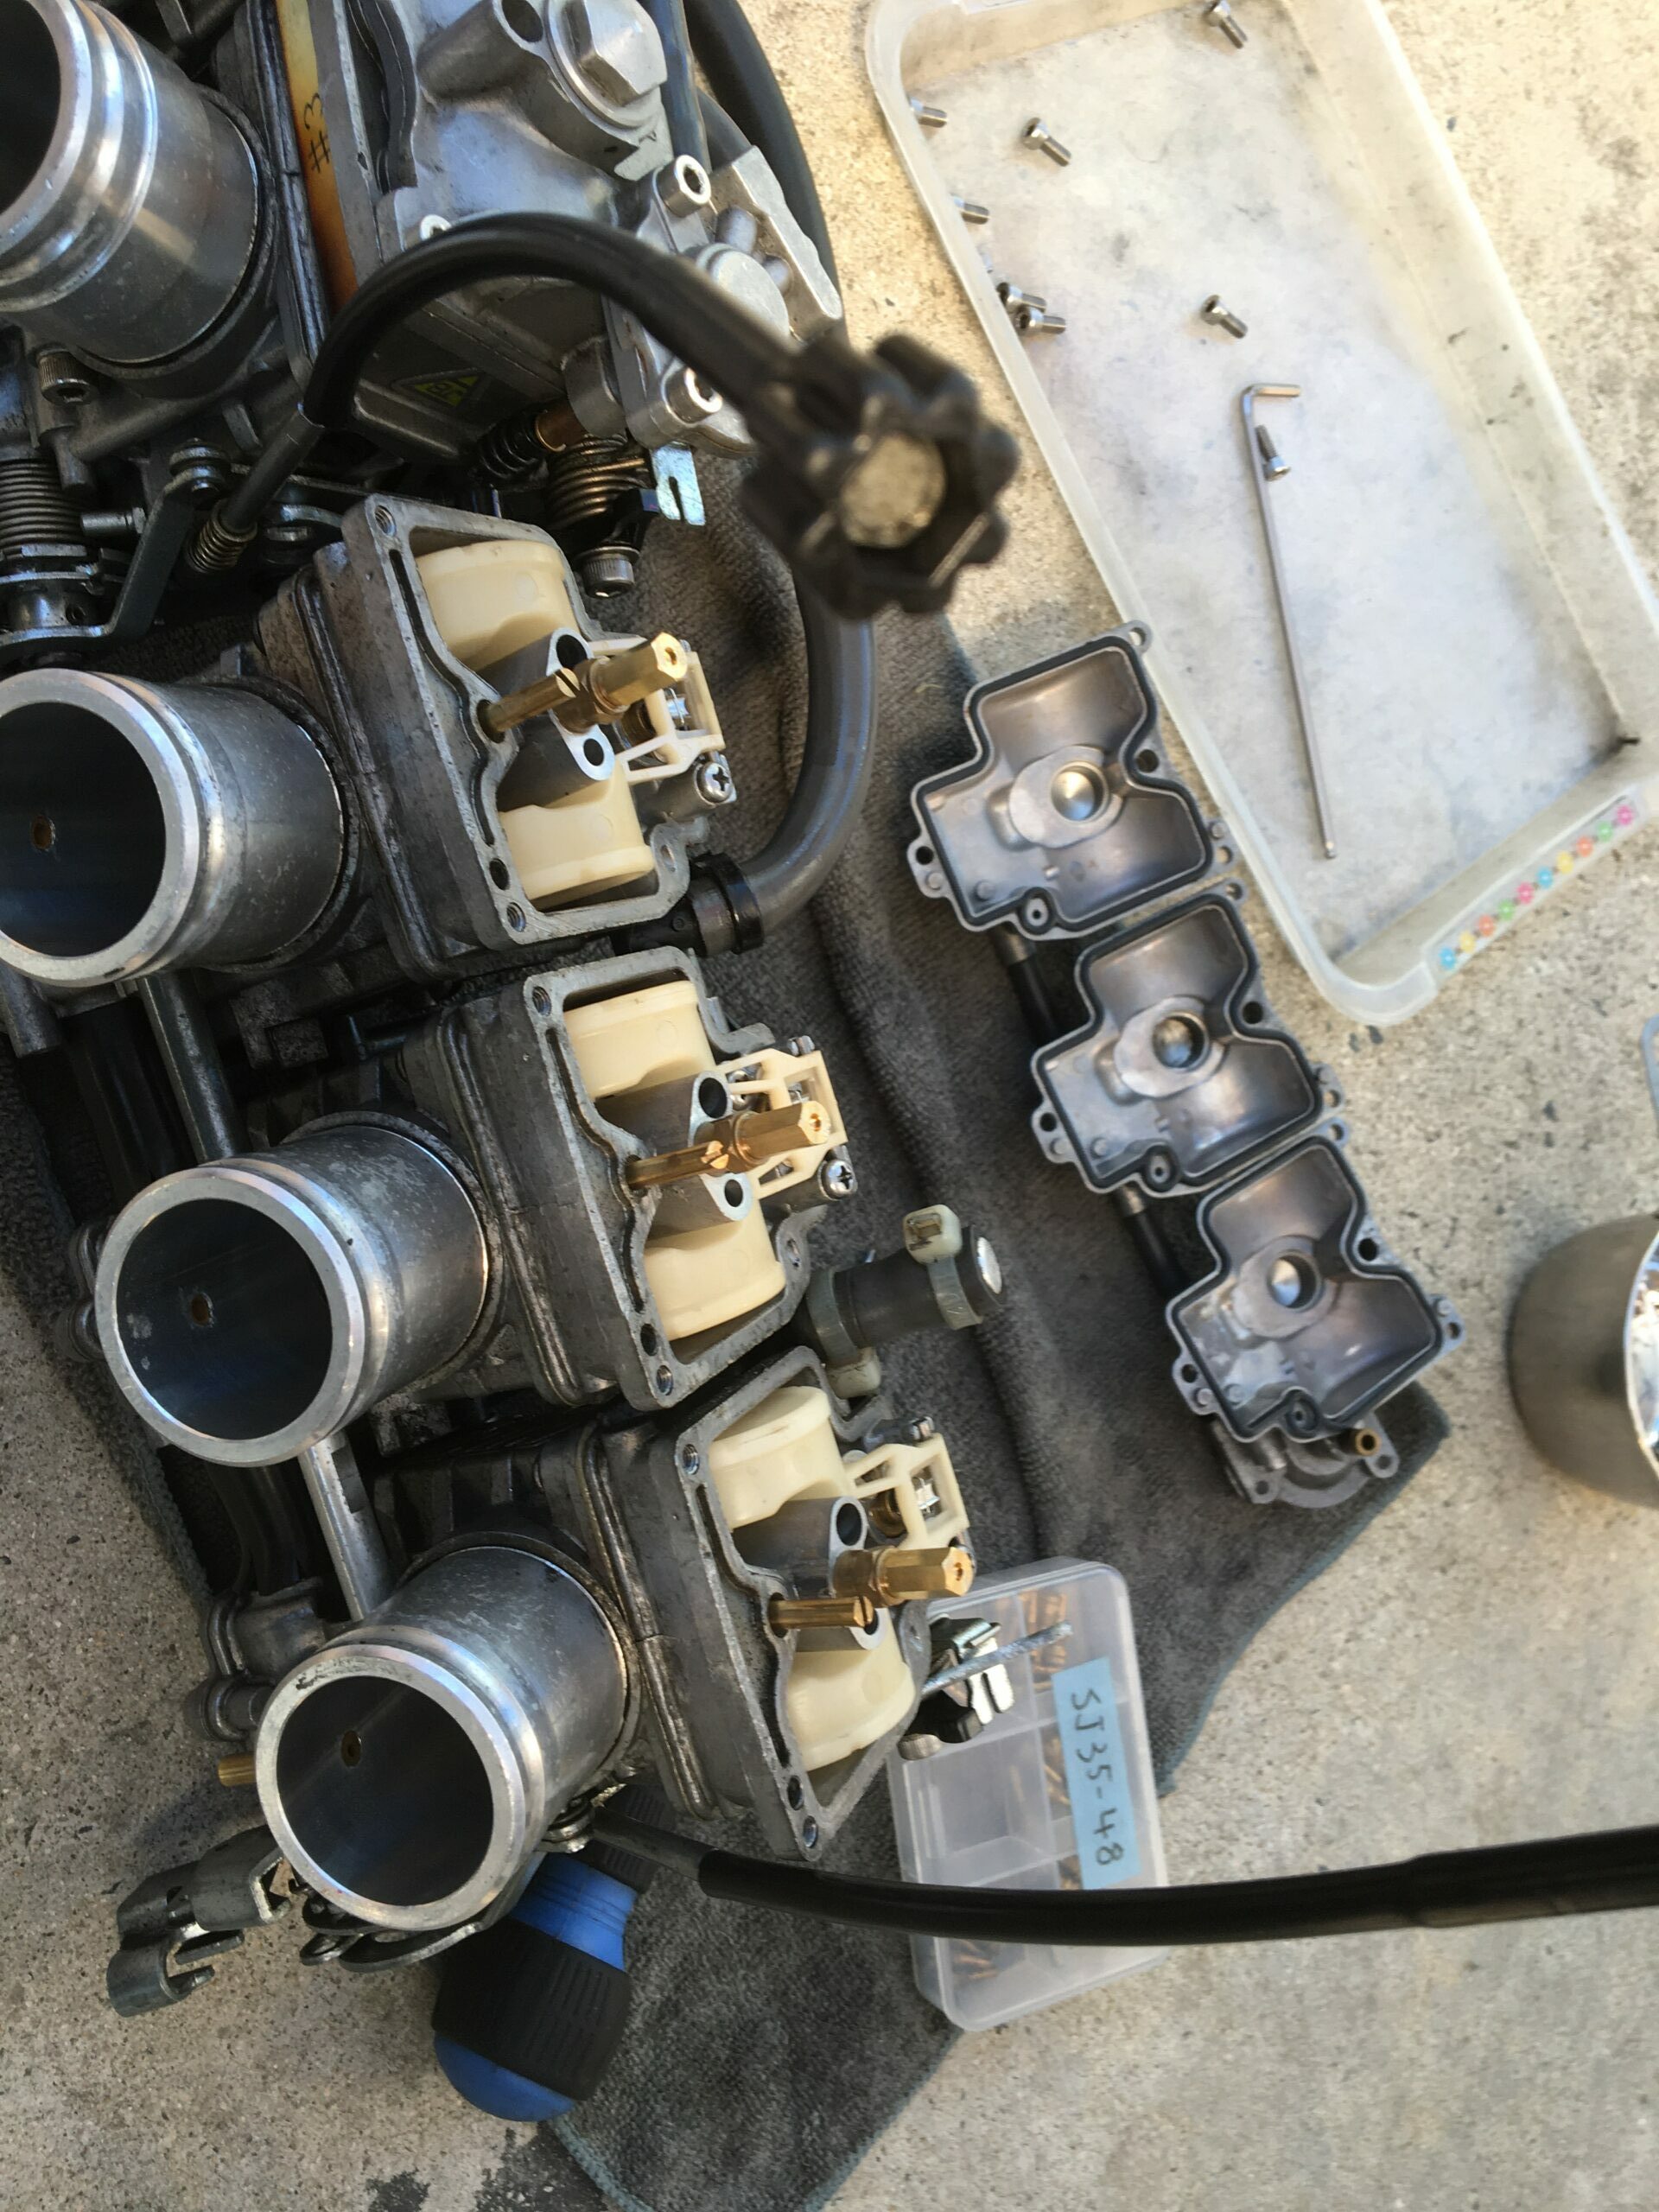
①. The Chamber Packing May Swell
When changing the slow jet, always remove the float chamber. If gasoline remains on the chamber packing and is not wiped off immediately, it may swell and become unusable for reuse. This can happen in a very short time. Please make it a habit to wipe off any gasoline promptly.
②. Debris Clogging the Slow Jet
After reassembly, there are times when the engine runs poorly or behaves oddly. This can occur not just with the slow jet but with any changed part that may have debris lodged in it. For instance, debris might clog the holes on the side of the slow jet, or you might intend to use four #42 slow jets but accidentally have one #45 jet mixed in.
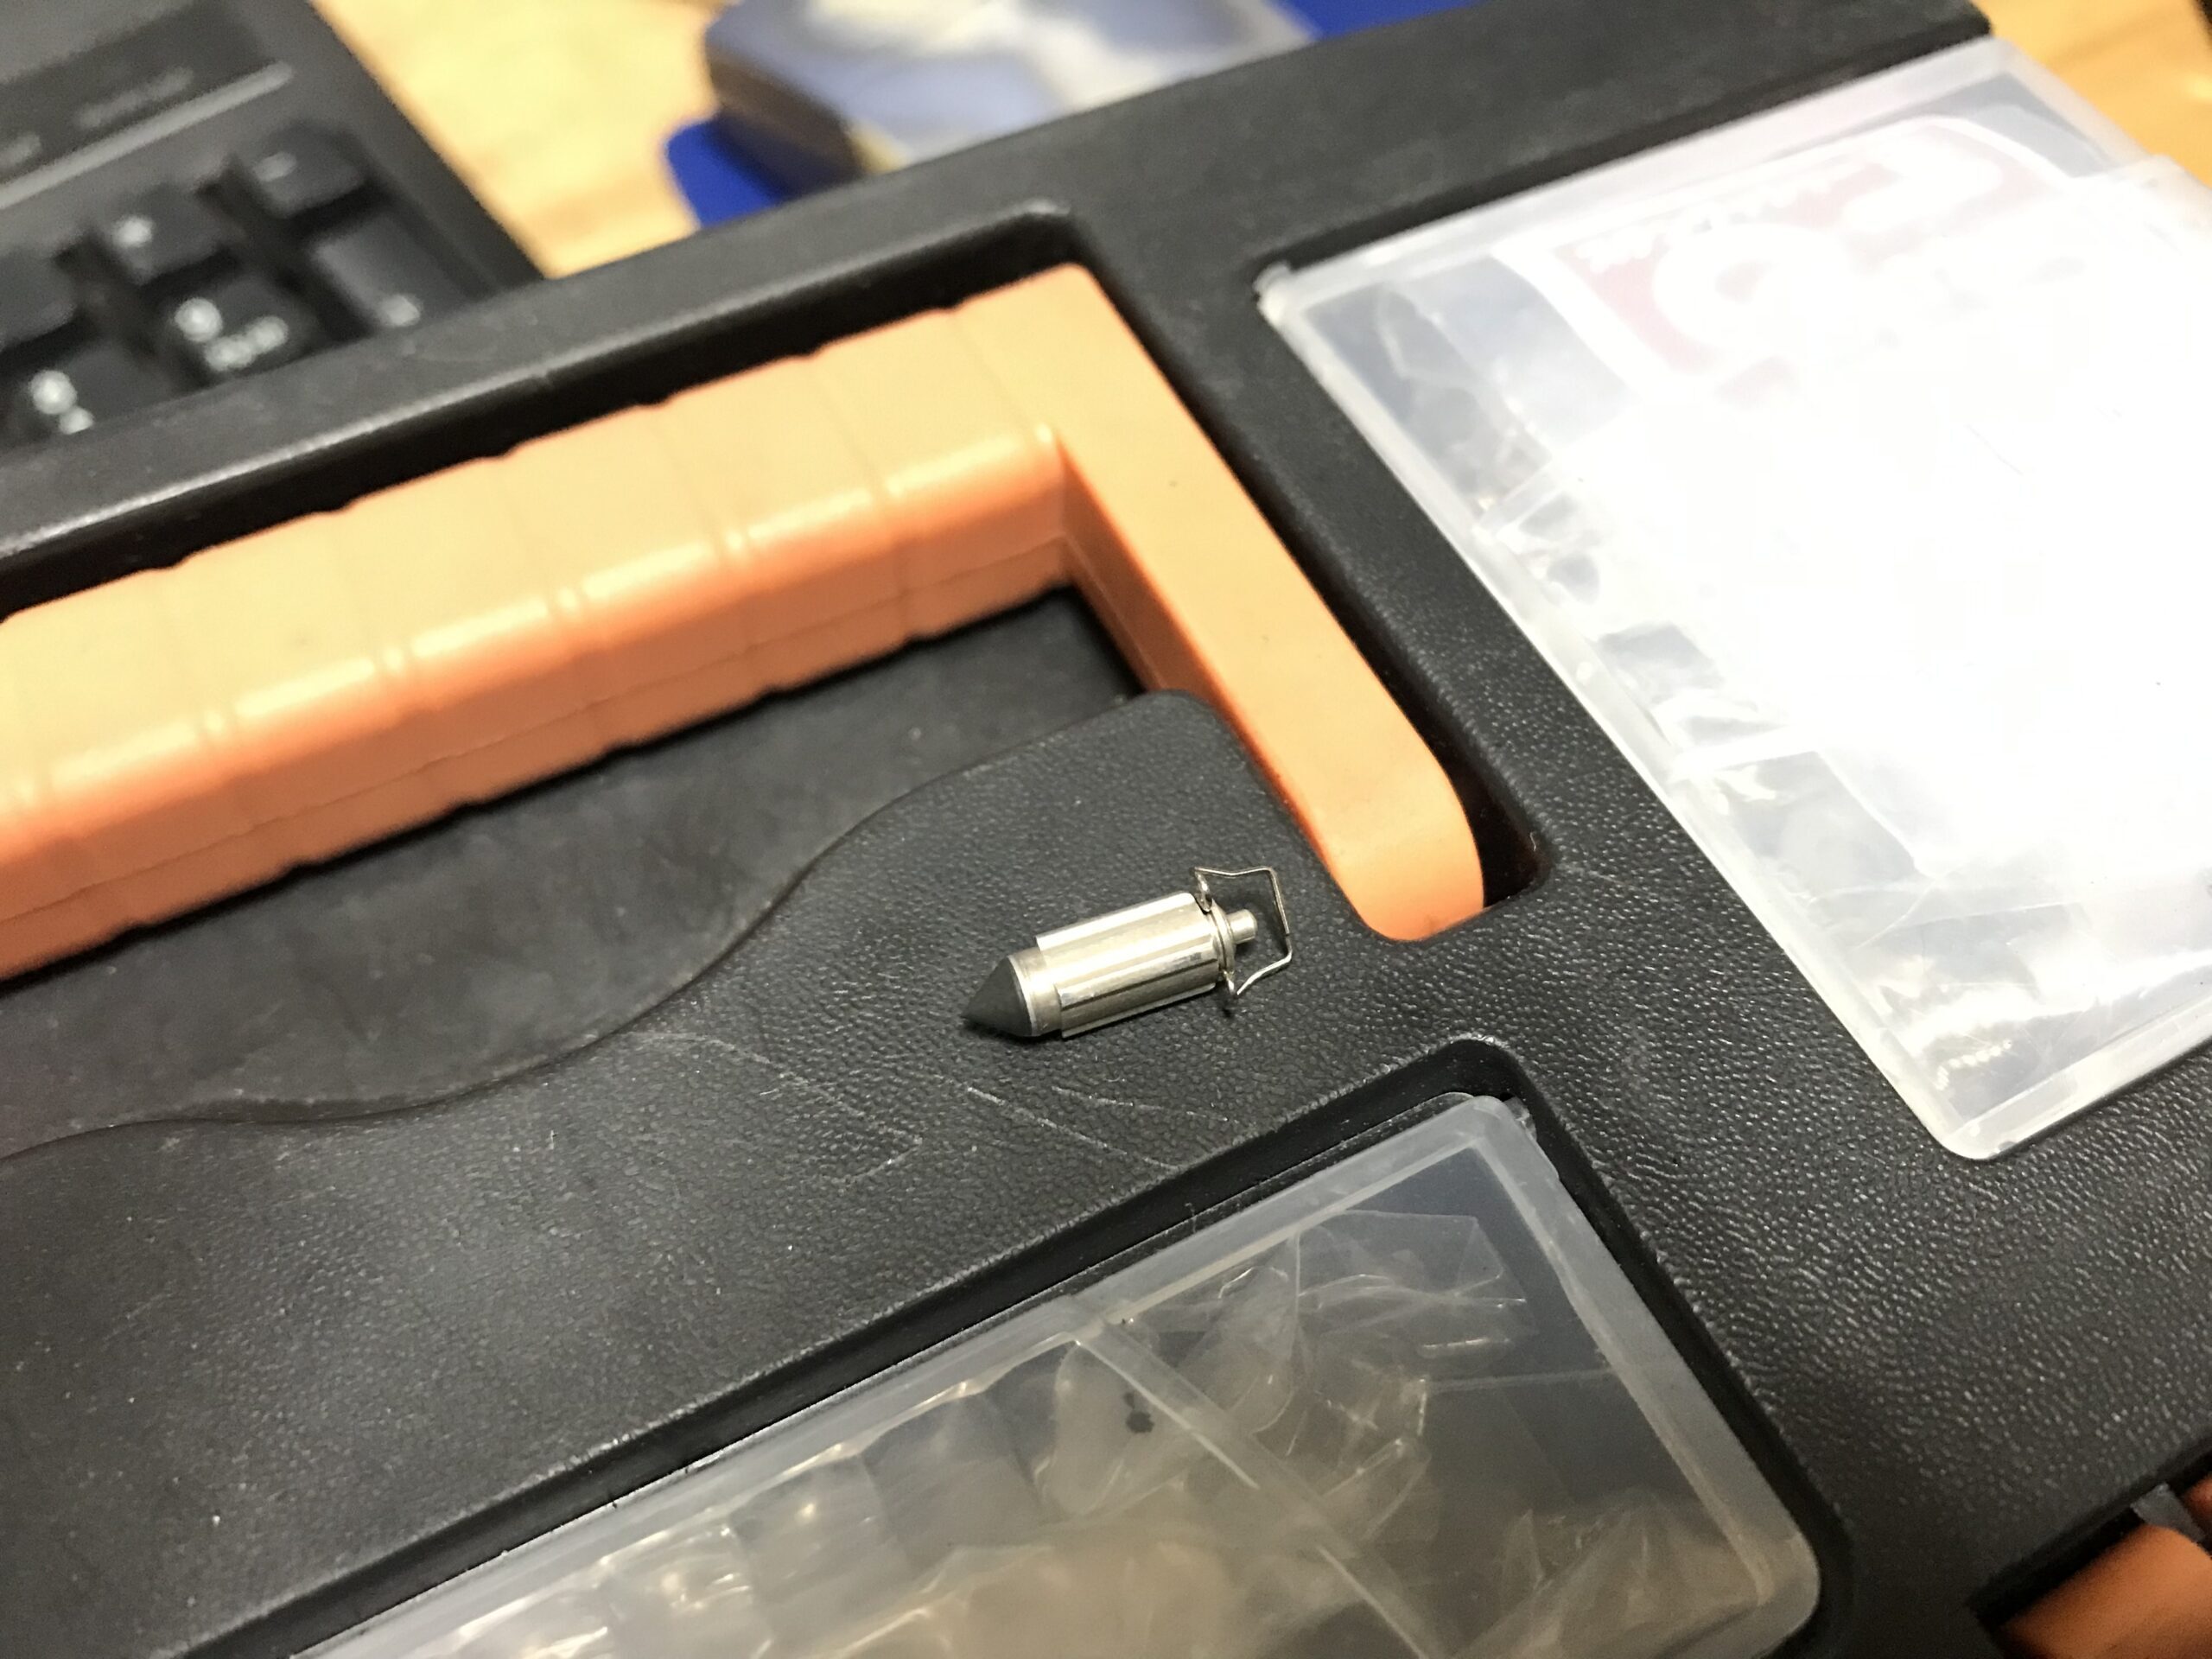
③. Debris Getting Caught in the Float Valve
Immediately after changing the slow jet, there is a high possibility of debris getting caught in the float valve. Fine rust can flow into the float chamber along with the fuel. If the cleaning has not been done properly, there might be a buildup of rust or debris. Even if there isn’t much debris, just a tiny piece of rust can increase the likelihood of float valve issues.

If, by chance, a small fragment of debris gets caught in the float valve, it can prevent it from closing properly. This leads to fuel leaking from the air vent or around the main air jet at the bottom of the carburetor.

When an overflow occurs, the first step is to close the fuel cock. Next, identify the overflowing cylinder and try shaking the carburetor or lightly tapping the FCR, as this might resolve the issue. If that doesn’t work, it’s likely that debris has clogged the float valve, so disassembling and cleaning it will fix the problem. When disassembled, it’s often easy to visually identify debris lodged in the float valve.
④. Gasoline Leaks
Improper Tightening of the Float Chamber

Sometimes, the float chamber may not be tightened correctly. If the chamber gasket is not properly installed, it can lead to gasoline leaks from the disassembled areas.

When gasoline leaks occur, it is often due to issues in the disassembled parts or problems with the fuel line, such as cracks or insufficient sealing.

To prevent leaks:

①. Ensure the float chamber is tightened evenly, applying the correct torque to avoid warping the chamber.
②. Double-check the gasket installation to ensure it is seated properly without twists or misalignments.
③. Inspect the fuel line for any signs of wear, cracks, or loose connections that could lead to leaks.
Regular inspection and proper assembly techniques can help mitigate these issues.
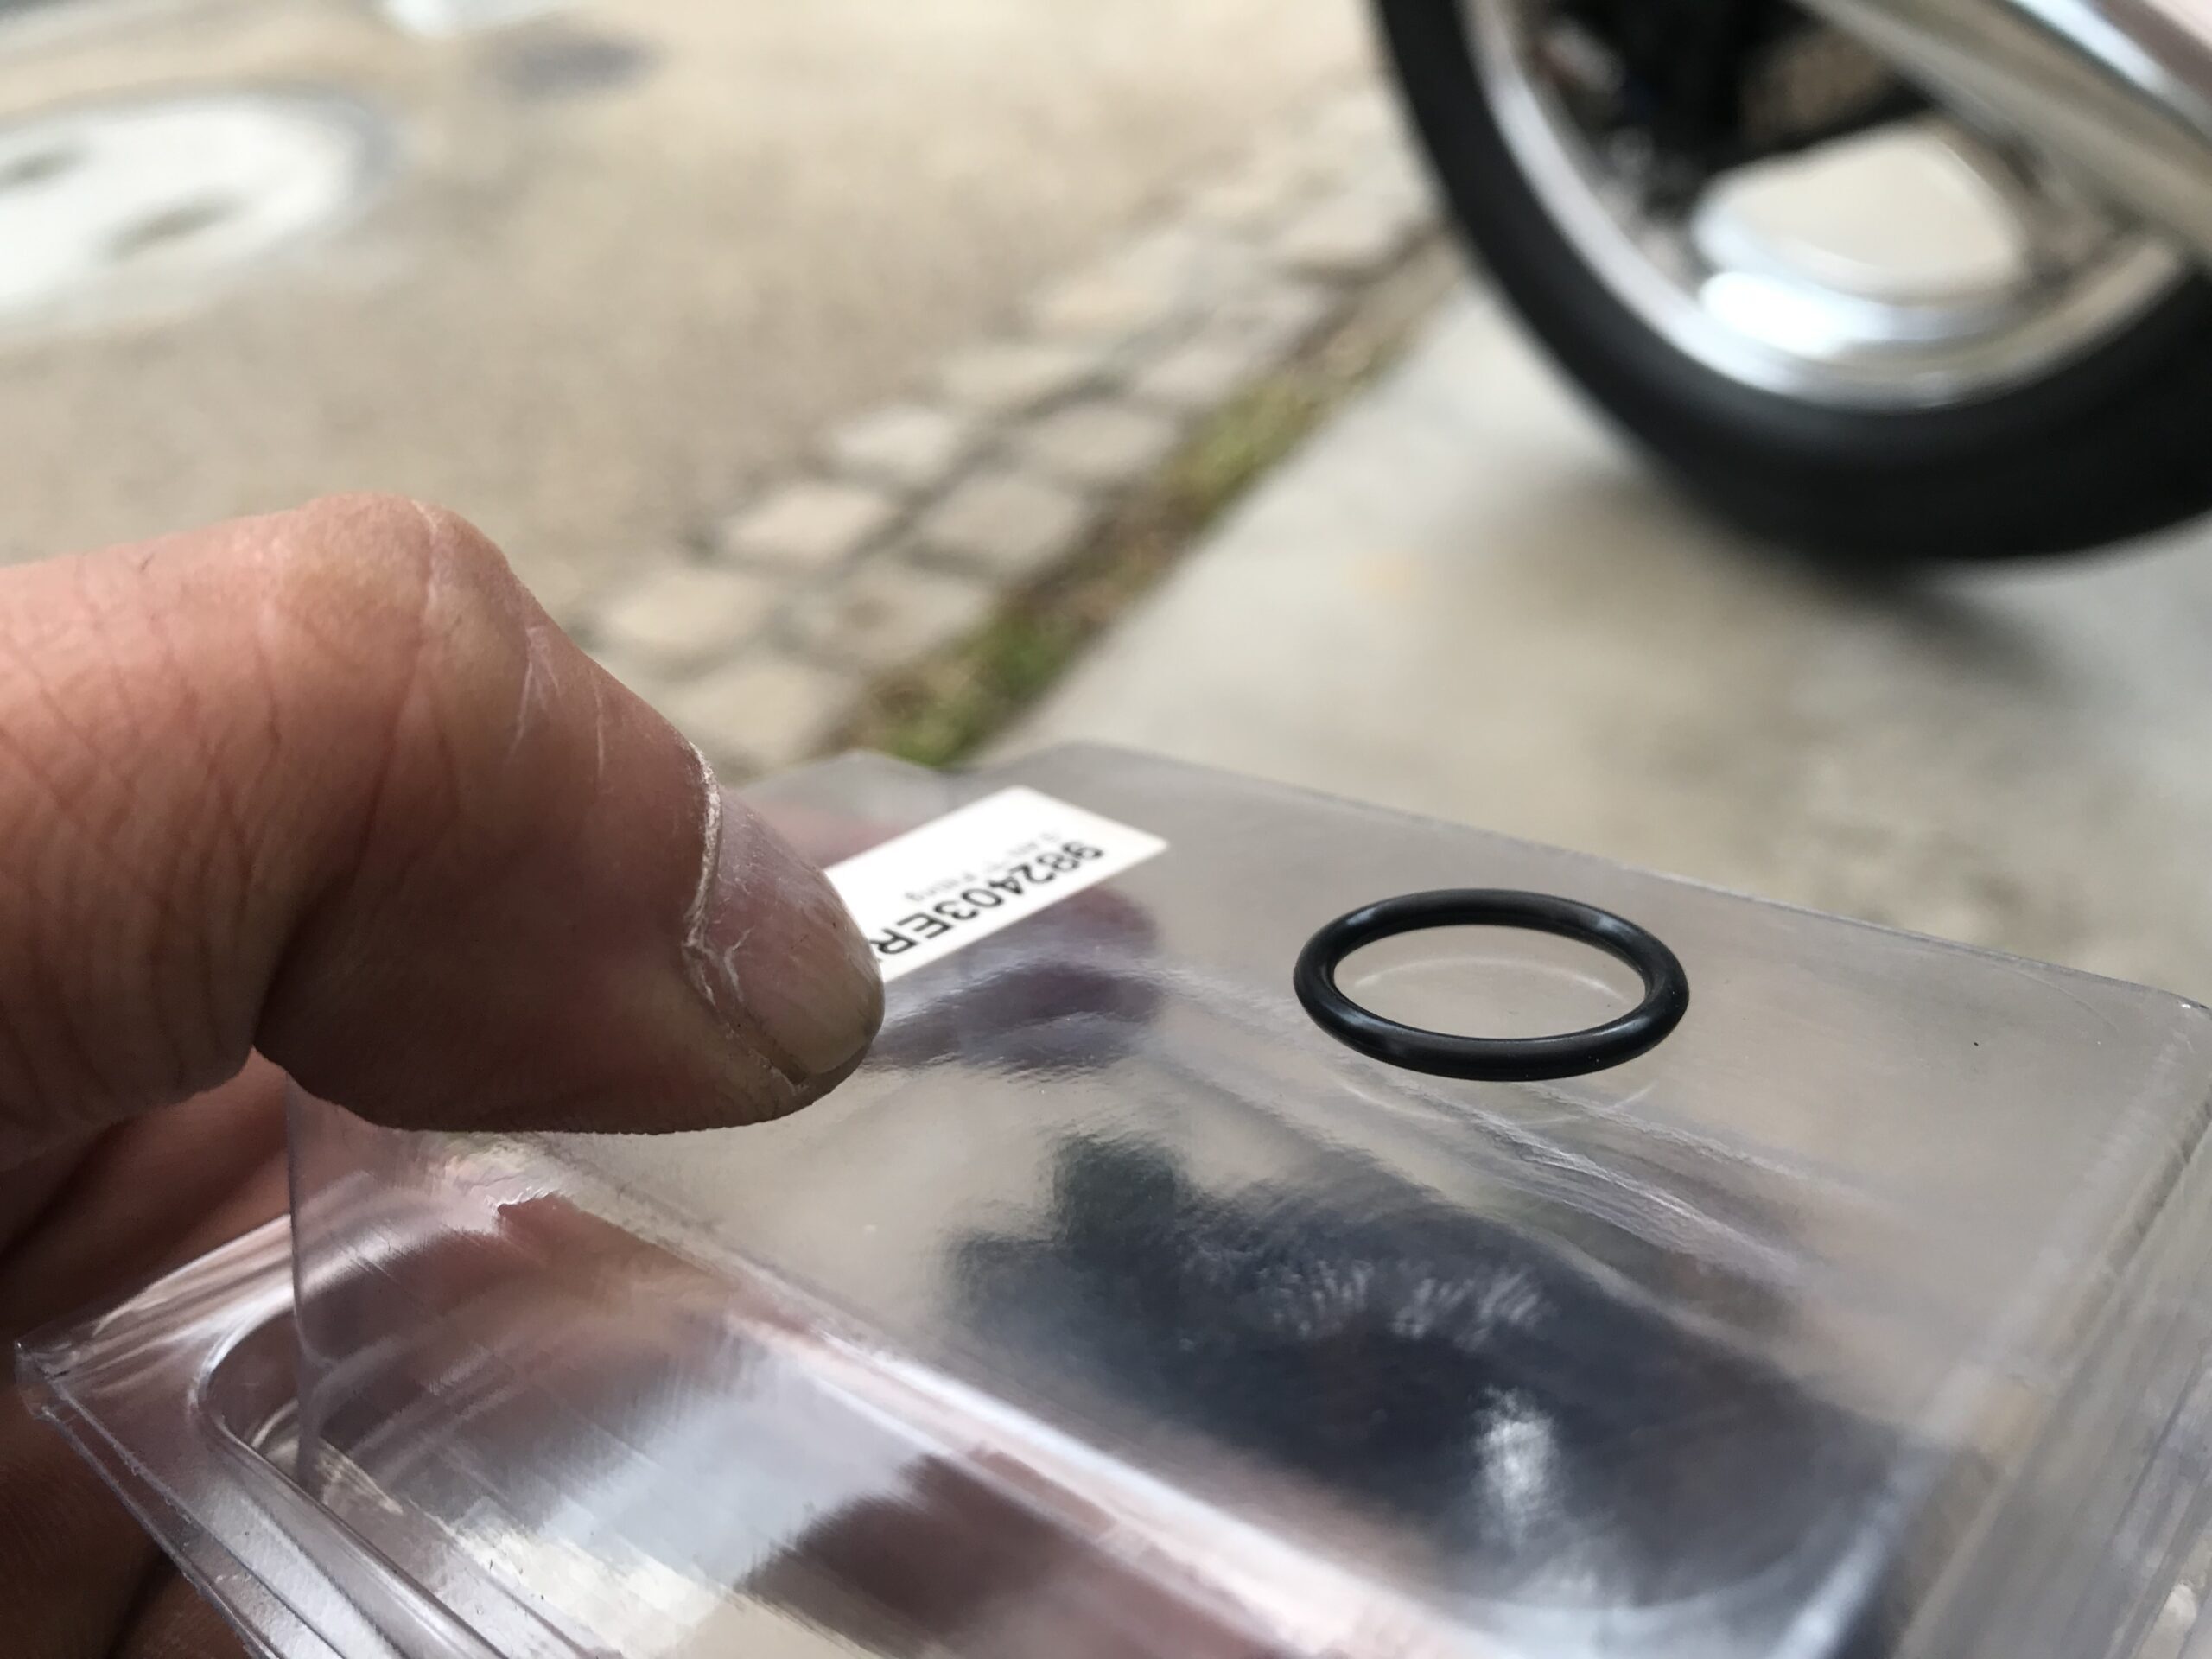
For FCR Beginners – Trying Frequent Changes to the Slow Jet【summary】
When working on your FCR carburetor, you'll discover many insights through maintenance. While exploring various sizes of slow jets, it's wise to also stock up on spare float chamber gaskets and drain bolt gaskets. This proactive approach can save you time and frustration later on.
FCR Tuning – Should the Slow Jet Be Changed According to the Season?【summary】
In my experience, changing the slow jet should be the last resort. Focus on adjusting the needle clip position and screws first, as they offer a more straightforward and lower-cost approach to tuning. For seasonal adjustments, start with these changes, and only consider altering the straight diameter or the slow jet if necessary.

With winter upon us in Japan, it’s the perfect time for maintenance and upgrades. For those riding during this season, please be cautious of icy roads and enjoy your time safely.

See you again!
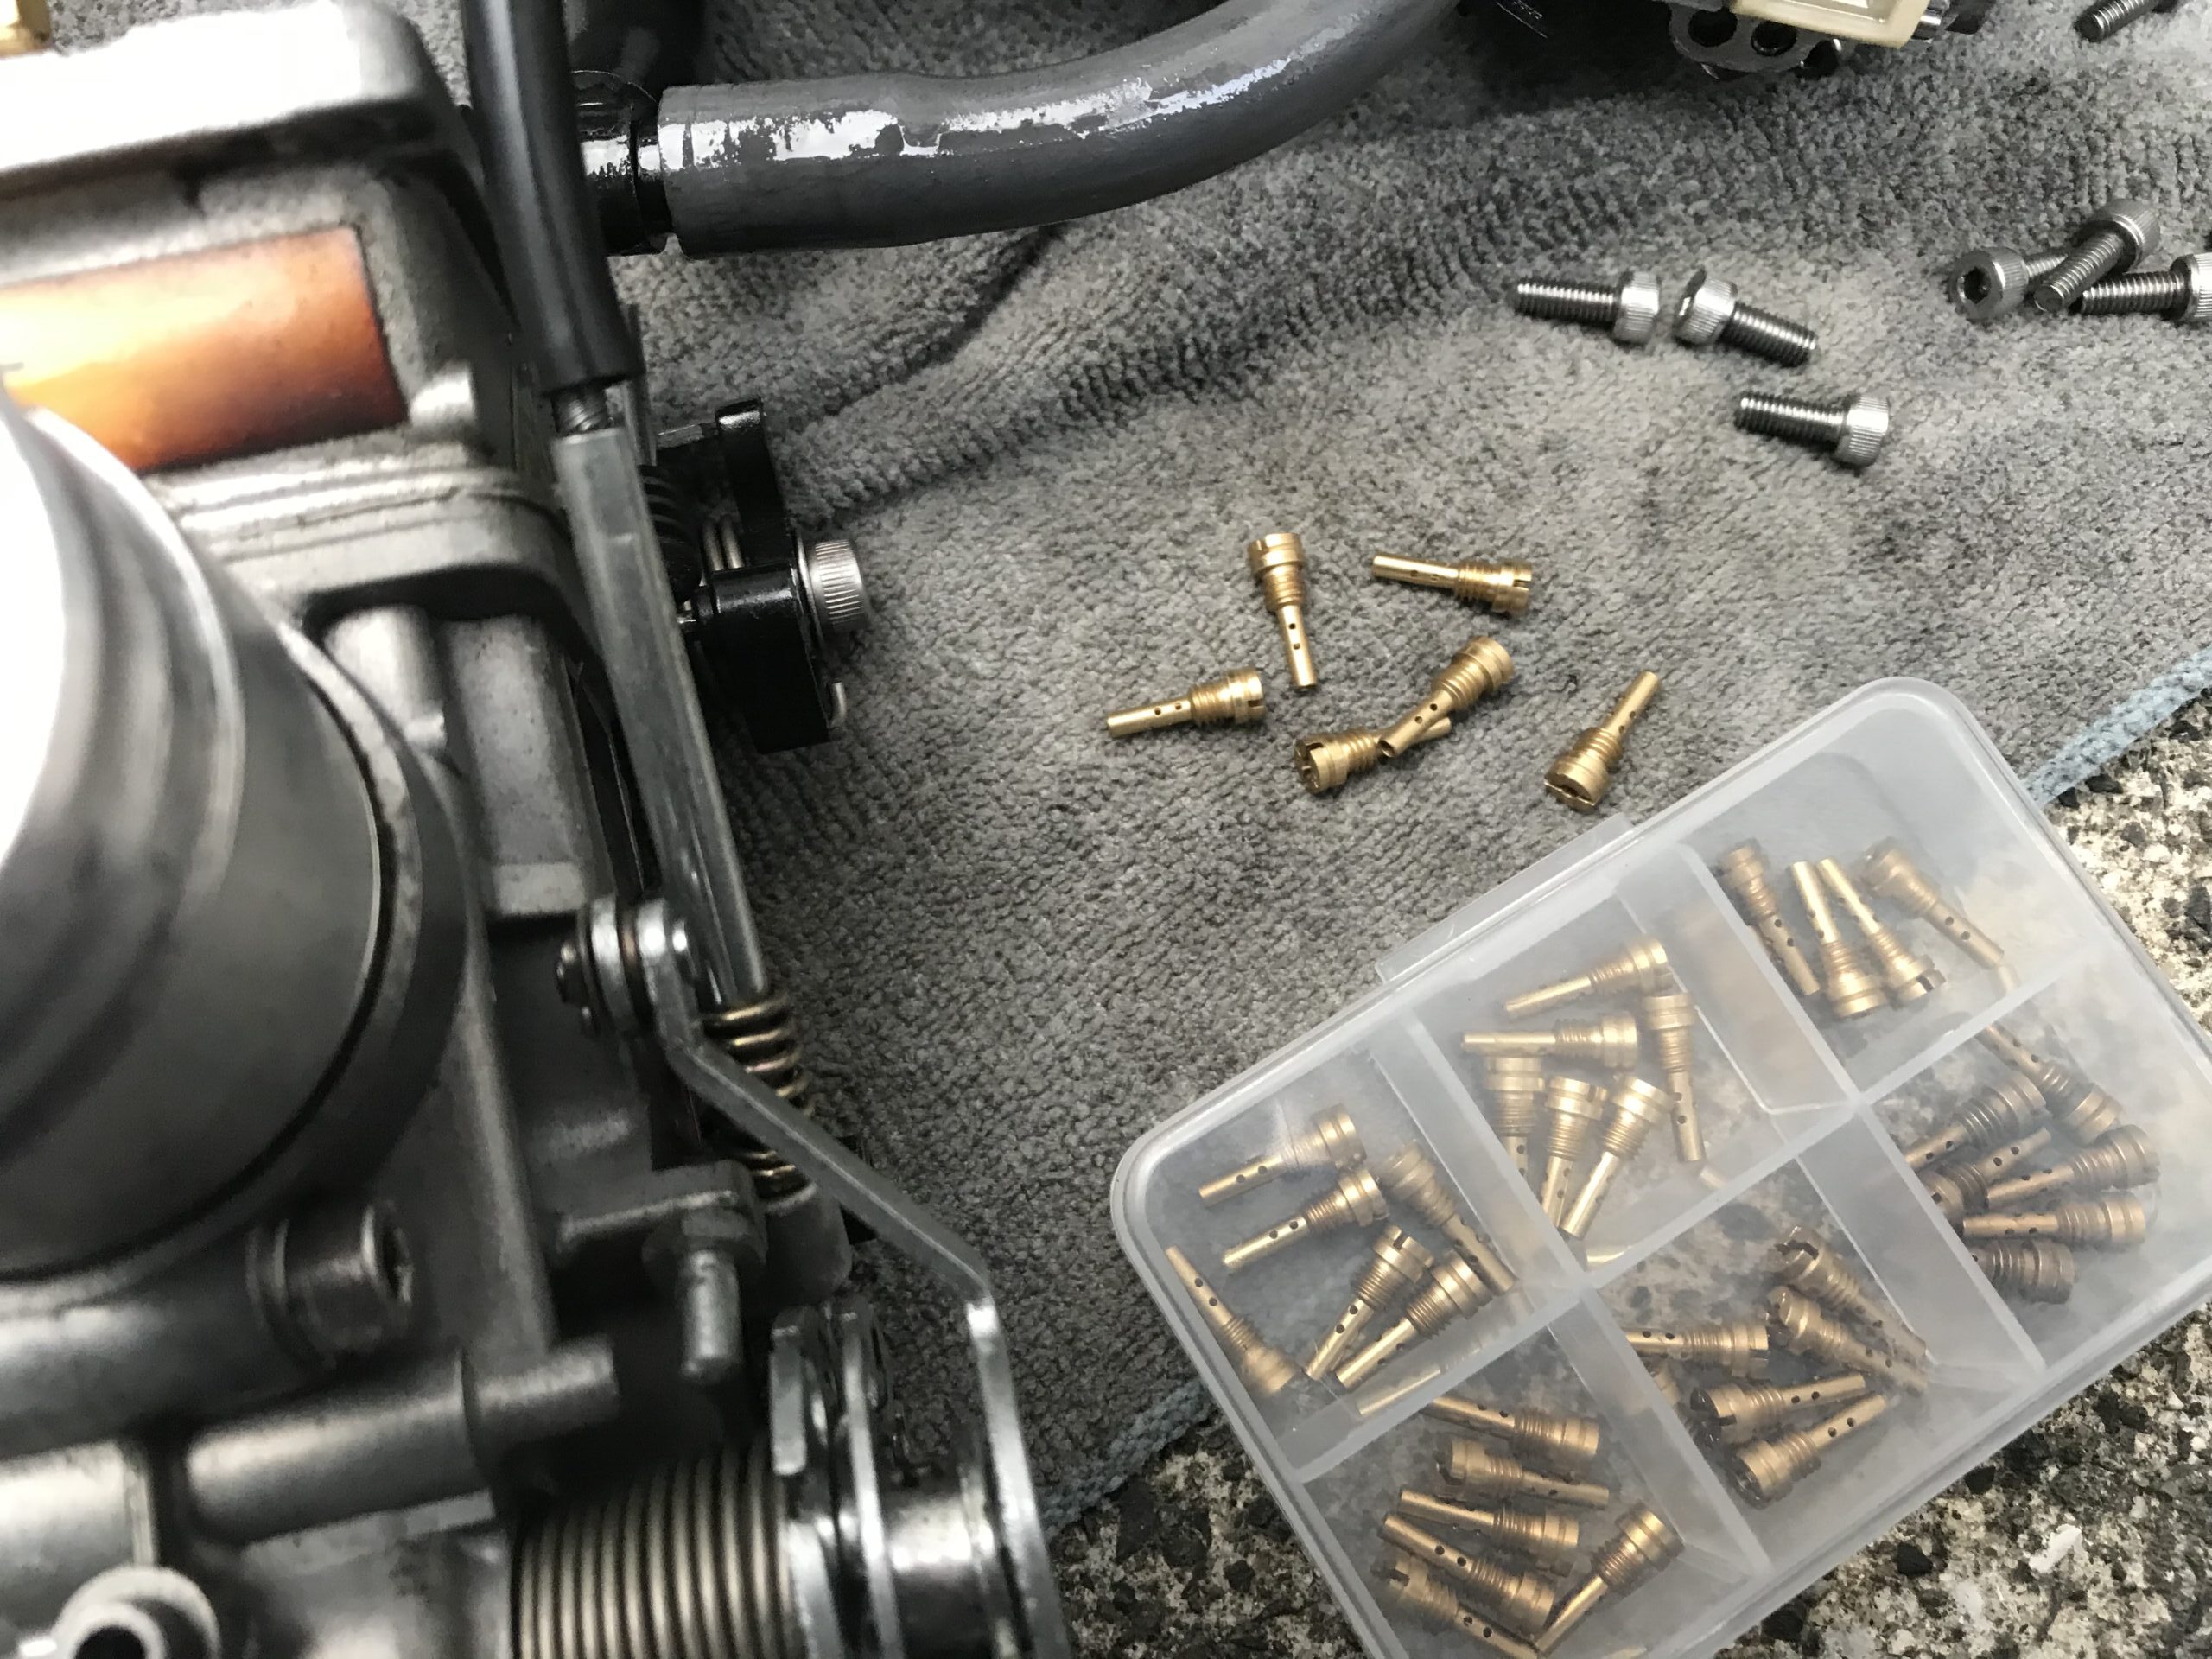
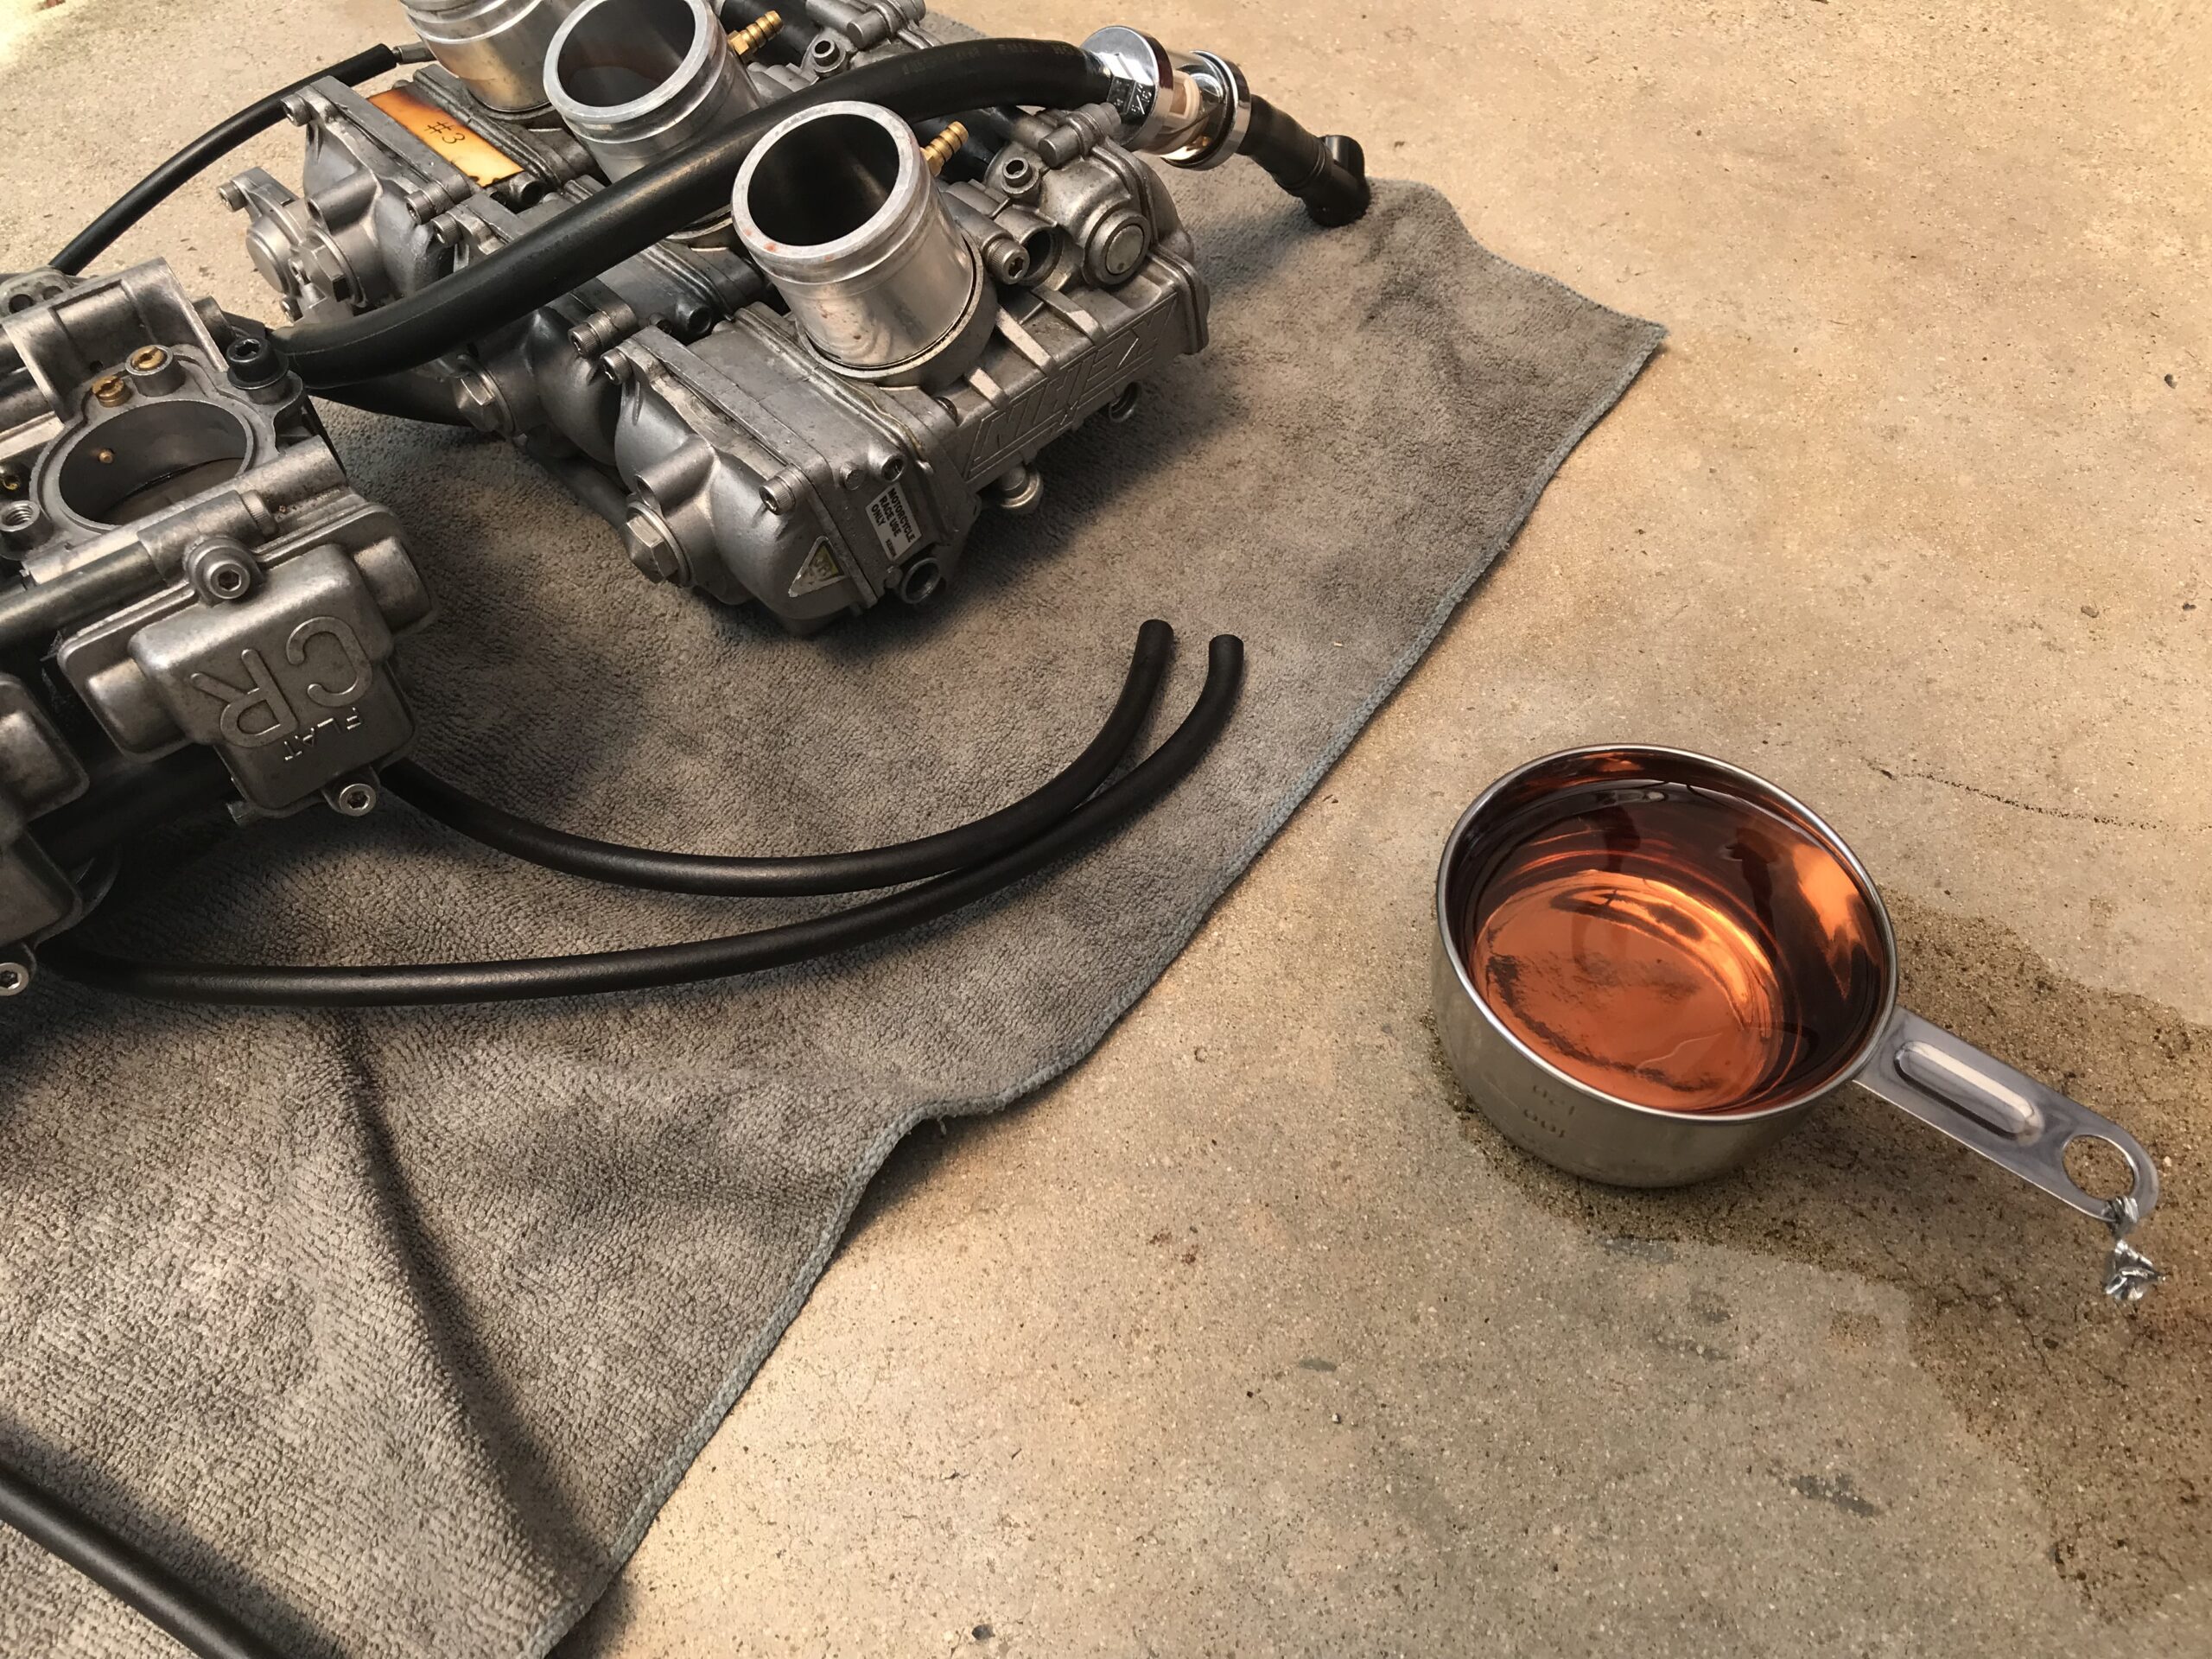
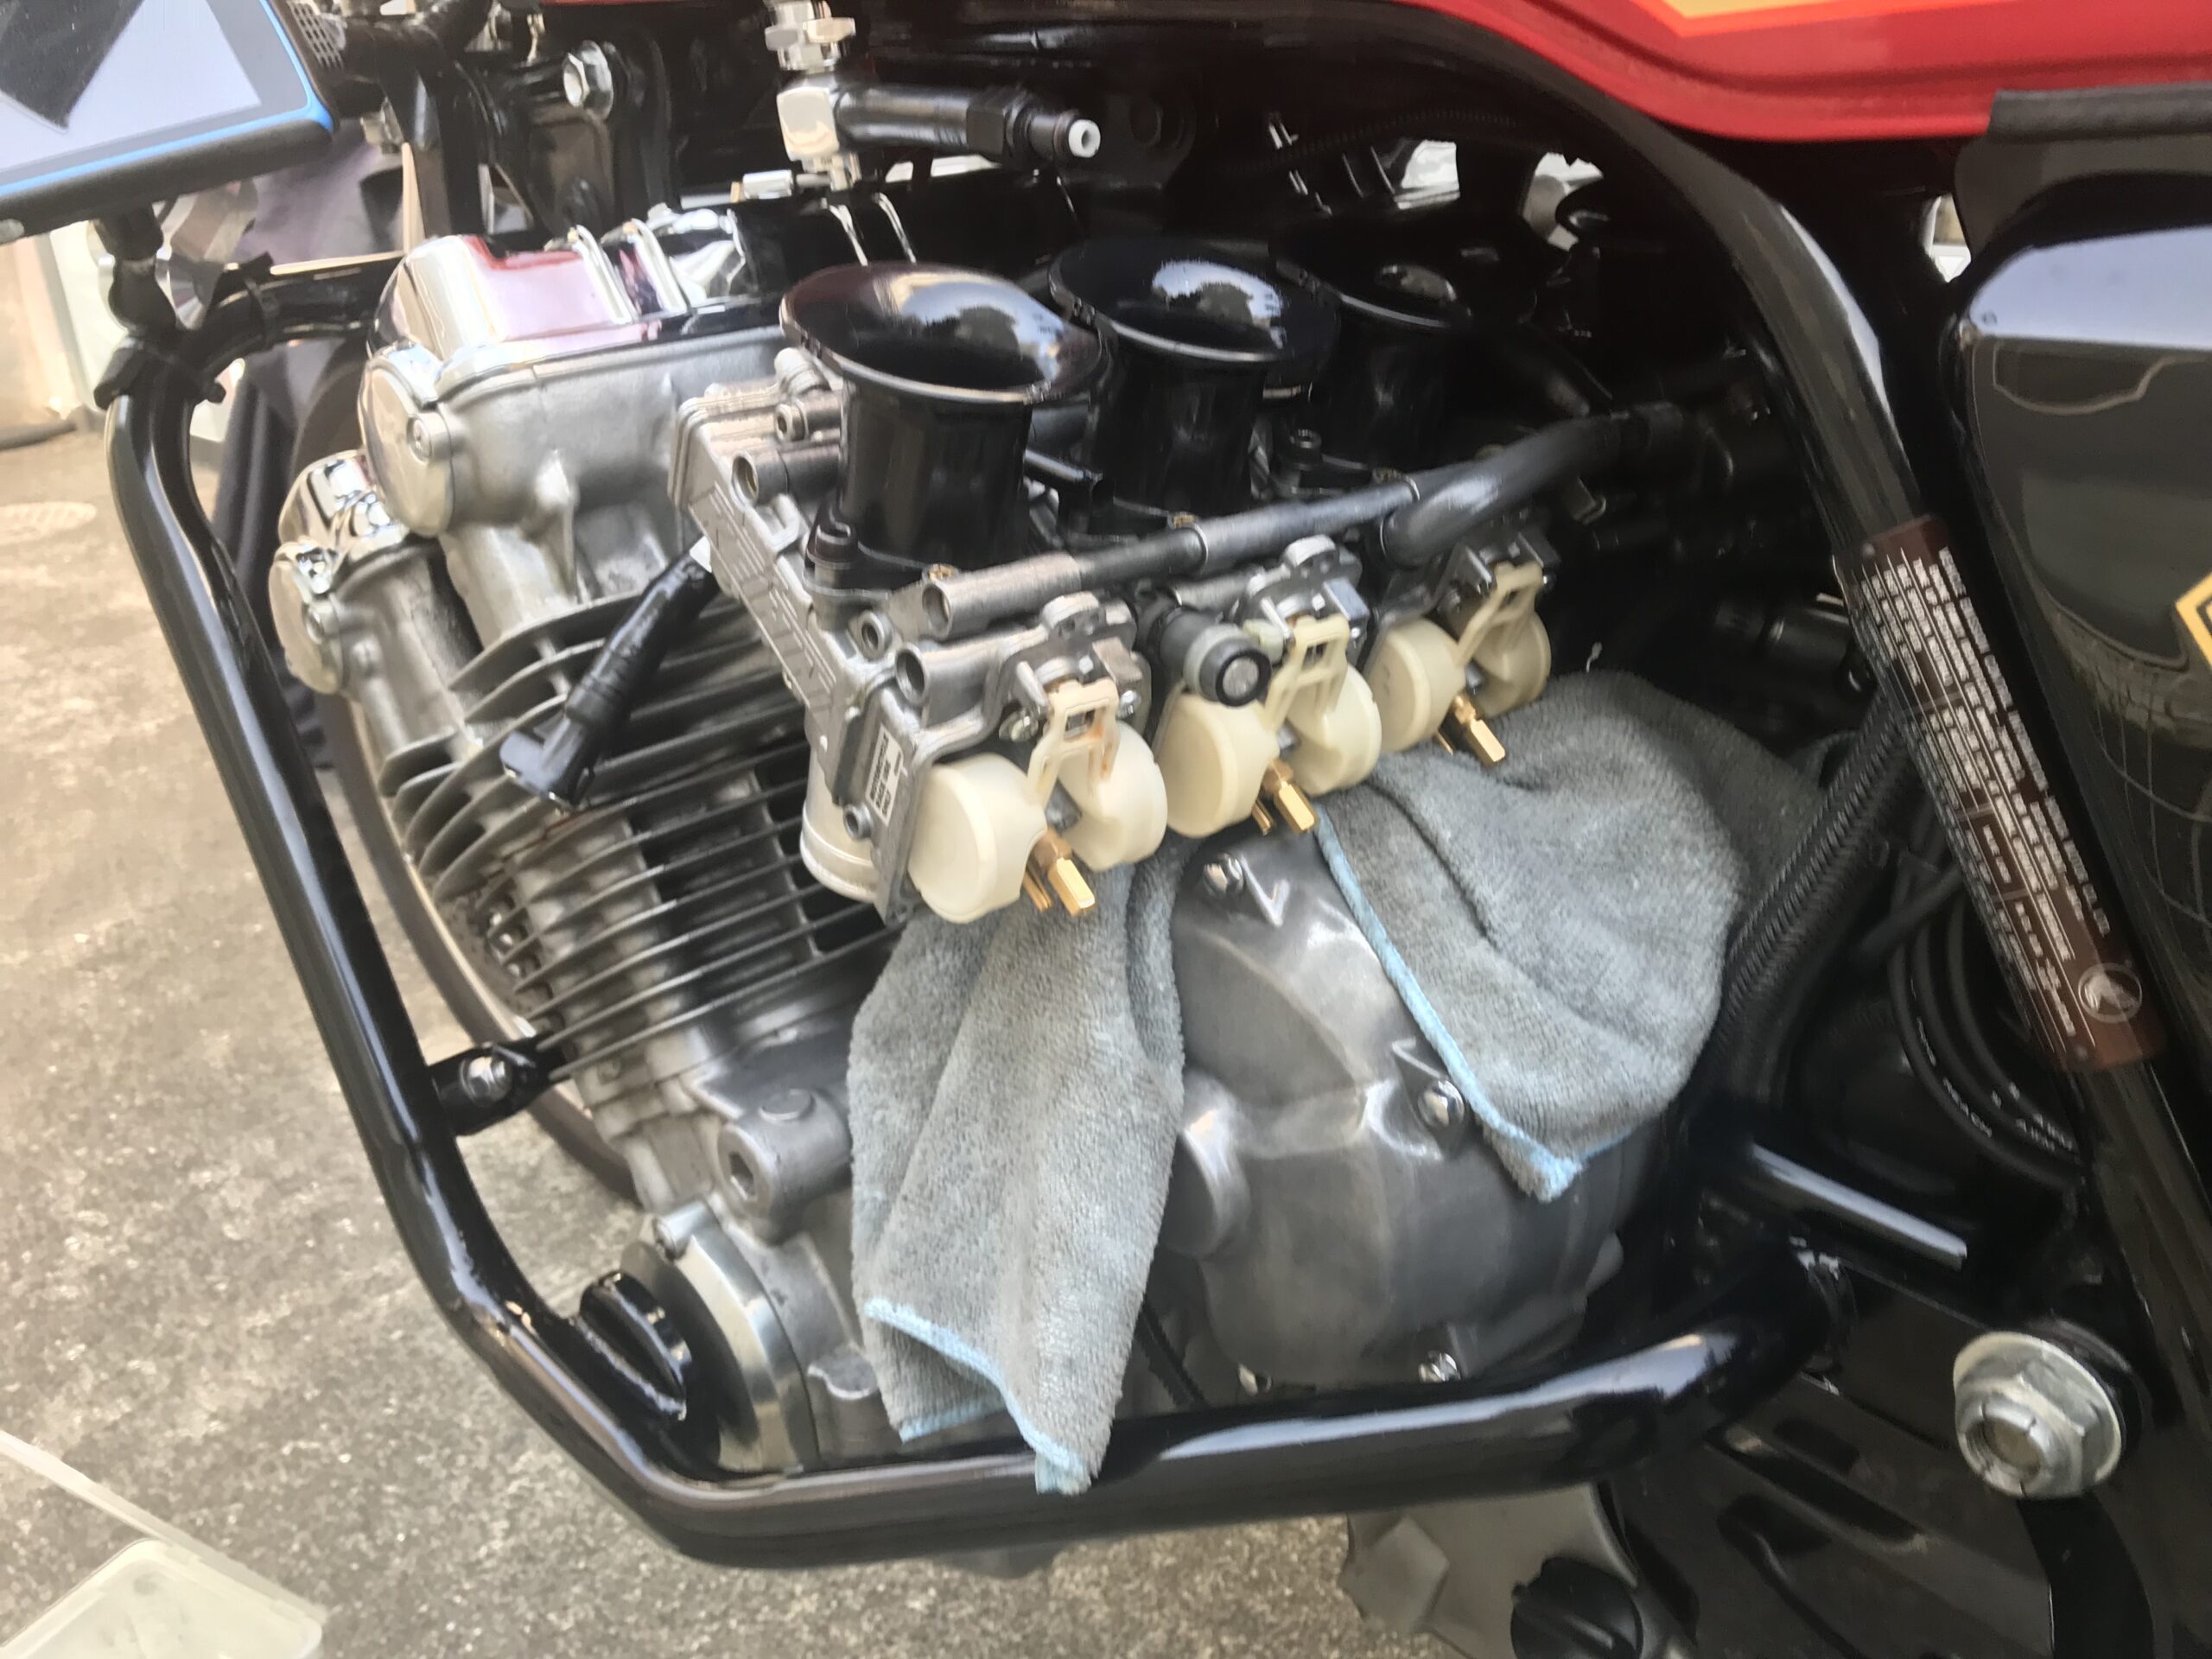
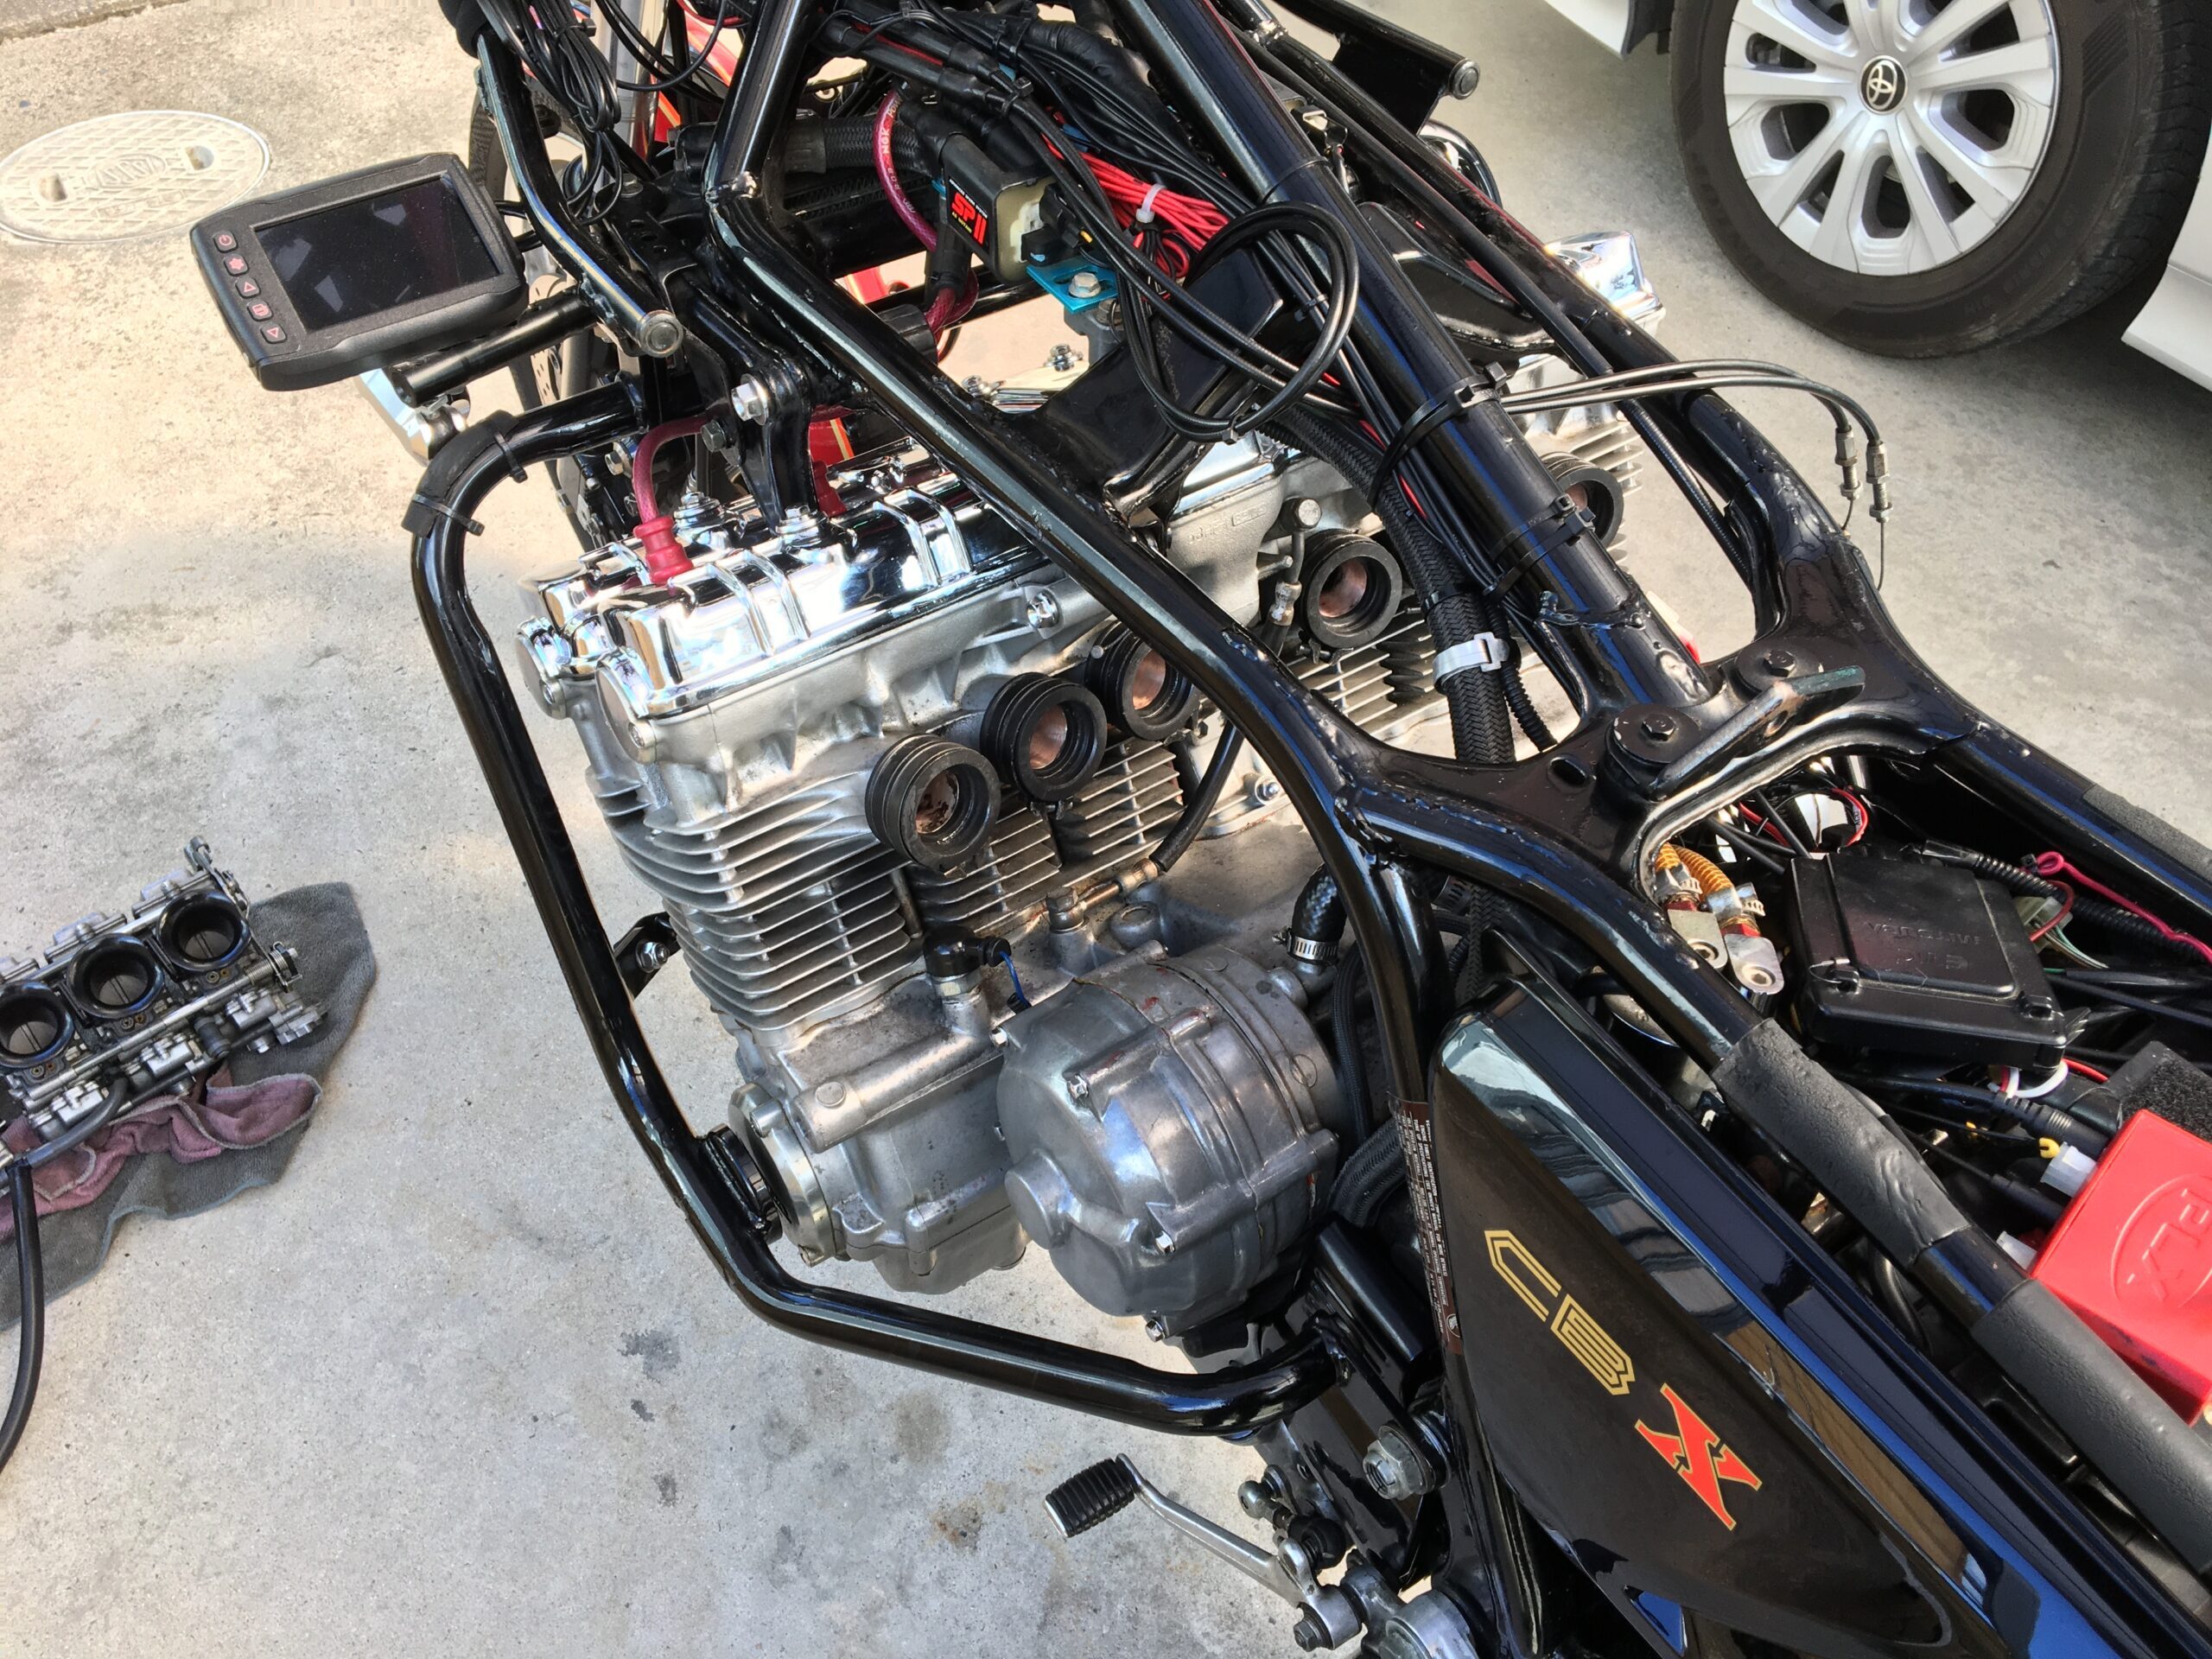
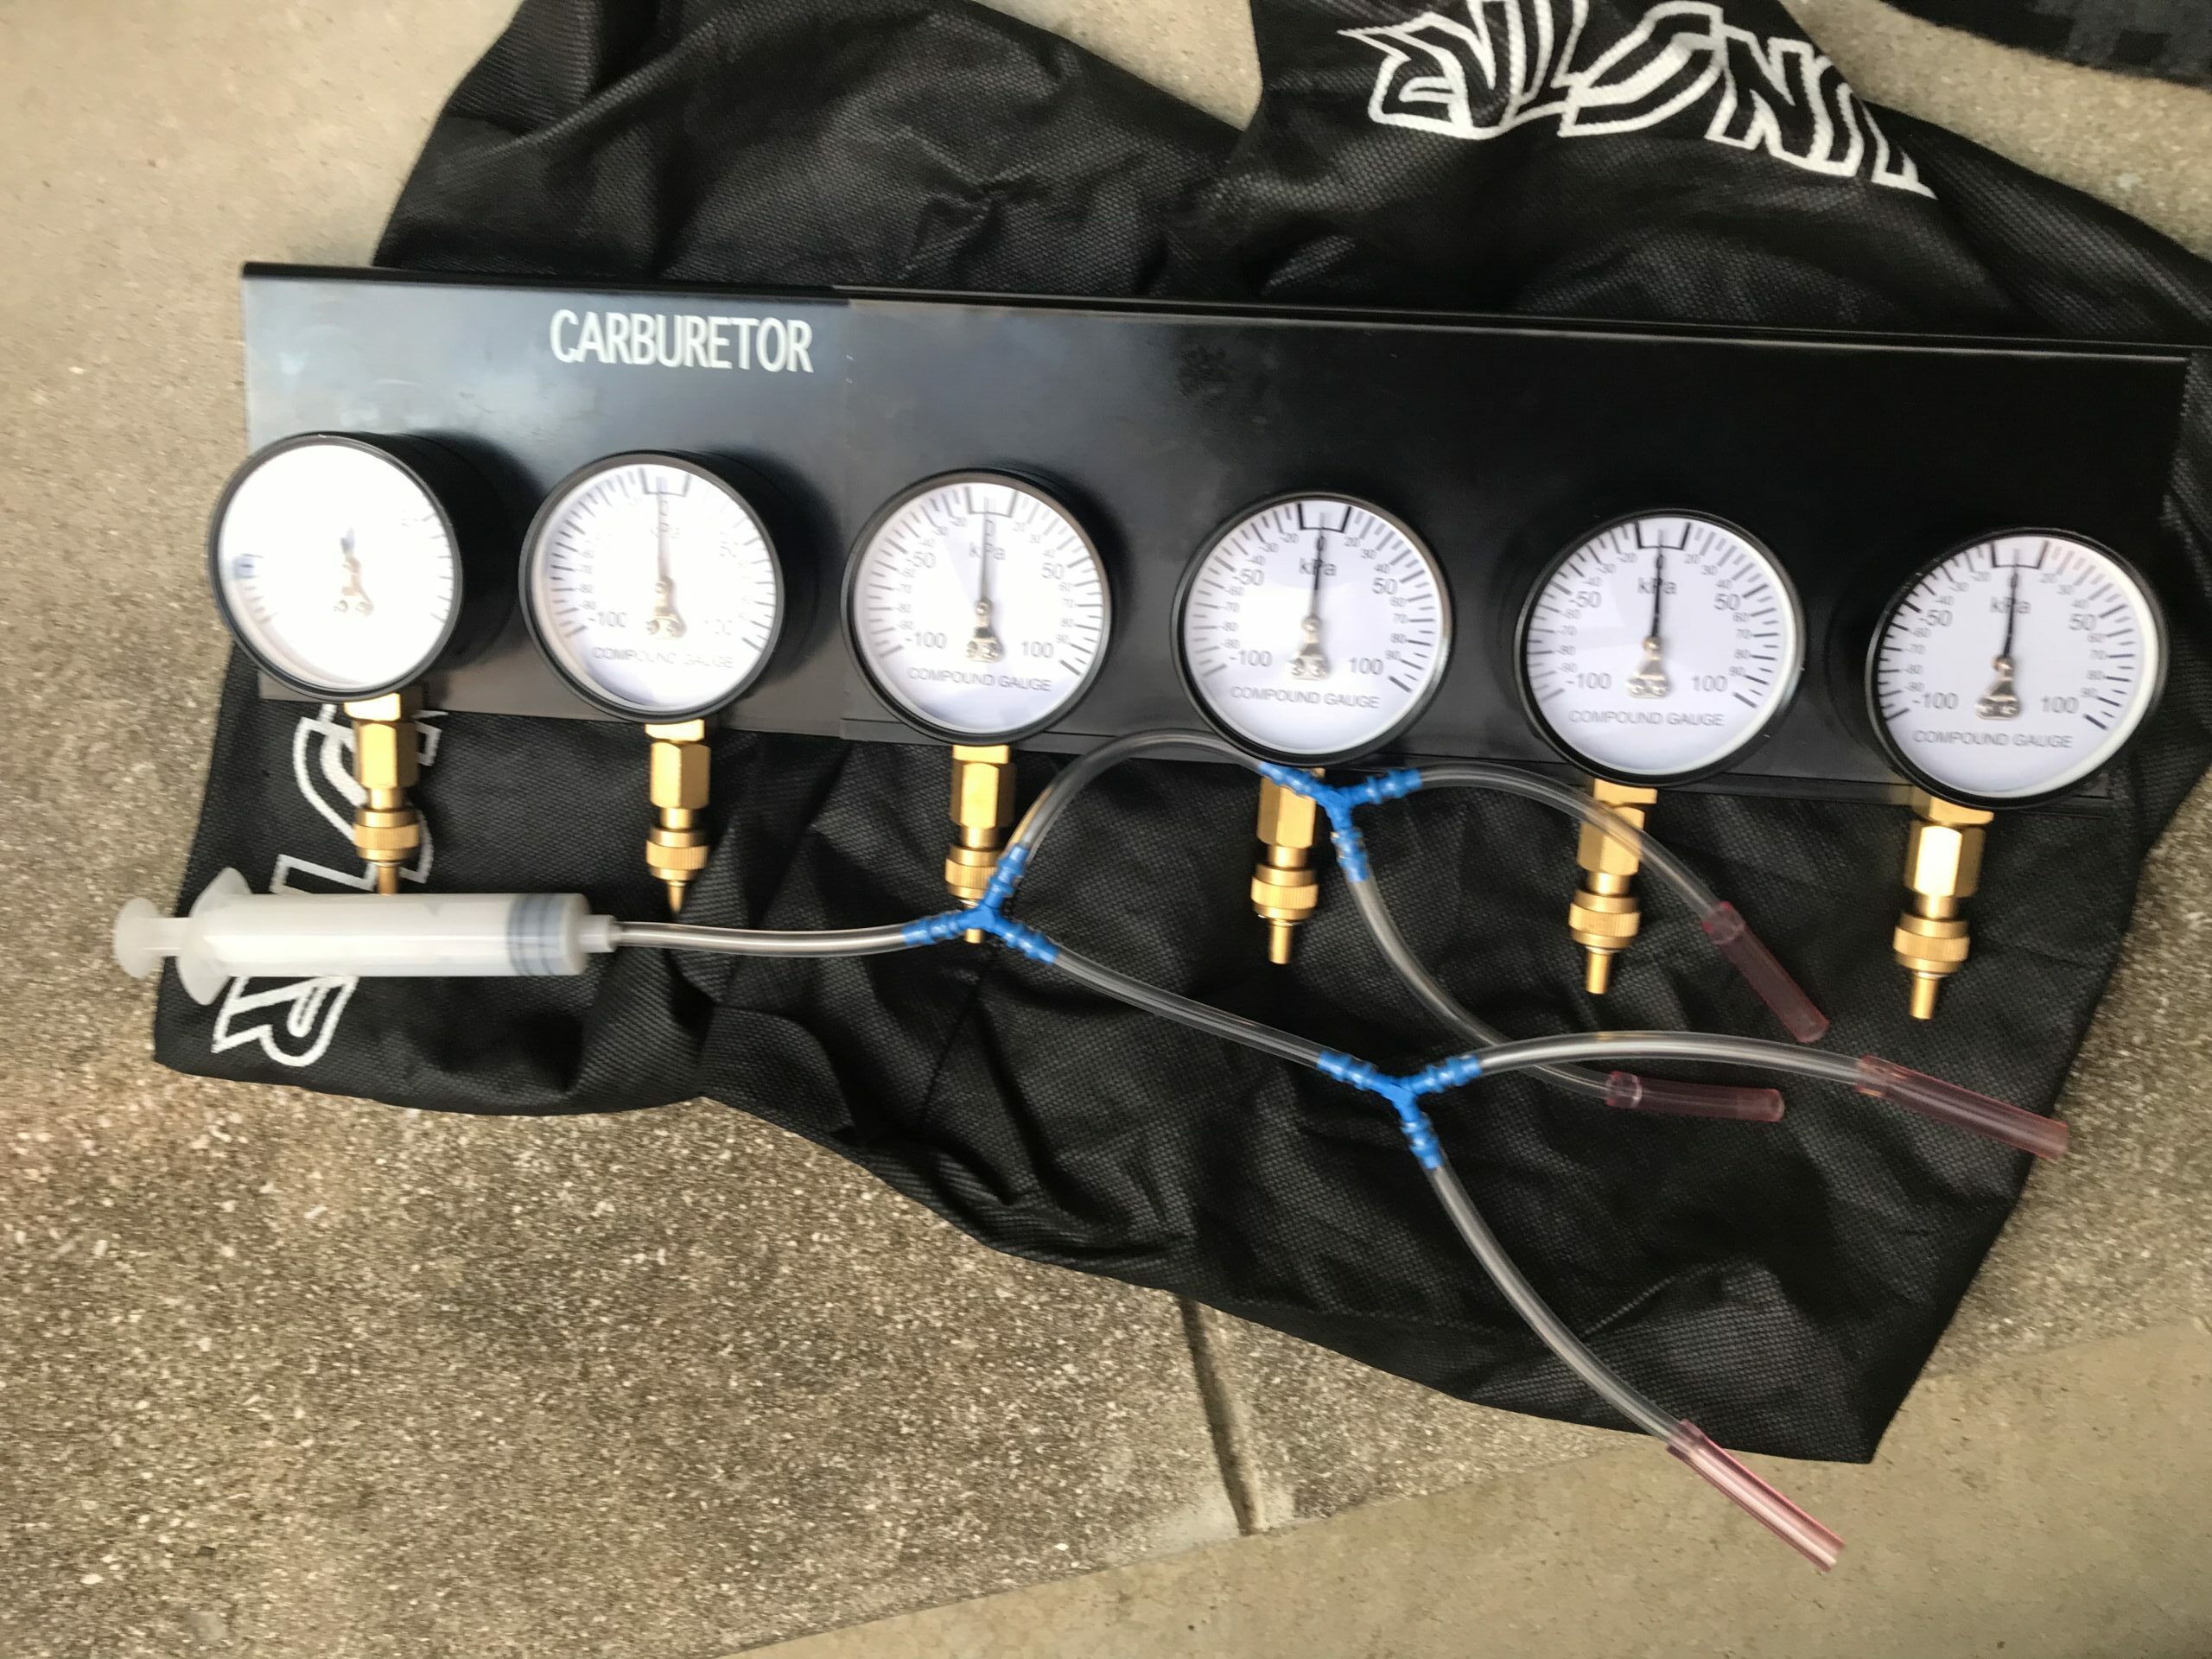
Photos related to changing the FCR slow jet.
I will include photos related to changing the slow jet, including past posts. I also tried changing the slow jet without removing the FCR. In the end, making the changes without skipping steps results in fewer troubles and better work efficiency.